A friend and I decided to go camping in Wales, which perfectly coincided with the passing of the ex-hurricane Bertha! To many this is a bizarre time to choose to go camping, but from a landscape photography perspective, angry weather equals exciting weather.
At the moment I am trying to train myself to only use prime lenses as Fujifilm offers such a wide variety covering lots of helpful focal lengths (the announcement of the XF90mm f2 R and XF16mm f1.4 R being added to the lens roadmap is very exciting). The reason for this is that to me they inspire creativity, using the fixed focal length makes me think more about composition and simply take more time with each picture. However, the thought of changing lenses in high winds and heavy rain atop a cliff wasn’t particularly appealing so the ever-camera-bag-present XF18-135mm came into its own. Having previously used a prototype version of the lens on the Farne Islands (see my initial impressions here) this was the first time I had really put the production version through its paces and I have to say it passed with flying colours.
Because I was generally taking landscape photographs I didn’t miss the wonderful wide aperture capabilities of prime lenses. The other bonus of using the XF18-135mm was the fast auto focus and probably, more importantly, the weather sealing. Once mounted to the X-T1 the weather resistance system left me with one less thing to think about while battling the hazardous conditions.
I wasn’t the only thing out enjoying the powerful winds though, a few fulmar were flying around the cliffs, putting on a very impressive aerial display. This was a great opportunity to try the continuous focus in mirky conditions with a very fast moving subject. Once locked on the keeper rate was very high.
Enjoying the conditions
Target ahead
Cliff flyby
Fulmar in the scene
The other very helpful feature of the XF18-135mm lens is the 5-stop image stabilisation which proved very helpful in countering the blustery and often dark conditions.
Setting Welsh sun
Going further against my plan to use only prime lenses, the other lens used extensively was the XF10-24mm R OIS on the X-Pro1. Again I went with the practicality and versatility offered by this wide angle zoom lens. Despite this being a zoom, I loved using it at the ultra wide 10mm end to capture as much of the impressive scenes in front of me as possible.
Incoming shower
Boisterous waves
Overall it was a great few days for photography, but before you go off camping in inclement weather, make sure you check with others you drag along, as the X-T1 – XF18-135mm set up is weather resistant and ready for anything, but they might not be so obliging.
Despite photographing lots of dogs prior to this I naively thought that I’d be able to line up eleven calm and collected Labrador puppies to demonstrate the effect of different apertures on a photograph.
Do these look calm and collected to you?
Despite the challenging subjects I hope that I can help you understand the fundamentals of using different apertures and how this affects a photograph.
To start off there are three things that are all intertwined in a photograph, these are your shutter speed, ISO/ASA and aperture. Shutter speed is the length of time your camera shutter is open for. This is important depending on what you are trying to photograph, if you are wanting to freeze action then you are going to want a fast shutter speed such as 1/1000 of a second. While if you wanted to create motion blur then you would want a slower shutter speed, for example, 1/60th of a second.
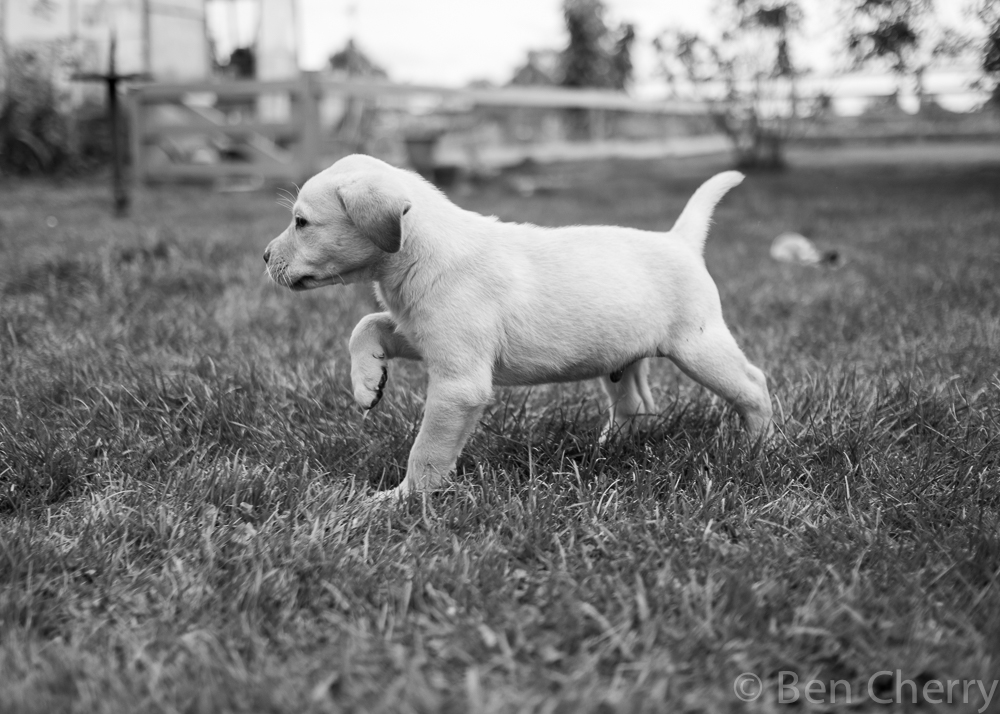
A shutter speed of 1/1900 of a second helped to freeze this leaping puppy
ISO is a way of setting the sensitivity of the camera sensor. The lower the ISO number (e.g. ISO 100), generally the better the overall quality of the image. However, the lower the number the more light required for an exposure. A sensor set up at ISO 100 requires a shutter speed four times longer than a sensor set up with ISO 400. With ISOs you have to decide what you want to prioritise, faster shutter speed or better quality, you have to find the compromise you are happy with for the situation at hand.
Tired puppy at ISO 200
Crop of puppy showing high levels of detail at low ISO
Then there are apertures… This dictates how deep the depth of field will be in the photograph. For example f1.4 has a very shallow depth of field that is helpful for isolating a subject, while f11 has a large depth of field that means everything in a composition can be sharp. Again though there is a twist as the smaller the f number the larger the amount of light let into the lens, meaning faster shutter speeds.
At f1.4 the depth of field is so shallow that only the eyes are in focus
If one of the three factors change, then it affects at least one of the two other factors. For example if your camera is set up with ISO 400 and aperture f5.6, showing a shutter speed of 1/250 of a second and you want to increase your shutter speed then you can lower your aperture a stop to f4 (which will double your shutter speed) or another stop to f2.8 (quadruple your shutter speed). Alternatively if you don’t want to change your aperture then you can increase your ISO to 800 which would also double your shutter speed.
Using puppies was a difficult choice…
My intention for this blog was to have a wonderful selection of shots showing eleven puppies sat in a line using a variety of different apertures to show how this affects depth of field. The owner Ruth Mercer, who very kindly let me photograph the puppies, said the best time to do this would be when they’re being fed. As the birds eye view picture clearly shows, my dream of a nice orderly line was never going to happen! Why I thought this was possible with these little bundles of energy was beyond me. No matter though, the whole experience was utterly heart warming. And all is not lost as I did obtain some shots that highlight the difference in depth of field caused by different apertures.
Puppy at f1.4
Puppy at f10
You can see that with the second photo the depth of field is much greater than the first. This in turn shifts the focus away from the isolated, in-focus puppy in the first image to the whole scene of the second image. Note how your eye should be drawn a lot more to the bottom of the black puppy a lot more in the second image because it is in focus.
Despite being a rather unusual way to highlight how different apertures can affect the image produced, I hope this puppy inspired explanation has helped further your understanding. The lens used for the majority of these shots was the XF23mm f1.4 r which offers very fast autofocus and a very shallow depth of field, using f1.4, to give the photographer the greatest amount of control through a wide aperture range (f1.4-f16).
The take home message is that a small f-stop number allows you to create a very shallow depth of field to help isolate a subject. While a large f-stop number will mean that a larger proportion of the content in the picture will be in focus. To finish with here are a few more shots of the puppies, generally using a shallow depth of field to keep the focus on these adorable little characters. You can also check out a video of this adorable experience here by Ellice Dart.
Just to make it clear, I am not an underwater photographer. I have dabbled in it from time to time in locations of incredible marine life, such as snorkelling around coral reefs. The North Sea has a high abundance of marine life and the coast of Penzance is one of two places that you can consistently see blue sharks (the other is Cape Town). So when Danny Copeland, a fellow University of Sheffield Zoology graduate, spoke about his plan to go and see them with Charles Hood, a local charter skipper (http://charleshood.com), I jumped at the chance to join him.
Previously I have used DSLRs for underwater photography in a Ewa-Marine underwater housing. This time though I wanted to continue to push the X-T1 in difficult conditions so I put it in the same housing with the 10-24mm. Despite being dwarfed by the bag, the set up worked really well.
Thanks to Danny Copeland for this photo of me and the camera. Follow Danny on twitter to get the latest on underwater photography and marine conservation.
Once we reached 10 miles out to sea we started chumming using mackerel heads (yum) to attract the sharks. Once they were in the area the four of us that went on the trip were able to slip into the water. Once I had checked the housing was sealed I swam around to find some subjects and came across this large jellyfish surrounded by lots of little fish. This example highlights the benefit of using a zoom lens underwater as I was able to get two very different perspectives using different focal lengths.
24mm
10mm
Conditions were generally slightly overcast which actually meant there was a lovely soft light, which helped control the highlights that would have been a problem if it was a clear, sunny day. However this did mean that it was slightly dark in the water, even at the surface, so I shot at ISO 1600 to start and pushed this as the sediment levels rose throughout the day. Other settings I made sure I had set up on the boat were: continuous focus with focus priority, continuous high speed shooting (8fps), matrix metering and LCD only display. Generally I was using aperture f5.6 to strike a balance between a fast shutter speed and a good depth of field.
Because I was wearing a mask and the camera was in a housing I couldn’t utilise the wonderful EVF but instead found the LCD screen to be a great alternative. It allowed me to have a clear view of the shark(s) by not having my face to the camera and provided easy viewing of composition through the back of the camera. The advantage of the X-T1 is that I have not noticed any difference in focusing speeds between the EVF and LCD, which isn’t always the case. All of these factors meant that I could really take in this remarkable experience as one shark in particular became more and more inquisitive…
Rising out of the depth
Coming in for a closer look
Closer…
Moments before bumping the lens!
The camera only helped to make the experience more memorable, with the shark showing interest in it. With an animal like this it was so interesting to witness its intelligence and curiosity, the term ‘spaniels of the sea’ I feel is very apt. At one stage the shark photo-bombed a picture of Danny!
Shark photo-bomb
Despite coming very close, it whole situation was very calm and meant that the interaction was an absolute joy. The shark even seemed to show a happy expression.
Playful shark
Overall, the X-T1 and 10-24mm set up exceeded my expectations. I knew it would follow subjects well but I thought that shooting through water would probably lower the hit rate. However, the only factor that affected this was human error. With a specifically designed underwater housing, this camera and lens set up would be a brilliant choice for any underwater photographer, with its small size, clear controls and superb image quality.
Hi there, my name is Ben Cherry and I am a guest blogger for Fujifilm. My primary interests are wildlife and travel photography but I’ve previously covered events from motorsport and snowboarding films to fashion shoots and weddings.
I have been a Fujifilm X-Series user for a year now, ever since I used an X-Pro1 for a trip Malaysian Borneo.
This is me…
What I look for in a photograph is a moment, from a smile to unusual animal behaviour, I try to capture a photograph that encompasses a situation and can tell a story. To me, photography is a form of story telling, like writing and painting it is how the content is perceived by the viewer that is important. If someone experiences an image, feeling and/or viewing the subject the way the photographer did at the moment of clicking the shutter, then to me that is the ultimate prize in expressing your experience of a moment.
Why Fujifilm?
I use Fujifilm cameras because for me this is the best system for my work, offering superb image quality, a small compact size for travelling and a wonderful enjoyment factor through the manual controls. From the X100s to the X-T1, all of the products I use offer something different to my photography, whether it’s the low light capabilities of the 23mm f1.4, 35mm f1.4 and 56mm f1.2 or the pocket-ability, go nowhere without it, design of the X100s.
The clear purpose and design of each product gives me the clarity needed to choose the right gear for the job at hand. In future posts I will be discussing what the Fujifilm X-Series offers me and also explain some helpful hints and tips for those who are new to photography and to those who are new to the X-Series.
Young Malaysian boy
Checking the catch
X100s for studio work
Silent shutter of X100s during intimate wedding
Snowboarder Jack Cornish with his daughters
Ismar Badzic snowboarding
Black Cullins, Isle of Skye
14mm – Foraging macaque
Highland roadblock
Gorging proboscis
Mobbing terns
A beak full!
In the meantime you can check out some of my previous blogs here and check out my website and social media:
We’ve been working with Alex for sometime now and he’s been creating some eye-wateringly good fashion shoots and editorial work in the UK and abroad for a while now.
X-E2 – 1/60 f/4 ISO3200 Image by Nathan Wake
We wanted to offer a select few the opportunity to come along to London for the day, shoot a top international model (the tallest and most beautiful person I’d ever met and am likely to), try out the Fujifilm X-T1, X-Pro1, X100S and range of lenses. The real pull however was to be working in close
proximity with Alex and get almost one-to-one training with. Alex would generously offer top advice and techniques on how to shoot street fashion, with an edgy feel. We ran a quick competition and notified the lucky people that would be invited to come along.
So, at The Sanderson (FYI if you’re thinking of visiting London try and stay here. The lift alone will blow your mind-honestly) I, along with Nathan and Hannah from Fujifilm, were there to meet the lucky winners.
X-E2 – 1/50 f/2.8 ISO3200 Image by Nathan Wake
The attendees were a real mix of shooting styles and photographic weapons of choice, but all very proficient photographers. Up in the lift (I will bang on about that given half the chance) to the fabulous suite which we were using. Jasmin had her hair and make-up fixed, tips were given from Alex how to direct hair and makeup and how to go about choosing a team of people to work with.
X-T1 – 1/125 f/1.2 ISO250 Image by Nathan Wake
While the styling was taking place Alex talked through how he came to use the Fujifilm system, why its worked for him and why it offers him creative freedom. How he can get shots which wouldn’t be possible with a traditional DSLR (more on this to come). Our competition winners then chose which camera / lens combo they wanted to use, Jasmin was revealed -ta-dar- and we were ready to hit the streets of Soho.
X-T1 – 1/125 f/11 ISO250 Image by Nathan Wake
6 photographers, 3 Fujifilm staff, one International model, one videographer (special thanks to Sinbad) and one Alex Lambrechts out on the streets of Soho. For those unfamiliar with London, its quite common to see lots of creative and exciting things going on, but we were stopping traffic! The public were quite rightly curious as to what was going on, but we all got into the hang of it straight away.
Alex was teaching us on the fly what to look for, angles, backlighting, top lighting, inspiring everyone and giving them confidence to try something new. On the spot, on the go.
X-E2 – 1/350 f/8 ISO200 Image by Nathan Wake
We tried different techniques, going down side alleys, using the urban architecture to frame different shots and learning more and more about how to create ‘wow’ shots using the cameras. Pretty soon anyone who may have been lacking confidence were sharpening their elbows to get in and get the shot.
Streets, alleyways, walkways, building entrances-anything and everything was being shot. SD cards were filling up at a rate of knots.
X-T1 – 1/125 f/11 ISO640 Image by Nathan Wake
After a good few hours of shooting, stopping and dodging traffic we were spent, so decamped to a pizzeria in Soho to take stock.
Cameras were passed around, experiences shared, top tips from all participants were exchanged.
X-T1 – 1/125 f/1.8 ISO1600 Image by Nathan Wake
Throughout the whole experience Alex was there, on hand, giving advice, giving encouragement but also letting you get on with it.
The whole experience was filmed in order to share with others what its like to shoot in those kind of conditions, with this kit. These are cameras which Alex shoots with professionally, not for a past time. They have to help him make a living. But this experience was showing others either new to the system, those thinking of trading up etc what opportunities there are and what they can enjoy from the Fujifilm X-Series.
X-T1 – 1/40 f/8 ISO3200 Image by Nathan Wake
Home, exhausted, happy and with some amazing images and memories which make me want to shoot more, challenge myself more and become a better photographer.
You’ve read the blog, seen the images, now you can watch the video too!
The reason I wanted to attend was to learn from Alex and to try out Fujifilm X series cameras and street photography
I liked the buzz of the street photography experience and the camera was excellent and very manageable due to its size. I was really concerned as I am not technical that I wouldn’t be able to get nice images but I was very pleasantly surprised.
X-T1 with XF23mm f/2.2, 1/140, ISO200
—
Brian Rolfe
Having just purchased my X-Pro 1 and Alex being one of the reasons that helped me make that jump, I wanted to get an insight into how Alex used the system, settings and tips on the X system and get some hands on time with my new camera and try something different.
I’ve had almost no previous experience in shooting street photography.
I really enjoyed the day, Alex took the time to go over how he came to use the X system, how he uses it and the benefits as well as a few pointers on particular settings. Aside from getting a better understanding of the cameras and some of the settings I learned a couple of new focussing techniques and how to shoot ‘on the fly’, totally different to most of my studio work and a refreshing change!
X-Pro1 with XF14mm f/11, 1/500, ISO6400
—
Robert Morgans
I wanted to meet Alex Lambrechts, Fuji staff, and experience an assortment of Fuji cameras and equipment and to have a go at some street photography. I enjoyed being with like minded people, picking up tips, and having a good time.
The day was a massive success despite being late getting outside. I really enjoyed it and met some lovely people who are now Facebook friends, plus got some great shots and learned some things.
I didn’t have a great deal of street photography experience, mainly shooting architecture. I did photograph people but, in my mind, the picture needs to pick up something interesting, an expression or act, to warrant the picture being worth publishing. I see too many nondescript street pics, so my experience is that it’s a difficult area to get expressive images but very rewarding when it happens.
I really enjoyed the day and the company. Alex and his wife, Jasmin, are a great couple and make the day. Jasmin was so good as a model that getting a great shot was fairly easy!
I learned that it is best to utilise the Fuji option of setting a minimum shutter speed to avoid motion blur and let the camera chose whatever ISO as even at very high ISO the file quality is superb. Setting the aperture small (like F11) for getting background sharp and more open for closer work.
X100S f/2, 1/340, ISO200
—
Tuesday Dé Máirt
I carry my dslr (with some heavy lenses) everywhere I go but it’s surely wearing me out so I asked Facebook friends to recommend me a handy camera that produces good quality pictures. Someone told me about the upcoming Fujifilm camera (back in January) so I waited and purchased XT1 when it became available. So coming to the workshop was the best idea – to learn more about the handsome camera’s capabilities.
This is my first time to try street photography.
The experience was remarkable! It was more of a relax kind of just chatting and taking photographs. Alex is very talented when it comes to teaching (aside from capturing great photographs!), he definitely made everyone get excited for the day and encourage everyone to just take pictures, waste no time! I love the tips I got from him, he surely know what he’s doing. And Nathan is there to help with technical stuff which I was expecting to learn that day too. Definitely a memory worth to keep…
X-T1 with XF18-55mm f/2.8, 1/4000, ISO500
—
Gerry Walden
My reasons for attending was to keep myself fresh on trending styles of photography with a hands-on experience.
I have extensive experience of shooting ‘street’ but this was a first for me within the style. My normal work is a more social documentary style.
The day was a great opportunity to interchange ideas with Alex and the others, and to network with fellow Fuji users of various abilities. It took me out of my comfort zone and challenged me to think more progressively about what I am doing.
X-Pro1 with XF14mm f/5.6, 1/320, ISO400
Joshua Brathwaite
Being relatively new to the world of photography the Fujifilm X Street Fashion workshop was fantastic and just what I needed. It gave me not only the technical pointers that I’d hoped for, but being introduced to the Fujifilm X systems changed my whole view of photography. It opened me up to new ideas and techniques that simply aren’t possible with the DSLR camera. I’m now saving up to buy the XT1. Alex and the Fujifilm team were very helpful and put on an awesome day in the streets on London.
—
Finally, a special thanks to Nathan Wake for shooting the lovely images that make up the first part of this blog post!
A classic camera in a classic location – see why the X-E1 and the French capital make the perfect combination
“I love the beauty and elegance in Paris: the architecture, the open spaces and the people. But it’s the small details that I like as much as the famous monuments and chateaux.”
Alastair documents Paris with a Fujifilm X-E1, which he started using last year.
“I chose the X-E1 after hours of research into mirrorless cameras. I was using a DSLR and a bridge camera previously but I haven’t touched either since getting the Fujifilm. It’s been a pleasure to use.”
13th Arrondissement
Lens: XF18-55mm F2.8-4 R LM OIS Exposure: 1/300sec at F5.6, ISO 800
This is the ground floor of a nine-storey apartment block in the 13th Arrondissement. It’s due to be demolished, but before that happens 102 street artists were given full access to do as they wished with both the interior and exterior. This was one of my first shots of the exterior of the building. I liked the combination of the three elements to the picture and the X-E1 does a great job of capturing vibrant colours. I queued for over five hours to get this shot, but it was worth it. To be surrounded by artistic creations on floors, walls and ceilings was stunning.
Métro
Lens: XF18-55mm F2.8-4 R LM OIS Exposure: 1/4sec at F8, ISO 1600
I don’t often have my camera out on the Métro as thefts are not unknown. The stations make fascinating subjects for photography though. I wanted to experiment with capturing the moving train as it pulled into the station, and I like the effect of being able to see through the train windows to the opposite platform. I can’t remember whether I intended to include the woman looking along the length of the train. I’ll claim it as good composition, but it may have been luck. The exposure is 1/4sec and it’s hand-held so I don’t know what kind of magical trickery Fujifilm have managed to incorporate into their image stabilisation. But it works!
T-Rex
Lens: XF18-55mm F2.8-4 R LM OIS Exposure: 1/1900sec at F13, ISO 200
This seven-metre, metal Tyrannosaurus Rex sculpture overlooks the Seine on the platform of the Bateaux-Mouches boating company. I’d walked past it plenty of times before but on this occasion the sky was more dramatic and the sun was offering the chance of backlighting the dinosaur. Initially I had the sculpture in silhouette but the Fujifilm RAW files give so much flexibility for changing the exposure and I prefer being able to see the amazing details in the chrome finish.
Monmartre
Lens: XF18-55mm F2.8-4 R LM OIS Exposure: 1/450sec at F4, ISO 200
Sometimes you just notice a scene and know immediately that it will make a good image. The X-E1 is great for this as you can shoot really quickly. This is in Montmartre, and I noticed the woman taking a few photos. As well as her striking red coat, I like her stance as she leans against the wall. Hopefully my photograph makes you want to know what she’s pointing her camera at, but I’ll leave that to your imagination.
City view from Sacré-Cœur
Lens: XF18-55mm F2.8-4 R LM OIS Exposure: 1/45sec at F22, ISO 1600
I really enjoy watching other residents and visitors enjoying Paris. This is the view over the city from Sacré Cœur. I took a few shots of this couple but this is my favourite, and the only one that’s pigeon-free. I like the idea of sharing the view with them. Initially I converted it to black & white since none of the colours are particularly important to the shot. Then I tried just removing some of the colour saturation so that the colours are more subtle without being distracting, and this was the end result.
The Louvre at dusk
Lens: XF18-55mm F2.8-4 R LM OIS Exposure: 20secs at F16, ISO 200
It was a clear afternoon so I decided to head to the Louvre for dusk. With the X-E1 on a small tripod, I set the ISO to 200, switched off the stabilisation on the lens and choose the aperture. The X-E1 does a great job of exposing accurately so I’m usually happy to leave the shutter speed on automatic. All my photos are shot in RAW (although the X-E1 JPEGs are also excellent), with conversion and post-processing in Lightroom 5. My processing is usually minimal; this shot was cropped slightly to better fill the frame, with some minor exposure adjustments and a light vignette applied.


 Having just purchased my X-Pro 1 and Alex being one of the reasons that helped me make that jump, I wanted to get an insight into how Alex used the system, settings and tips on the X system and get some hands on time with my new camera and try something different.
 I wanted to meet Alex Lambrechts, Fuji staff, and experience an assortment of Fuji cameras and equipment and to have a go at some street photography. I enjoyed being with like minded people, picking up tips, and having a good time.
 I carry my dslr (with some heavy lenses) everywhere I go but it’s surely wearing me out so I asked Facebook friends to recommend me a handy camera that produces good quality pictures. Someone told me about the upcoming Fujifilm camera (back in January) so I waited and purchased XT1 when it became available. So coming to the workshop was the best idea – to learn more about the handsome camera’s capabilities.
 My reasons for attending was to keep myself fresh on trending styles of photography with a hands-on experience.
 Being relatively new to the world of photography the Fujifilm X Street Fashion workshop was fantastic and just what I needed. It gave me not only the technical pointers that I’d hoped for, but being introduced to the Fujifilm X systems changed my whole view of photography. It opened me up to new ideas and techniques that simply aren’t possible with the DSLR camera. I’m now saving up to buy the XT1. Alex and the Fujifilm team were very helpful and put on an awesome day in the streets on London.


