Here’s the challenge – take ONLY three pictures in one hour – No deletes & no post-processing.
Today, the challenge was simple – at least with the rules anyway. You can only take three photos in one hour, you’re not allowed to delete, post process or even retake the photo. This meant you had to really think hard about the subject, the composition, all the camera settings combined and…. get it right, first time.
And for your info – all images are shot straight-out-of-camera.
Picture one
As my first image I wasn’t sure what to shoot, or when I should take my first image. This was easily solved however, when I wandered to the riverside and saw this beautiful light bouncing off the water. I took my time to find the right angle and also noticed this small bird sitting near the edge nearby. With this, I shuffled along on my knees (was definitely worth it) to incorporate him/her into the top left third of the image.
Fujifilm X-E2 XF35mm f/3.6, 1/1300th, ISO200
Picture two
This shot I couldn’t resist, the car belongs to a colleague of mine (*cough* Marc’s) and for me, it captures that humorous moment when you know you should re-park your car, but in Marc’s case… you just don’t. I also, from a photography aspect love the lines that flow from the back of the car and along the path to the left. I chose black and white to take the attention away from the colour of the scene and more to what is going on in the scene – being the damage to the rear bumper and ‘eccentric’ parking 😉
Fujifilm X-E2 XF35mm f/2.8, 1/125th, ISO200
Picture three
As my final image, I wanted to capture a peaceful mood. As we walked along Bedford Embankment I spotted this couple relaxing in the crisp winter air. I crept behind them and silently began looking through my camera settings to find the right choice. As there was so much contrast in the scene I jumped instinctively towards the black and white film simulations. This is where I broke the rules! I literally couldn’t decide which B&W filter to use, so, I shot the same scene three times (one on each B&W filter). I found that the B&W with red filter gave me the most pleasing tones so this was the keeper, and yes I did admit to Marc that I cheated slightly!
Fujifilm X-E2 XF35mm f/2, 1/2500th, ISO200
My thoughts
All in all, even though I cheated a bit, it was super exciting & an excellent exercise to undertake – I highly recommend it. It just turned my normal way of shooting on its head. I would normally frame up a shot and take a few images, experimenting with different apertures etc but with this exercise, I just needed to put my knowledge to the test. I looked through my camera menu selecting specific settings that would suit my style and thought much harder about the composition to ensure it was just the way I wanted it, first time.
It also made me connect more with the environment we were in, internal thoughts like “Where is the best light coming from?”, “What angle should I take this from?” & most importantly “What is actually interesting to shoot in my current area?”.
At one point I actually went right under the bridge to look for a new viewpoint, got my knees dirty, banged my head and came back out without an image! But this was worth it, for I knew that the shot I wanted, wasn’t there. My advice is to try strange angles & odd perspectives, this way you’re either eliminating bad shots or discovering great, new shots that you wouldn’t have known about before.
Happy Snapping! 🙂
Fujifilm X-T1 XF18-55mm at 55mm f/8, 1/1300th, ISO200Fujifilm X-T1 XF18-55mm at 18mm f/8, 1/60, ISO200Fujifilm X-T1 XF18-55mm at 35mm f/16, 1/420, ISO200
As winter starts to set in, photographers are looking for ways to capture this cold season. For me, winter is best covered in the morning. This is a personal preference but in the mornings you have frost, a reasonable hour for sunrise and (if you’re lucky) fog or mist.
There are three types of fog, so you need to decide what you are looking for and this will depend on your location:
Ground fog – In mountainous/hilly areas and cold patches you can get ground fog collecting in valleys. After a rainy night or over wet ground you can get shallow precipitation fog.
Sea fog – Also called advection fog, this is where warm air passes over cold sea water.
Sea/River smoke – Where the air is colder than the water, creating a generally shallow level of fog, this is generally restricted to water areas, hence river smoke.
When trying to photograph fog you need to use the weather forecast to understand what the evening will be like in your desired location. I was fortunate enough to visit Curbar Edge in the Peak District the afternoon before my first morning I was there to scout the location. It was just before sunset and the fog was forming in the valley below and at that point I decided to try it out the following morning to see how it would look.
The weather for my first morning at Curbar was drizzling and there was a thick layer of cloud, which meant it was pretty unlikely I’d witness much golden light, I thought I’d set out and give it a go. I am so happy I did! This was my first real experience of photographing mist and it is incredible how quickly the spectacle evolves in front of your eyes. I one point I was photographing down one end of the valley, taking some long exposures, only to look over my shoulder and see that it had dramatically changed down the other end of the valley!
I used the X-T1 and the XF18-135mm lens for my main set up. As it was a wet morning the weather-sealed kit meant that I could stop worrying about the system and focus on the spectacle. As well as offering weather sealing, the XF18-135mm meant that I had great versatility, meaning that I didn’t have to worry about changing lenses the entire time. However, I also ended up using a neutral density filter to reduce the amount of light reaching the sensor to further extend the shutter speed. This was great but because I was using a filter set instead of screw in filters it meant that the front element was exposed to the conditions. Long exposures and rain drops do not mix! Thankfully a little umbrella tucked away in my bag helped to shelter the filter.
Generally I was not bothered about using a fast/moderate shutter speed so I set up the system on a tripod and used ISO 200 (the lowest RAW compatible ISO) and generally around F8. The addition of the ND filter, which was a 10-stop filter, meant that the shutter speed required was dramatically decreased. This results in the mist smoothing out, giving quite an interesting effect. See the comparisons below (note that despite the fact the ND filter is meant to be neutral it has put a distinct colour cast on the images).
0.6 sec
125 seconds
1/13 sec
58 seconds
1/10 sec
58 seconds
The ND filter extended the shutter speed so much that I had to use the bulb setting, as the required shutter speed was longer than 30 seconds. For this I used the remote trigger that allowed me to hold down the trigger (lockable) to keep the shutter open for as long as required. The X-T1 shows the length of the shutter speed on the back screen, this is very helpful. There is something to consider thought when using long exposures: the processing time. As soon as you go beyond 30 seconds, the processing time dramatically increases from seconds into minutes, this isn’t a problem but is something to be aware of when trying to photograph a scene that is evolving constantly.
To make sure I didn’t miss any moments while the X-T1 was processing and to get some different shots, I used the X100s with ISO 1600 to produce a fast enough shutter speed to allow me to use the camera one handed. Picture the scene: a wonderful valley filled with fog unfolding in front of me, one camera on a tripod; my left hand sheltering it with an umbrella; photographing the scene with the X100s in my right hand at the same time! Who says photographers can’t look cool…
The three above photos were taken with the X100s using the monochrome + red filter jpeg preset.
The reason I chose Curbar Edge is because it provides a high vantage point. This is really important to optimise your chances for good mist photography. It generally means that you should be hit by the early morning light and so should warm up faster! This is a valid point to consider on crisp winter mornings, not that it happened this time around. A high vantage point allows you to see for a greater distance, hopefully providing you with a greater number of layers to your picture. At the top of a valley, Curbar Edge allowed me to see for miles along the valley, which offered both valley fog and river smoke. The ability to then use a telephoto lens to zoom in on particular areas can result in some quite striking shots.
But also having the ability to instantly zoom wide was a great asset to try and obtain a variety of photographs.
The colour photos were all taken with the X-T1 and I used the Classic Chrome camera calibration in Lightroom which produced wonderful colours in my opinion. I have only just started using this camera calibration and I love it.
Though on this occasion the sun didn’t break through the thick cloud cover, the spectacle was nevertheless remarkable and I can only imagine what it would have looked like if sun rays had broken through.
The second morning
Despite being very happy with the previous morning I decided to give it another go as the forecast suggested there was a better chance of a proper sunrise. This time round I decided to not focus too much on lengthy shutter speeds, but instead the details in the fog. What I didn’t expect was the amount of fog!
The range of the 18-135mm meant that I could capture the grand scale of the fog at 18mm, with the car in the first of these pictures giving a sense of scale. Then using the longer end of the lens I pulled out particular parts of the landscape, such as the little cottage that looks like it should be in Harry Potter and the hilltops surrounded by a sea of fog, turning them into islands. As well as the incredible amount of fog, the sun did make a bit of an appearance too. Despite this it was a very cold morning, producing a wonderful frost. I was very happy to have packed a hat and pair of gloves.
I positioned myself so part of the hilltop was between me and the rising sun, creating a backlighting effect on Curbar Edge, which brings the fog alive.
Because of the brighter sky this time round I needed to use a ND gradual filter, where unlike the filter I used during the first morning, this one changes from one end to the other, as the name suggests. At one end it is darker (you can buy filters at different stops, depending on how dark you want to make part of the image), while at the other it has no effect on the light. I use these when I am photographing something with a sky that is much brighter than the ground below. With the above image I used a filter which didn’t stop down the light enough to correctly expose the sky but I like it nevertheless because of the frost (it get particularly difficult to expose correctly when the sun is in the image). While the picture below is a slightly better example of a ND gradual filter in use.
I hope this has proved helpful and now it is your turn to get out there and photograph the wintery conditions. Let us know how you get on.
If you’re like most people, much of the time you live life on autopilot. Everyday tasks, like taking a shower and driving to work are managed by long-established habits. This leaves the mind free to think but rather than exploiting this freedom the mind, left unattended, fills its day with internal chatter about what happened yesterday or last week or what you have to do after lunch or this coming weekend. Sometimes it all gets a bit too much.
What is “enlightened photography”?
Photography provides an opportunity to give our minds a holiday but unless we also clear the mind of its senseless chatter, photographs only ever reflect our cluttered existence. That is why, on a Magic Is Photo Safari, we teach more than just the technical aspects of photography. We also help you to be mindful to the photo opportunities around you – to recognize each moment for what it is and connect with the land and the wildlife in a way that will not only transform your photography but possibly your everyday life as well.
Take a load off and fire your imagination
Imagine, then, that it’s February and you are deep in Yellowstone National Park. The quiet is absolute. The waist-deep snow is talcum powder-soft and the park’s ancient trees loom against the vast blue sky to create a landscape plucked straight from your wildest imagination.
The clean, crisp air, sulfur springs and pine nut-aromas unite to provide the perfect accompaniment to the natural geothermal features that are an ice age in the making. It’s an ethereal, ever shifting landscape of cryptic light and shadow that plays home to wild wolves, coyotes, bobcats, eagles, bison, foxes and elk – the perfect location to immerse yourself in nature and take a load off your mind.
The highlights
See fantastic wildlife, including top predators and snow-covered bison and elk
Our specialised snow coaches give us brilliant winter access to the park
Immerse yourself in the solitude of this incredible landscape
Dawn ‘til dusk photography
Our flexible itinerary allows us to go where the action is
No single supplement
Learn from Simon Weir’s 10-years experience as a pro’ photographer
Hands-on tuition as you need it and optional evening seminars
Special extra lectures on Infrared, night and time-lapse photography
£300 discount for Fuji photographers
The experience
Let’s start off by saying that everything you’ve ever heard and seen about Yellowstone in winter is true. Every step you take can quickly become the best step you’ve ever taken. And through this land of ice and magic move the animals. Like apparitions, in the semi-corporeal mists they drift through the hinterland. Yellowstone may seem at slumber but in winter it’s awake and alive with wildlife.
Our photographic days begin at around 7:00AM, when we board our specialized snow coaches for a full day in the park. Initially, the road takes us east, following the course of the Madison River. This is an excellent area for sighting trumpeter swans, bald eagles, elk and bobcat. At Madison, there is a warming hut, which provides hot drinks and snacks and a warm fire, and is a favourite mid-morning stopping place with our guests.
The Madison Valley is a prime wildlife area and we can expect to see plentiful bison, coyote, fox and maybe the rare and elusive wolf and bobcat. From Madison we can take one of two routes: north-east following the course of the Gibbon River, towards the Norris Geyser Basin, taking in the famous Gibbon Falls; or south, initially following the course of the Firehole River towards Old Faithful, Yellowstone’s most famous geyser.
Each route offers a changing landscape, interspersed with ghost-like trees and the rising steam from distant geysers, and wildlife sightings of bison and elk and more. We spend the whole day in the park, returning as the sun disappears beyond the horizon, leaving behind its fire-red glow.
At day’s end, we head back to the warmth and comfort of our cozy lodge where, like old friends around the fire, we’ll share our stories from the day’s photography and visualize the next day’s adventure. Life – and photography – really doesn’t get much better than this.
The details
A 7-day photo safari from 8th – 14th February 2015 at just £2,255 per person with £300 “Fuji” discount (normal price £2,555). Price includes airport transfers, accommodation, lunches, Park entry fees and permits, snow coach transport and all tuition. Flights to and from Bozeman International Airport are excluded.
Booking
For further information and to book on this safari, simply click here.
When I first started using the Fujifilm X-Series last summer I didn’t realise how helpful electronic viewfinders (EVFs) can be. Being able to see a live view of the exposure and then adjusting this via the exposure compensation dial means that I am more efficient. When using SLRs it is often difficult to get exposure compensation exactly right the first time around, this often means you take a photograph multiple times to get it just right. With X-Series cameras you are able to see how an exposure adjustment will effect the exposure of the image before you take the photo. This is especially helpful for fleeting moments, especially in quickly changing light.
The exposure compensation can be adjusted in post-production but I feel the live view produced by EVFs has helped me improve my photography. This makes my editing workflow shorter, which is always an advantage.
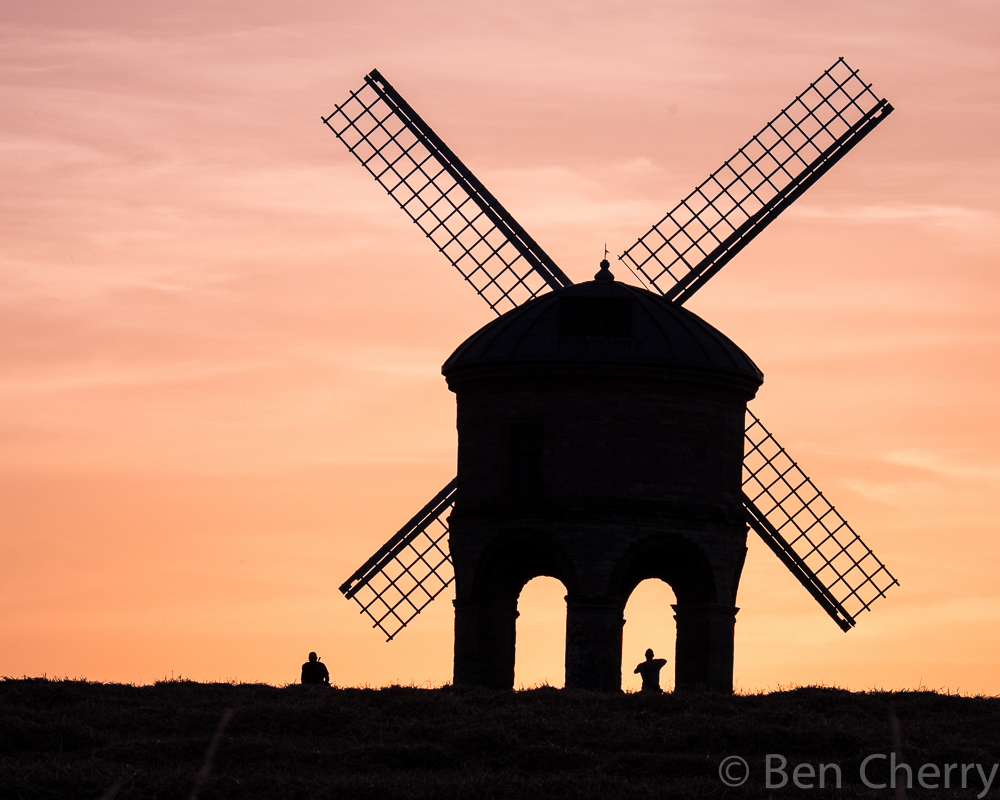
I found this feature particularly helpful when taking silhouettes, such as the images of Chesterton windmill in the gallery below.
EVFs are also very helpful with non-Fujifilm lenses or using Fujifilm lenses in manual mode as they can accurately show when the focus is correct. Even with the X100s and X-Pro1, which have hybrid viewfinders, I use them almost exclusively in EVF mode instead of OVF mode because, for me, it offers more benefits.
We recently held a small internal training course for the Fujifilm UK team and we asked professional photographer Paul Sanders to join us and help teach us more about landscape photography. After spending some time with Paul and listening to him talking about his work and his thought process in regards to photography, it became apparent that Paul had a very interesting story that I’d love to share.
Below is Paul’s story from being a trainee photographer in 1991, up to his current passion, hobby and luckily for him, profession – Fine Art Landscape Photography. If you have any thoughts or questions for Paul, please feel free to leave a comment at the bottom of this blog.
Fine Art Landscape Photographer Paul Sanders
“I’ve been involved in news photography since 1991 when I started as a trainee photographer at The Daventry Express in Northamptonshire. I’m incredibly driven and knew straightaway that I wouldn’t settle for life on a weekly newspaper, I wanted the big time, the only place I could see myself working was for a national newspaper and one in particular; The Times. I think essentially it was because The Times is in my opinion the best newspaper in the world for it’s reporting and accuracy. I got my head down, worked hard sacrificed everything, relationships, family, friends and social life all in the single minded pursuit of my dream job.
X-T1 with XF10-24 @10 – F8 – 120 Seconds – ISO200
“By 1998 I was working for the international wire agency Reuters in London and in 2002 I got the call from The Times to join their team. When The Times changed from broadsheet to the more modern compact format I was given the job of revitalising the way pictures were used in the new format. Finally on 1 April 2004 I was made Picture Editor, I had total responsibility of the entire visual content and a team of the finest researchers and photographers working with me. To say I was in my element was an understatement. However success at that level comes with a high price. Daily I would view between 17 and 20 thousand images, direct photographers, manage budgets, layout pages and train young hopefuls. By 2010 I had reached breaking point, I suffered with chronic insomnia and depression, my marriage started to break down and the wheels came off my train. I hid this all from the world until December 2011 when I announced that I was leaving the job I had pursued for years.
“When you have a breakdown your body and mind are telling you to change a few things, I needed to slow down, take stock and recover. My recovery began with shooting large format landscapes. I’d wander the country 5×4 camera and tripod over my shoulder trying to be Ansel Adams or Joe Cornish and failing miserably. The process of shooting film again slowed me down, enabling me to organise my mind a little and start to get in touch with the joy of photography. In many respects my early foray into landscape work was such a failure because I wasn’t being true to myself – I wasn’t connecting with my subject at all.
X-Pro1 with XF14mm – F16 – 140 Seconds – ISO200
“During 2013 I had an epiphany in seeing, I realised that actually it was ok to shoot the images I wanted, not the classic views, but using my emotional and spiritual connections with the landscape to create images that resonated with my soul. I had switched from 5×4 to DSLR during 2012, to save weight and money. Still I was finding it hard to work, I would always think can I be bothered, many times I would lug my equipment to a location and not bother getting it out of the bag; it was too much hassle. I wasn’t enjoying my work at all.
“However what I had realised was that to truly see what I wanted, the sitting, watching and listening had really opened my eyes and my heart to the images I wanted to create. What I needed was a camera that didn’t get in that way of my connection or creativity.
X-Pro1 with XF14mm – F22 – 1/2 sec – ISO 200
“In early 2014 I handled the Fuji X-T1 for the first time and instantly fell in love, I actually had goose bumps on my skin, such was my connection with this camera. It was a bit like the moment Harry Potter picked up his wand for the first time!
“As soon as they came to market I bought two, a variety of lenses, and swapped out much of my DSLR equipment totally committed to these tiny miracle workers.
XT-1 with XF55-200 @ 100mm – F4.5 – 1 second – ISO320
“My energy and creativity were revitalised, the camera wasn’t in the way, it was literally a plug in to my imagination allowing me to record what I wanted in the way I wanted without the weight or cumbersome nature of my previous equipment. I pushed myself out of my comfort zone and shot the images I had been feeling. I stopped trying to be accepted by the majority and concentrated on being true to myself. If no one likes my work really it doesn’t matter to me at all. If people do and I sell a few pictures then that’s a bonus.
“I still sit for hours watching and feeling the landscape in front of me, but now I feel that I am truly connected with my work through the little Fuji. The X-T1 isn’t a barrier like my Canon, it’s a conduit. They are virtually invisible to me, instinctively my hands fall in all the right places, there’s a wonderful simplicity to them which helps me as I’m quite simple in many ways too. The less complex the process of making pictures the less I have to be concerned with. I have no desire to pixel peep or get bogged down in the technical arguments about shadow detail or sharpness, I just want to create images that please me.
X-T1 with XF55-200 – F16 – 180 Seconds – ISO200
“The work I shoot now totally reflects how I feel about the world and myself, I can pour my soul into those little black bodies and know that they are keeping it safe for me.”
A friend and I decided to go camping in Wales, which perfectly coincided with the passing of the ex-hurricane Bertha! To many this is a bizarre time to choose to go camping, but from a landscape photography perspective, angry weather equals exciting weather.
At the moment I am trying to train myself to only use prime lenses as Fujifilm offers such a wide variety covering lots of helpful focal lengths (the announcement of the XF90mm f2 R and XF16mm f1.4 R being added to the lens roadmap is very exciting). The reason for this is that to me they inspire creativity, using the fixed focal length makes me think more about composition and simply take more time with each picture. However, the thought of changing lenses in high winds and heavy rain atop a cliff wasn’t particularly appealing so the ever-camera-bag-present XF18-135mm came into its own. Having previously used a prototype version of the lens on the Farne Islands (see my initial impressions here) this was the first time I had really put the production version through its paces and I have to say it passed with flying colours.
Because I was generally taking landscape photographs I didn’t miss the wonderful wide aperture capabilities of prime lenses. The other bonus of using the XF18-135mm was the fast auto focus and probably, more importantly, the weather sealing. Once mounted to the X-T1 the weather resistance system left me with one less thing to think about while battling the hazardous conditions.
I wasn’t the only thing out enjoying the powerful winds though, a few fulmar were flying around the cliffs, putting on a very impressive aerial display. This was a great opportunity to try the continuous focus in mirky conditions with a very fast moving subject. Once locked on the keeper rate was very high.
Enjoying the conditions
Target ahead
Cliff flyby
Fulmar in the scene
The other very helpful feature of the XF18-135mm lens is the 5-stop image stabilisation which proved very helpful in countering the blustery and often dark conditions.
Setting Welsh sun
Going further against my plan to use only prime lenses, the other lens used extensively was the XF10-24mm R OIS on the X-Pro1. Again I went with the practicality and versatility offered by this wide angle zoom lens. Despite this being a zoom, I loved using it at the ultra wide 10mm end to capture as much of the impressive scenes in front of me as possible.
Incoming shower
Boisterous waves
Overall it was a great few days for photography, but before you go off camping in inclement weather, make sure you check with others you drag along, as the X-T1 – XF18-135mm set up is weather resistant and ready for anything, but they might not be so obliging.