You have a cat, your sister has a horse and the two of you have a favourite animal at the zoo? If any of these animal friends is not doing well and needs to go for an x-ray, for example, our technology can help treat patients of any size.
Horses, small, or zoo animals can all fall ill and require adequate treatment. With our products we are looking to support veterinarians in their daily quest to advance the welfare of animals.
Thank you to Fujifilm Germany’s Medical Systems division, who have kindly shared these insights with us today. To learn more about their work, visit their homepage (in German). For our readers outside of Germany, please visit our European presence.
As someone who has traveled 50,000 miles in the past couple of years, I’ve come to realize you don’t have to go far to have fun and make great photos. Truth is, no matter where you live, all you have to do is step outside your back door. I guarantee that if you slow down and look closely at what’s around you, you’ll find many interesting subjects. Whether it’s literally in your backyard, in the nearest park, or an adorable pet —these things are right there under your nose just waiting to be noticed.While visiting Louisiana, I headed out with my weather-resistant FUJIFILM X-Pro2. Within just a few yards I found leaves, flowers, insects, frogs, and my beloved pooch Emma. Admittedly, I wasn’t feeling very inspired in the beginning. At first glance, there was nothing particularly interesting about my environment. I walked out my door, down a paved road and stumbled upon a nondescript nature path. I had to force myself to slow down and peer into places I would otherwise have overlooked. By the end of the shoot, I was having a blast.I recommend keeping it simple and just grabbing your camera and one or two lenses (tripod optional).I chose my FUJINON XF56mmF1.2 R APD prime lens known for its sharpness, clarity and beautiful bokeh effects. The FUJINON lens lineup pairs perfectly with – and optimizes – the X Series camera system. This APD prime is the only lens I’ve ever used that ships with its own apodization filter (think ND filter) which creates smooth bokeh outlines and enhances the three dimensional feel of an image. To maximize the bokeh capabilities and create a macro-lens aesthetic, I opened the lens up all the way to f/1.2 and manually set the focus to its closest distance. Then I just explored and moved the camera in and out on various objects. When I found something I liked, I framed up an interesting composition and further refined the focal point.
**Lighting tip: look for subjects in the open shade or go out on an overcast day. This will ensure your light is soft, your colors are enhanced and your exposure values are under control.The other lens was the venerable XF50-140mmF2.8 R LM OIS WR which is one of the best lenses available today for image quality and stabilization. I find this lens to be excellent all around and I’ve always enjoyed shooting portraits in this focal range. Enter my beloved brindle boxer — Emma. She emerged in a bed of flowers and I instantly had a muse!I found close to a dozen pictures in under an hour while I was just meandering around. It really pays to take your time (and your camera) and absorb whichever features happen to be around you. You will see the beauty and details in everyday life. I guarantee you’ll find something interesting.
Not many people realise it, but before I started travelling and shooting Motorsport, photographing pets was a major part of my business. I would shoot a lot of equine and dog portraits with the odd cat, snake or rat thrown in now and then. I still run Pawfolio, but it’s now more a project of love, or reserved for when people who know me as ‘the pet photographer’ really want me to shoot their most beloved….. not the kids, yep it’s always the dog!
I see a lot of people posting photos of their pets on instagram lately, with some pets even having their own pages. So I thought I would put a few tips together that might be fun to try out if you want to get a great shot of your own pooch…. some of the tips might even work on pictures of the kids too!
For my doggy model, I’m going to use Bria aka ‘The Beast’, my beautiful Sprocker Spaniel. These shots all involve natural light as I wanted this article to be of use to everyone. As long as you have a camera and a lens you can get stunning shots of your beast without expensive lighting.
Preparation
In my ‘Pawfolio’ bag. Don’t panic! You don’t need all of this! this is just some of the equipment I use on various shoots… If you have only one lens and a camera you’ll be fine 🙂
Camera: XPro1, XT1, XT10
Lenses: 18mm F2, 35mm F1.4, 10-24 F4, 90mm F2, 50-140mm F2.8
Lighting: Ambient/Natural Light
Extras: Dog, lead, willing assistant (wife, kid, person you met on a dog walk?), dog treats / squeaky toy / bouncy ball / whistle, silly voice, insurance (if you want to shoot other peoples dogs!), mobile phone
Top Tip! Things become massively easy in life once a dog knows how to sit, stay, and look at food!! this is where all that training pays off! You will need a few basics such as;
Sit, Paw, Down/Sleep, Stay, Come…
(We had to learn some of these commands in polish once for a clients dog we photographed.)
A food-orientated dog is perfect, if this isn’t working then it’s down to the favourite toy, bouncy ball or failing that, making stupid noises…..dogs love this! The right noise will get a dog to tilt it’s head in a way that looks cute but whilst saying ‘what are you doing, human?’
Play with your beast first;
this builds a little trust between the dog and yourself.
It’s fun for both of you,
it burns off the dog’s energy reserve
A few minutes playing around the kit isn’t a bad thing either, it lets the dog know that the camera is nothing to be worried about and not something strange and dangerous…
Around the house – Your own dog
Ideal for practice and often the easiest of images to shoot are where the dog is relaxed in their own surroundings or favourite spot. I normally wait for ‘Beast’ to find somewhere nice to settle or I encourage her to sit roughly in the right place. Quite often I’ll pap her as she drifts off to sleep. These are candid based shots but can turn into gorgeous intimate photos.
I use any of the following 18mm f2, 35mm f1.4 and the 90mm F2 mostly to achieve the shallow depth of field for this type of shot. The XF35mm f2, XF16, XF23 and XF56mm would be amazing also. Any lens at F1.2 – F2 will make a stunning image. I often use the X-Pro1 and X-T1. The OVF on the X-Pro1 can be really useful in hybrid mode during low light if the EVF wont preview the shot.
#Tip – You can put the Fuji camera to silent mode if the dog is too distracted by the shutter sound. Beast used to hear the shutter then pounce on me because she thought the sound meant that the shoot was over.
The candid shots I usually try to get for every dog shoot are:
Nose
That big snuffler is amazing. Shot at 1.2 or on a Macro it makes a stunning detailed image.
Paws
The texture of the pads or the hairy paw is beautiful. If it’s your dog, hold the paw and capture a paw & hand selfie #TooCute
Face
Poor beast with the collar of shame
“What’s going on down there?”
Like any face or portrait I shoot, I always focus on the eye closest to me. If you shoot the furthest one and the closer one is blurred, the image just looks wrong – please don’t do it!!
#Tip – Try shooting the dog from ‘a dogs view’ or from below the dog looking up. Crawling around in the dirt is just an everyday thing for me, but I think it’s really worth getting the unusual perspective. This is also now where the flip out screen is genius and the X-T1 or X-T10 becomes king.
That said, don’t rule out the standing up traditional viewpoint. Sometimes if you stand right over the dog looking down, you get that ‘puppy face’ beaming back up at you, and there is nothing cuter.
Outdoors
For outdoor shots, choose a nice spot your dog is going to love and that has some features or atmosphere about it. The beach is an awesome place for dogs, and one of our favourites, with lots of space, great light, and lots of zooming. For this a 90mm, 50-140 or the new 100-400 is ideal because the animal can move around freely but you can still fill the frame. This situation is ideal for the X-T1 or X-T10 because of their high frame rate. I would probably go for the X-T1 more to help keep the sand, salt and spray out of the camera. I would also recommend the weather resistant lenses for this type of shoot. A rogue wave splash or a shake down from the Beast can spray your gear from a surprising distance.
You won’t believe the range on this thing!
Rivers are great too, but always check the current is safe. Look for a spot on the bank with space and great moody lighting, perhaps between some trees. You should make sure your beast can get in and out easily, and I always have someone with me to throw a ball or something safe for the dog to chase, or I sometimes just sit and watch the animal play and have fun on their own.
Before river
After river
My favourite lens for outdoor dog shoots has to be the 50-140 F2.8. With good flexibility and a shallow depth of field at F2.8 there’s always gorgeous bokeh in the background. I try to keep the shutter up between 2000th and 4000th of a second to keep the motion frozen. If the light is changing or the dog is running through light and dark patches, try ‘auto ISO’.
Set the the auto ISO range function to work between ISO 200 and 6400. To control the aperture, try to stay in the range of F2.8 – F4/5.6 or if you want some amazing textural shots and there is loads of light, dial in F8 – F11. Again get low… I have the tilt screen for this, or just get in the dirt and sand and the shots will be amazing.
You could also try the 16-55 F2.8 if you want the shot to be a little more environmental, shoot wide and get more of the landscape in your photos. When you print this type of shot they look great printed large.
If you want to get really creative try ‘panning’ the dog. This is a technique we use on the track to shoot cars at the races. Select a shutter speed between 1/8th (very creative) up to 1/200th (suggest you start there and work your way down to 1/8th), and rotate your body at the hips following and tracking your dog as it runs past. You want to work your shots at slower and slower shutter speeds to create a wonderful action arty shot…
Doggy pan
More about the author
John + Beast
John Rourke has been shooting professionally for 15 years and is the owner of Adrenal Media, the Official Photography Agency for the FIA WEC (World Endurance Championship), and the ELMS (European Le Mans Series) including the world famous ‘Le Mans 24hr’. He shoots all of his professional and personal work on Fujifilm X series cameras.
Despite photographing lots of dogs prior to this I naively thought that I’d be able to line up eleven calm and collected Labrador puppies to demonstrate the effect of different apertures on a photograph.
Do these look calm and collected to you?
Despite the challenging subjects I hope that I can help you understand the fundamentals of using different apertures and how this affects a photograph.
To start off there are three things that are all intertwined in a photograph, these are your shutter speed, ISO/ASA and aperture. Shutter speed is the length of time your camera shutter is open for. This is important depending on what you are trying to photograph, if you are wanting to freeze action then you are going to want a fast shutter speed such as 1/1000 of a second. While if you wanted to create motion blur then you would want a slower shutter speed, for example, 1/60th of a second.
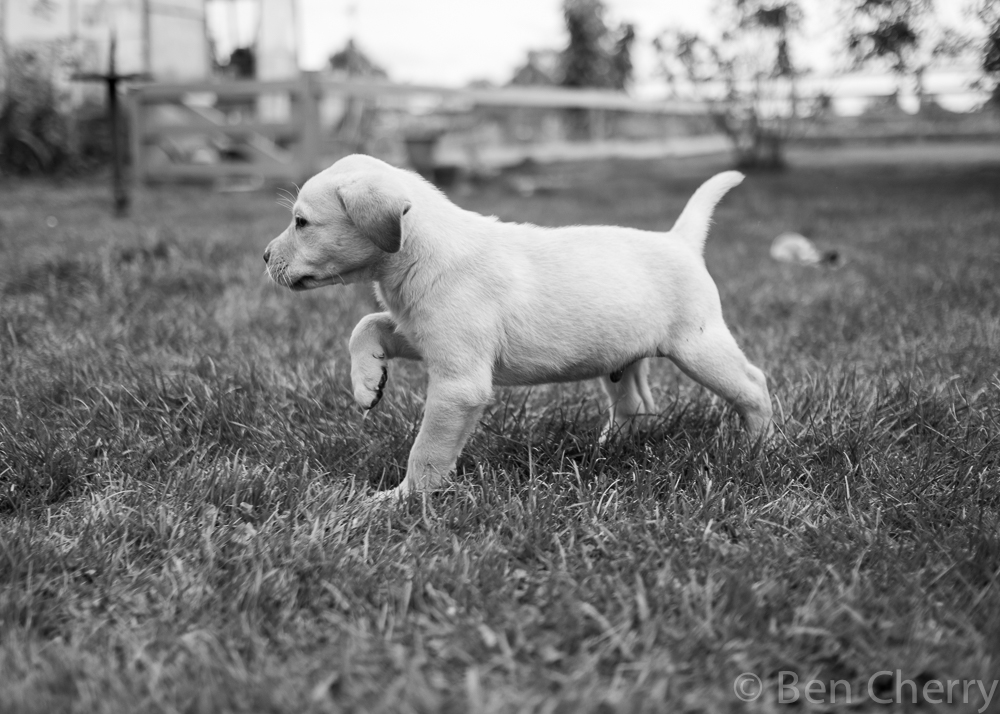
A shutter speed of 1/1900 of a second helped to freeze this leaping puppy
ISO is a way of setting the sensitivity of the camera sensor. The lower the ISO number (e.g. ISO 100), generally the better the overall quality of the image. However, the lower the number the more light required for an exposure. A sensor set up at ISO 100 requires a shutter speed four times longer than a sensor set up with ISO 400. With ISOs you have to decide what you want to prioritise, faster shutter speed or better quality, you have to find the compromise you are happy with for the situation at hand.
Tired puppy at ISO 200
Crop of puppy showing high levels of detail at low ISO
Then there are apertures… This dictates how deep the depth of field will be in the photograph. For example f1.4 has a very shallow depth of field that is helpful for isolating a subject, while f11 has a large depth of field that means everything in a composition can be sharp. Again though there is a twist as the smaller the f number the larger the amount of light let into the lens, meaning faster shutter speeds.
At f1.4 the depth of field is so shallow that only the eyes are in focus
If one of the three factors change, then it affects at least one of the two other factors. For example if your camera is set up with ISO 400 and aperture f5.6, showing a shutter speed of 1/250 of a second and you want to increase your shutter speed then you can lower your aperture a stop to f4 (which will double your shutter speed) or another stop to f2.8 (quadruple your shutter speed). Alternatively if you don’t want to change your aperture then you can increase your ISO to 800 which would also double your shutter speed.
Using puppies was a difficult choice…
My intention for this blog was to have a wonderful selection of shots showing eleven puppies sat in a line using a variety of different apertures to show how this affects depth of field. The owner Ruth Mercer, who very kindly let me photograph the puppies, said the best time to do this would be when they’re being fed. As the birds eye view picture clearly shows, my dream of a nice orderly line was never going to happen! Why I thought this was possible with these little bundles of energy was beyond me. No matter though, the whole experience was utterly heart warming. And all is not lost as I did obtain some shots that highlight the difference in depth of field caused by different apertures.
Puppy at f1.4
Puppy at f10
You can see that with the second photo the depth of field is much greater than the first. This in turn shifts the focus away from the isolated, in-focus puppy in the first image to the whole scene of the second image. Note how your eye should be drawn a lot more to the bottom of the black puppy a lot more in the second image because it is in focus.
Despite being a rather unusual way to highlight how different apertures can affect the image produced, I hope this puppy inspired explanation has helped further your understanding. The lens used for the majority of these shots was the XF23mm f1.4 r which offers very fast autofocus and a very shallow depth of field, using f1.4, to give the photographer the greatest amount of control through a wide aperture range (f1.4-f16).
The take home message is that a small f-stop number allows you to create a very shallow depth of field to help isolate a subject. While a large f-stop number will mean that a larger proportion of the content in the picture will be in focus. To finish with here are a few more shots of the puppies, generally using a shallow depth of field to keep the focus on these adorable little characters. You can also check out a video of this adorable experience here by Ellice Dart.


 While visiting Louisiana, I headed out with my weather-resistant FUJIFILM X-Pro2. Within just a few yards I found leaves, flowers, insects, frogs, and my beloved pooch Emma. Admittedly, I wasn’t feeling very inspired in the beginning. At first glance, there was nothing particularly interesting about my environment. I walked out my door, down a paved road and stumbled upon a nondescript nature path. I had to force myself to slow down and peer into places I would otherwise have overlooked. By the end of the shoot, I was having a blast.
 I recommend keeping it simple and just grabbing your camera and one or two lenses (tripod optional).
 I chose my FUJINON XF56mmF1.2 R APD prime lens known for its sharpness, clarity and beautiful bokeh effects. The FUJINON lens lineup pairs perfectly with – and optimizes – the X Series camera system. This APD prime is the only lens I’ve ever used that ships with its own apodization filter (think ND filter) which creates smooth bokeh outlines and enhances the three dimensional feel of an image. To maximize the bokeh capabilities and create a macro-lens aesthetic, I opened the lens up all the way to f/1.2 and manually set the focus to its closest distance. Then I just explored and moved the camera in and out on various objects. When I found something I liked, I framed up an interesting composition and further refined the focal point.
 The other lens was the venerable XF50-140mmF2.8 R LM OIS WR which is one of the best lenses available today for image quality and stabilization. I find this lens to be excellent all around and I’ve always enjoyed shooting portraits in this focal range. Enter my beloved brindle boxer — Emma. She emerged in a bed of flowers and I instantly had a muse!
 I found close to a dozen pictures in under an hour while I was just meandering around. It really pays to take your time (and your camera) and absorb whichever features happen to be around you. You will see the beauty and details in everyday life. I guarantee you’ll find something interesting.
 By
By