Photography

Capture and share memories.

Interview with Dave Jackson – a recent convert to the Fujifilm X-T1 for professional wedding work

Dave JacksonDave started as a full time professional photographer in 1993 using a medium format Bronica. He made the switch to digital in 2005 using Fujifilm S2 and S3 cameras. From 2008 he’s been using Nikon D300’s and D700’s.

Dave and his wife Janice now specialise in weddings (40-50 per year), with a blend of classic, traditional, contemporary and reportage. They are pretty obsessed with lighting and locations. and use Graphistudio exclusively for their albums.

Recently they made the switch over to Fujifilm and offered to write about their reasons for doing so.

“My love affair with Fuji X cameras started like many professionals with the X100 which I’ve had now for a couple of years. I had yearned after an X-Pro1 for a while and took advantage of the great deal at The Photography Show in Birmingham this year which included the grip, 18mm F2, an extra battery and the chance to claim a free lens from Fuji I chose the 60mm F2.4 macro and also purchased a 35mm F1.4 shortly after.

“I really don’t know why but I didn’t take a lot of notice of the X-T1 on it’s launch but after another trade show and attending Damien Lovegrove’s Concept to Print tour I was hooked.

“I began to consider how the X-T1 could fit into our current range of Nikon D700’s and pro lenses and even on a longer term could it become our main camera(s)?

300814_XT1D_0695
XF18-55mm – ISO 640 – 1/160 – f/8

“We are a 2 shooter husband and wife team currently covering between 40 – 50 weddings per year. For some time, we have been concerned about the weight of our equipment and camera bags, today’s weddings are non-stop, very demanding assignments, often with several locations and very little time for actual shooting. I can’t begin to tell you how many camera bags / waist belt combinations we’ve tried (“oh no! Not another camera bag”, sighs Janice!) but nothing can change the actual weight of a D700 with battery grip, 2 batteries and a 70-200 F2.8!

290814_XT1D_0049
XF35mm – ISO 1250 – 1/160 – f/1.4

“I was taken aback at the weight of the X-T1 with vertical grip and 18-55. Other features that attracted me were the large dials for exposure compensation, ISO selection and shutter speeds, the tilt screen, virtually silent operation (the D700’s are noisy in a quiet church) and of course the best electronic viewfinder available so far. Fuji’s ‘roadmap’ of lens releases was also beginning to make everything look so promising.

“So I went ahead and purchased an X-T1 with 18-55 F2.8 -4. Already owning an x100 and X-Pro1 meant many of the menu settings were familiar and of course the 3 prime lenses I already owned could be put to immediate use if necessary. I already had 2 batteries but purchased another 2 as well as I knew they would be needed for the number of shots we take at an all day wedding. The camera felt so right in my hands and in no time at all I set everything up ready for wedding photography (settings shown in the image captions).

“We had a wedding just 5 days after purchasing the camera. I decided to jump straight in at the deep end and shoot as much of the wedding as possible with it.

“The X-T1 behaved impeccably! It took a while to get used to the EVF, I found a sort of 3 stage evaluation of the images whilst shooting-
1. Assess image with live view (aperture priority with exp compensation). The image can look a little contrasty with dark shadows and / or bright highlights.
2. Check the 0.5 sec preview. This looks better and less contrasty than the live view.
3. Chimp the image on the rear screen if in doubt. The image on the rear screen was confirming all was fine and I found myself ‘chimping’ less and less, knowing if the EVF preview looked ok that was enough.

300814_XT1D_0274
XF35mm – ISO 400 – 1/3000 – f/1.4

“Use of the EVF provided another advantage that I hadn’t really thought about. When ‘chimping’ with the Nikons the rear screen can be difficult to view. We often find ourselves taking a shot and turning our backs to couples to shade the screen to try and check exposures / blinks etc. The XT-1 solved this immediately with the preview in the viewfinder perfectly viewable regardless of light levels.

“A lot has been said about battery life. I added the vertical grip after the first 2 weddings and purchased another 2 spares. If a battery dies then the one in the body is immediately deployed so no chance of missing any shots and I can change the grip battery at a convenient moment. I am using 8GB Sandisk Extreme cards getting about 200 shots and the batteries are lasting for about 2 cards (400 shots).

“My next task is to sort using flash. Conditions were such that I didn’t need to use fill flash for these weddings. I used a Nikon SB22 and Nikon SB900 on Auto Aperture for a couple of in car shots and one cake cutting shot and used the D700 for first dance.
At the time of writing we have now shot 4 weddings with the XT-1 and I am completely convinced we have made the right decision.

“So, another XT-1 for Janice with 55-200 F3.5 (until the 50-140mm F2.8 arrives!) and probably an X-E2 each as well + 56mm F1.2, 10-24mm F4 lenses, – Oh dear the bank balance is going to take a hit!”

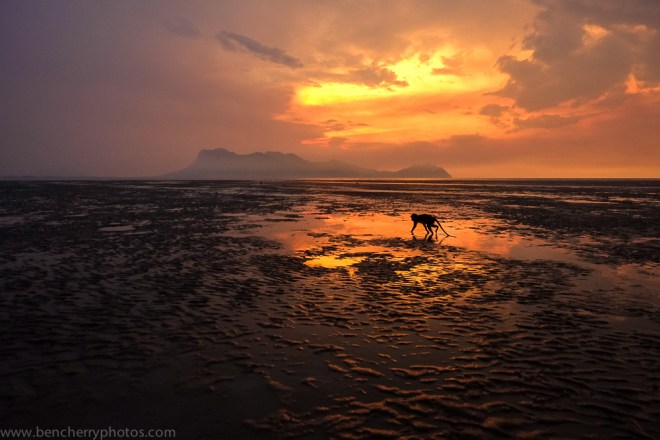
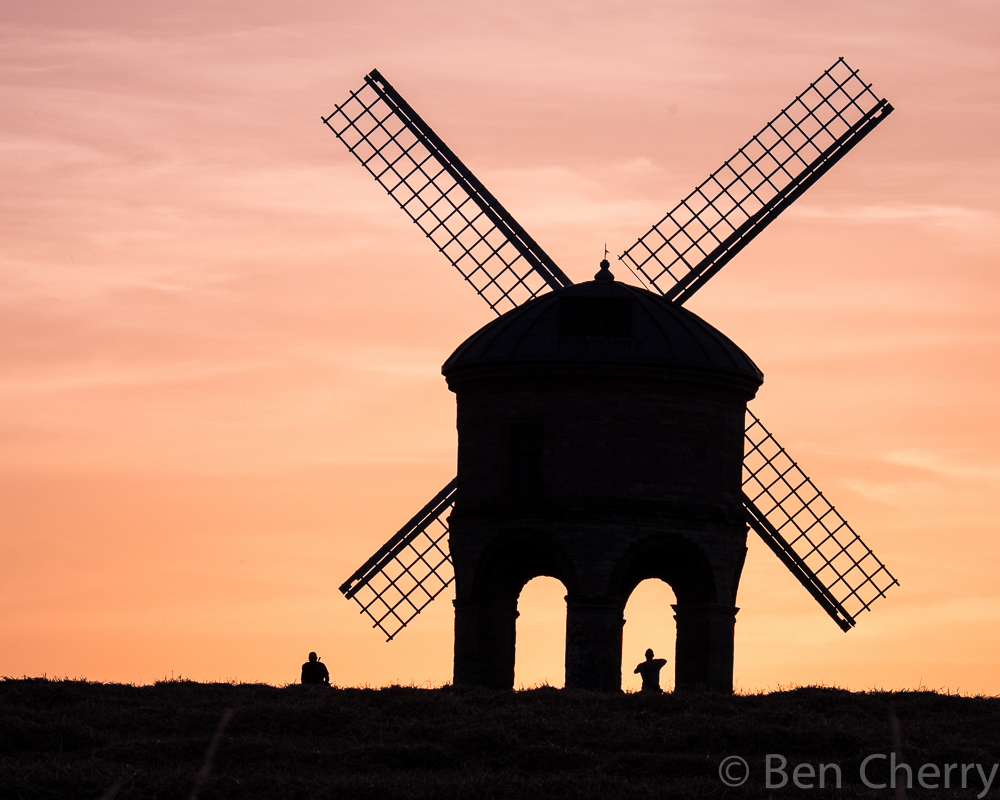
Check out more shots in the slideshow below:

To see even more of David’s work, click on the following links:
http://www.davejackson-photography.co.uk
https://www.flickr.com/photos/djp_lighterside/

Why lens choice is important?

Use of different focal lengths

This blog is going to try and cover the fundamentals of lenses, explaining when to use them and why. If you have any questions after reading this then please get in touch via:

If you haven’t already seen Dale Young’s great blog on “What focal length I should use and why?” Then check it out here.

I too took some photos at different focal lengths (see the below slideshow), between 10mm and 135mm, to emphasise how certain focal lengths are generally better than others for portraiture. This topic has brought up lots of comments and I have edited this part a number of times to try and get the best brief explanation, without going off on too big a tangent! To break it down to fundamentals, the thing that affects perspective is distance, the distance between the camera and the subject. The focal length you choose affects the framing of a subject. With the series of photos below, I tried to keep the framing the same for all the focal lengths; the thing that changed was the distance between the subject and me. At 10mm I was a mere few cm’s from the subject’s face (awkward), while at 135mm we were a few metres apart. This longest example (135mm) shows a flattening effect, where the content seems compressed. This occurs because of greater distance between the subject and myself. Making the depth of the face (e.g. from the nose to the ear) proportionally less compared to the distance between the subject and the lens… The opposite is true for the wide-angle photos. Take the 10mm example again; I am so close to the subject that the depth of the face makes up a larger distance than the distance between the lens and the nose, making the perspective exaggerated (also note how you can see the shadow behind the model with the wide-angle shots but you can’t with the telephoto portraits because of the narrower angle of view).

In full frame or 35mm film terminology, 50mm is deemed the ‘standard focal length’, as it is close to our eye’s central angle of view. This means that a 50mm lens produces a perspective very similar to what we see. Because the sensors in Fujifilm X-Series cameras are generally 1.5X smaller than full frame sensors (APS-C sensor size), this standard focal length equates to a 35mm lens, like the XF35mm F1.4 R. This is quite complicated to explain (it could be a whole other blog!)… So much so that I have spent hours editing these paragraphs, but hopefully you get the gist of how different focal lengths affect the perspective of a picture. There are some very informative comments about this topic at the bottom of this blog if you want to find out more.

Wide-angle lenses can create exaggerate perspectives which produce amusing (which is good as it’s engaging) portraits, especially with animals!


Apertures

Before we go any further, lets just check you understand the fundamentals of using apertures. If not then check out my previous blog that helps to explain how different apertures affect a picture (plus there are cute labrador puppies!).


Putting both together

35mm f1.4
35mm f1.4

Now that we understand how different focal lengths and apertures affect the look of a picture we can look at how to combine the two. First of all lets think about portraits: If you want to isolate a subject generally you are going to want to use a standard or telephoto lens with a low F-stop, such as the XF35mm F1.4 RXF56mm F1.2 R or the imminent XF50-140mm F2.8 R OIS WR. For the image to the left I wanted to try and isolate the woman from the background as it was very busy and distracting, and while it isn’t entirely clean it is made better as a result of using F1.4 for a shallow depth of field.

If you want to capture an environmental portrait generally you would use a wide-angle lens and depending on how much of the environment you want to make out in the background you’d range the F-stop between F2 and F11.

Both of the pictures above were taken with the X100s (I love using it for these kinds of photos). The left image is at F2 and while you can make out the room the clarity of it is poor. Compare that to the right image where the use of F11 results in the mountain behind the boarder being sharp.


Prime vs. Zoom

This is very much a personal preference, there is no right choice. It depends on lots of factors, from space and weight restrictions to financial limitations. Because prime lenses have a fixed focal length, they tend to be smaller, lighter and have larger minimum apertures (F1.2-2.8) compared to zoom lenses. While zoom lenses have the convenience of effectively including many different prime lenses, generally these have more restricted apertures (F2.8-5.6). For me, it depends on the situation. I prefer prime lenses because of the greater depth of field control. As well as this I believe that the fixed focal length makes you think more about your photography, particularly composition. However, the convenience of zoom lenses in situations that are changing quickly can be invaluable as you don’t have to change lenses as often to obtain a variety of photographs. When conditions are unpleasant this is vital in order to protect the sensor. A point to consider is that the XF18-135mm F3.5-5.6 R LM OIS WR plus the recently released XF50-140mm F2.8 and XF16-55mm F2.8 R WR (hopefully arriving in the first quarter of 2015) are all weather sealed making them ideal partners for the X-T1, creating a weather sealed system.

If I am working in relatively controlled conditions where it is easy for me to change lens regularly then I try to use prime lenses.

But if conditions are not suitable for continuous lens changes or a situation is quickly evolving and I need to be on my toes the zoom lenses are what I grab.

The zoom lens examples above are all wildlife examples (which are often taken in difficult conditions where a situation is quickly changing) were captured with the telephoto half of the XF18-135mm F3.5-5.6 R LM OIS WR. The reason why I chose these examples is because I wanted to show what can be done with F5.6 as the maximum aperture, showing nice bokeh in the images where I’ve tried to keep the attention on the subject. Now imagine what will be possible with the new XF50-140mm F2.8 R OIS WR! Can you tell I’m a bit excited about it…?


What lens for the occasion?

The main reason I first moved to the Fujifilm X-Series was the prioritisation of high quality lenses. With the announcement of the X-Pro1, the first lenses available were the XF18mm F2 R, XF35mm F1.4 R and XF60mm F2.4 R. These are all high quality, lightweight prime lenses that, together, offer a wide focal length range package. From there the lens road map laid out Fujifilm’s intentions to create a strong lens collection covering a wide range of uses.

Generally lenses are associated with a particular genre of photography based on their focal length. For example wide lenses such as the XF14mm F2.8 R and XF10-24mm F4 R OIS are intended for landscapes and long lenses like the XF55-200mm F3.5-4.8 R LM OIS are for wildlife and sports. But rules are made to be broken and your lenses don’t necessarily have to be used to fit those stereotypes. The photograph below was taken with the 14mm lens, generally intended for landscape photography, however I used this lens to capture this macaque foraging for stranded marine life amidst a sunset scene.

14mm - Foraging macaque
14mm – Foraging macaque

The important thing to remember with your lens choice is to think “what do I want to convey?” On this occasion I wanted to show the scene as a whole. In the landscape shot below I focused on the distant hills over a bay with the setting sun using the 55-200mm lens, which is usually associated with wildlife and sports. This helped to emphasise the golden glow which wasn’t as prevalent with a wider-angle view.

120mm - Landscape
120mm – Landscape

Conclusion

Hopefully you now understand that lens choice can have a huge impact on your end result. If you understand the principles of focal lengths and apertures then you have a grasp on what lens to use and why. Remember that lenses are tools designed to help fuel your creativity. For me, a lens that I am very much looking forward to is the XF50-140mm F2.8 R OIS WR. This lens offers the versatility of a zoom but with a constant aperture of F2.8 it gives very good depth of field control. A lens such as this has many uses and I’m sure it is going to be a big hit with photographers from all genres.

A good exercise to try would be to force yourself to use one focal length next time you go for a walk. No matter if you’re using a prime or a zoom lens, try and restrict yourself. The purpose of this is to understand what you can capture with certain focal lengths so that in the future you will hopefully be more decisive with what focal length to use in a given situation. Remember that you can change the end picture dramatically through different apertures. Why not give it a go and then share with us the variety of photographs you managed to capture with the same focal length. Or you can change it up and use one aperture but change your focal lengths. Share your results with us and if you have any questions please get in touch via the contact details at the top.

Until next time, happy Shooting!

Ben Cherry

The X100T – from concept to product announcement in seven short months

In February 2014, during my first ever trip to Japan to attend the CP+ Show in Yokohama, I was also lucky enough to be present at one of the early planning meetings for the X100T, along with a few carefully selected professional photographers – Yukio Uchida (Japan), Bert Stephani (Belgium), Gianluca Colla (Italy) and Kevin Mullins (UK). Each one of the photographers used Fujifilm CSCs for their work, but also an X100S for personal work, and some professional work where it suited. After spending a few days talking about how our equipment affects their working lives in a positive light, they were given very specific instructions to tell us exactly what they didn’t like about them.

Less than seven months on and I’m holding in my hands a pre-production version of a camera that was based on many of the subjects discussed in this meeting.

How do you make something “more perfect” ?

There were two sides to the meeting. First up, the Japanese developers worked through a list of their ideas to understand what the photographers thought of them.

I paraphrase of course but here’s kind of how the conversation went:

Developers: Do you want a full-frame sensor?
Photographers: No because the camera would need to be bigger and that would degrade the purpose of the camera

Developers: Would you like an f/1.8 or larger aperture lens?
Photographers: As above. No because the camera would need to be bigger.

Developers: Would you like a tilting screen?
Photographers: As above again.

At this point you could see that the Japanese product developers are getting a bit nervous. How can you further evolve and develop a product if the users of the product are already perfectly happy with the existing one?

Developers: Does it need an Electronic Shutter?
Photographers: Not sure… what would be the benefits?
Developers: Shooting much faster shutter speeds, even with the aperture wide open – no need for the ND filter

OK finally we have our first TICK!

Developers: Would you like better movie functions? More frame rate options, manual exposure control?
Photographers: Yes, as long as it doesn’t have any effect on the camera’s ability to shoot stills

And another TICK. We’re really cooking now.

Developers: What about Wifi?
Photographers: Would be useful, as long as the camera doesn’t get any bigger

Developers: How would you like to be able to use manual focus while shooting OVF?
Photographers: We’re listening…

The developers pulled out a concept modified X100S with a special LCD panel installed outside the Optical Viewfinder. They went on to explain how this LCD display would actually be inside the camera and the user can switch on or off the ability to fine-tune the focus without switching from OVF.

I’ve had a go with this on the pre-production version and I can really see the value. I’m a big fan of coloured focus peaking so to be able to have it while looking through an OVF is really nice. It’s quick to toggle on or off, much faster than switching between OVF and EVF, so you can pay attention to the frame and just check the focus when you need it.

They then went through a pretty long list of changes / enhancements etc… of which a lot made it into the X100T I’ve got in my hand.

“We will consider”

In my experience, one thing that Japanese people hate to do is to outright say the word “no”. Every suggestion for a change to any of our cameras always gets one of these two responses:

  1. “We will do this” – this actually means “We have already done this”
  2. “We will consider” – And they do!

Next up in the meeting it was the photographer’s turn to suggest changes, all of which met one the answers above. Here are a few things I remember our guests asking for. This is not to say that these were not already in consideration by the development team.

  • Ability for the user to customise the Q menu – check
  • Standardise the main layout of the camera controls – time will tell on this but the X100T button layout is more like the X-T1 than the X100S, particularly on the user’s right thumb.
The rear controls of the X100T are more like an X-T1 than an X100S
  • Various different film types to be considered to be added to the list of Film Simulation modes – Classic Chrome making it into the range
  • More Function (Fn) buttons – check
  • Black version available at launch – check
  • Everything above, but retain the same size, shape and pretty much weight as the X100S and X100 – check

It’s not to say that the entire product was built from that one single meeting. Of course not. The team in Japan do an amazing job considering requests from Fujifilm staff and professional photographers all over the world. It is this constant ability to listen to feedback and then build on it that makes this an incredibly exciting and rewarding place to work.

On top of these changes, here are a few others that I’ve heard customers ask for that have made it in:

  • Allow users to select the AF area with the 4-way controller, without pressing the Fn Key.
  • AUTO ISO “profiles”
  • Ability for Exposure compensation to still work when the camera is in M mode, as long as the ISO is set to AUTO
  • Aperture ring moves in ⅓ increments.
  • Increase the grip on the manual focus ring

And finally some nice changes that made it over from the X-T1:

  • Coloured Focus Peaking
  • Remote shooting / wireless image transfer
  • Awesome updated GUI that rotates based on camera orientation
  • Interval Shooting
  • 3 stops Exposure Compensation
Here's what my X100T will look like when I get it. Much love for the WCL-X100
Here’s what my X100T will look like when I get it. Much love for the WCL-X100

Conclusion

The whole experience opened my eyes to what an amazing company it is that I work for. Staff and customers alike have a voice that is constantly helping to shape future development to produce the perfect products.

Many of these changes have been added to already-released cameras via free firmware updates. In my opinion this is a great move by Fujifilm as we are relatively new (this time round) to the professional end of the market and building trust is very important to help us gain a good reputation.

But whether we’re able to update existing models, or evolve the models with newer, improved versions, the reason it is working well is because everything is being carefully developed based on what actual users want. I’ve now seen this with my own eyes, and hold the proof in my hands.

改善 (kaizen) – Good change.

Come and see the X100T

The Fujifilm X100T will be available to get your hands on in the Touch & Try section of the Fujifilm stand at Photokina 2014 – Tuesday 16th September to Sunday 21st September at the koelnmesse Trade Fair and Exhibition Centre in Cologne, Germany.

http://fujifilm-x.com/photokina2014/en/whatson-touch-and-try.html

Oh and I’ll be there too if you fancy coming along and saying hello 🙂

Links

X100T
Learn about the new X100T camera
Read the X100T announcement

X-Photographers website’s
Kevin Mullins
Gianluca Colla
Bert Stephani
Yukio Uchida

My love affair with EVFs

When I first started using the Fujifilm X-Series last summer I didn’t realise how helpful electronic viewfinders (EVFs) can be. Being able to see a live view of the exposure and then adjusting this via the exposure compensation dial means that I am more efficient. When using SLRs it is often difficult to get exposure compensation exactly right the first time around, this often means you take a photograph multiple times to get it just right. With X-Series cameras you are able to see how an exposure adjustment will effect the exposure of the image before you take the photo. This is especially helpful for fleeting moments, especially in quickly changing light.

The exposure compensation can be adjusted in post-production but I feel the live view produced by EVFs has helped me improve my photography. This makes my editing workflow shorter, which is always an advantage.

I found this feature particularly helpful when taking silhouettes, such as the images of Chesterton windmill in the gallery below.

EVFs are also very helpful with non-Fujifilm lenses or using Fujifilm lenses in manual mode as they can accurately show when the focus is correct. Even with the X100s and X-Pro1, which have hybrid viewfinders, I use them almost exclusively in EVF mode instead of OVF mode because, for me, it offers more benefits.

What focal length should I use and why?

w360_6415757_tutorialbannerfordotmailerHere’s a quick, hopefully informative snippet as to why you might choose one focal length over another, and why.

The idea for this blog came about when I was asked recently “Why don’t you just zoom-out to get the person in the frame?”. This is a very good question and I felt it needed a mini demonstration to really help answer it. All one needs to conduct this experiment is the following:

  • A willing volunteer – I had a Marc
  • A zoom lens of any kind – In my case, the XF18-135mm lens
  • Oh, and a camera!

The experiment is simple; frame your subject (Marc) the same each time and take a picture at different focal lengths. I chose four focal lengths along the barrel of the lens to best demonstrate. With this, we had the ever-helpful Terry to hand with a camera to capture the experiment from the third person perspective.

Hopefully what you will notice is that the wider the angle, (18mm) the more clutter there is in the image whereas at the 135mm setting, pretty much all clutter has ‘disappeared’.

Why does this happen?

Without going into huge mathematical detail (that I don’t even fully understand) it is because wide angle shots will achieve a larger angle of view and long zooms won’t. This is how much ‘fits’ into the shot – peripheral vision if you like.

As a rule of thumb, wider angle lenses work great for landscape photography and indoors (where you don’t have a lot of room to manoeuvre) as they can fit more in. Wider angles, however, are not great for portrait shots as they will pull the centre of the frame forwards creating distortion in perspective – example image below.

Longer zooms on the other hand work great for de-cluttering a frame to create stunning portraits. This is because the angle of view is smaller, and more importantly, they have a compressing effect. In essence, a long zoom pulls the background closer to the foreground and can give a more natural, slim looking head shape whilst also helping aid the bokeh effect – increasing the focal length of a lens decreases the depth of field.

Here are two example shots I took that hopefully help demonstrate the difference:

The image on the left (135mm) shows Marc’s head in proper perspective. However, the right shot (18mm) shows the nose being ‘pulled’ forward towards the lens and his head being turned into a rugby ball! You will also notice there is more of Marc’s surroundings in the wider angle shot – this diverts some attention away from his face, which, in a portrait shot we don’t want to do.

I hope this post gets you thinking more about which focal length to use rather than just zooming in and out for convenience.

Having a zoom lens is incredibly helpful at times, but it would best to think of your zoom lens as a series of prime lenses. Most photographers, if not all, use specific focal lengths for specific purposes; this is due to the individual optical effects each focal length provides. It really does make a difference to the end result – as (hopefully) shown above 😉

If you can, please go and try this yourself to get a real feel for it. It will help with your own understanding as to what focal length you might want to use, and for which subjects


Saying ‘I do’ to the X-E2

I start to get nervous about two weeks before I shoot a wedding. It’s around this time that I start taking an unhealthy interest in the weather forecast, start worrying about whether I’m going to get enough time to shoot everything and start limiting the use of my camera because I’ve convinced myself it only has a few more shots left in it before the shutter combusts. This all happens because I don’t shoot weddings very often, I’m what fellow photographers would call a ‘Weekend Warrior’ and what pros lovingly refer to as ‘a pain in the arse’. I shoot weddings for friends and acquaintances and don’t charge much; I see it more as part job, part wedding present. You may be the same.

18-55mm @55mm, 1/60sec at f/4, ISO 800

My most recent part job/part wedding present represented two firsts for me. It was the first same-sex marriage I’d photographed (congratulations Gemma and Fiona!) and it was also the first time I’d added an X-E2 to my camera line-up. I’ll be honest from the outset and admit that the X-E2 wasn’t my primary shooter. Although I’m well versed in its capabilities, having previously blogged about using the same camera on a trip to Rome, I still don’t feel I know it well enough to use it as Camera 1. Instead, I’d earmarked it – along with the 18-55mm, 60mm and 55-200mm XF lenses – for specific tasks throughout the day, plus it would also double as a more than capable backup option should Camera 1, as prophesied, burst into flames during the nuptials.

Of all the things to have sleepless nights about before a wedding, camera gear shouldn’t be one of them. My search continues for methods of controlling the weather and bending time, but I prepared the night before safe in the knowledge that my camera gear was ready; firmwares updated, batteries charged, lenses polished, straps attached.

The X-E2 was the first camera out of the bag the following morning when I arrived early at the reception venue to shoot details on the tables. It quickly established itself to be a reliable focuser and exposer, while the image previews looked sharp and full of colour. As planned, it then came out on a number of other occasions throughout the day. Its near-silent operation and more discreet appearance enabled me to wander around and capture a whole host of shots that, had I attempted to shoot with Camera 1, would inevitably have resulted in wedding guests standing bolt upright while affecting cheesy grins. Not so the X-E2 which, with the 55-200mm attached, is the perfect combination for candids.

Its hushed credentials also proved their worth during the speeches at the reception. After selecting the Silent mode I was able to capture a wide variety of images, without causing the assembled guests to turn around every time I pressed the shutter. In short, the X-E2 and I got on famously during the day, even though it did show a larger than expected appetite for battery power.

18-55mm @55mm, 1/60sec at f/3.5, ISO 250

The bigger news was to come in post-production. I’d shot nearly 1500 images, so editing in Lightroom was a lengthy affair, especially when you consider everything was captured in Raw. But while general tidying up of images is to be expected, I found myself spending far less time on the X-E2’s files. They were supremely sharp straight out of camera, wonderfully vibrant and showed impressive quality at high ISOs. The speeches, for example, were shots at ISO 3200 and 6400 because of the low light levels at the reception, yet noise was well under control – far better, in fact, than Camera 1.

55-200mm @156mm, 1/90sec at f/4.5, ISO 3200

So what did I learn? Well, I’d certainly pack the X-E2 if I was shooting a wedding again – it’s agile, easy to use and cuts down post-production time, all of which are huge positives. Its retro charms didn’t go unnoticed by guests at the wedding, either. As I mingled at the reception, a DSLR-toting attendee came over and asked about the X-E2. ‘Is it a Leica?,’ he asked. I explained what it was, showed him some shots I’d taken and invited him to have a try. He took a couple of shots and handed it back, gave it the one over and said, quite simply: ‘Lovely’.

I’d have to agree.