#X-Thusiast

X-Photographer Chris Upton talks X-E2S

BY CHRIS UPTON

Amid all the deserved hype around the launch of the Fujifilm X-Pro2 it was easy to miss the upgrade to the Fuji X-E2, in the form of the X-E2S. In truth this is really an evolution rather than a revolution but, true to form, Fuji have integrated some very welcome features into this incarnation.

Before I run through these it might be worth explaining Fujifilm’s strategy around their, interchangeable lens, CSC (compact system camera) line up. Fujifilm’s launch into the CSC market came with the introduction of the X-Pro1 4 years ago. This model was styled around the retro rangefinder type cameras. It was an instant success due to the beautiful design and stunning image quality. The X-E1 and X-E2 followed in the same vein but in a smaller form factor. Whilst there are benefits of using a rangefinder for certain types of shooting, especially street, there are many photographers who prefer the typical DSLR style body with a central viewfinder. Enter the Fujifilm X-T1 and subsequently X-T10.

xe2sSo the thinking is that Fuji can now offer Pro / semi-pro and enthusiast cameras in both rangefinder and DSLR styled bodies. So in essence the X-E2S lines up alongside the X-T10 with a 16.3mp sensor.

20151108_lakes_0754-Edit

My “affair” with Fuji started in 2013 when I bought the X-E1. I had always wanted a small, light rangefinder style camera to use as a carry round camera to be used alongside my Canon DSLR system. I loved that camera and I still do, but whilst the X-T1 with its fantastic features and design is now my favoured body, the X-E1 is always in my bag.

So when Fuji asked me to test the X-E2S I was intrigued to see how it would compare to my own two models. My thoughts here are not meant to be a definitive technical review, there are plenty of other sites that offer that, but more around the user experience which will hopefully help you decide whether this body might be the one for you.

The X-E2S inherits the rangefinder style design and functionality with a series of new or improved features. The X-E2S is the same small size as the X-E1 / X-E2 and weighs in at a meagre 350g (body only) great for discreet, unobtrusive shooting.

20151108_lakes_0692-Edit

The X-E2S boasts improved viewfinder, autofocus system, handling and a more intuitive interface so let’s have a look at these in a little more detail.

One of the key benefits of the recent Fuji viewfinders is the ability to see in real time the exposure that you’re getting. Adjust the exposure or exposure compensation dial and see the screen go brighter or darker and confirm highlight and shadow control with the live histogram. The display is large with a 0.62x magnification and very bright and Fujifilm claim the EVF features the world’s shortest display time lag. The user can tailor the information appearing to their specific needs and this auto rotates when the camera is turned vertically, a really useful feature.

The X-E2S incorporates the superb new Auto Focus system that was introduced to the X-T1 and incorporated in the X-T10 and the new X-Pro2. This adds Zone and Wide Tracking to Single Point for easy capture of moving subjects. The standard single point mode offers 49 points for fast, precise focusing whilst the Zone mode allows users to select from three different sized zones from the 77 point focus area. The wide tracking feature excels at capturing moving subjects whether they are moving up and down, left and right or towards or away from the camera. This combined with Face and Eye detection options makes this a significant improvement over the old system and offers users one of the best and fastest AF systems available.

20151108_lakes_0552-Edit

The addition of a new, silent, electronic shutter is perfect for candid captures or shooting in quiet places and a top speed of 1/32,000 second means that the fast Fujinon lenses can be used wide open outdoors on a sunny day without the need for an ND filter. The interval timer enables shooting up to 999 frames with intervals from one second to 24 hours.
The camera features Fujifilm’s APS-C 16.3 megapixel X trans-CMOS II sensor. This is unique to Fujifilm and the random colour array and lack of low pass filter helps deliver outstanding image quality and low noise.

For those who like to shoot in low light there is an amazing new top ISO of 51200 though I rarely shoot above 3200 ISO where I have no problem with the quality of the files. If you like to shoot video the X-E2S can capture 1080/60p video and offers the latest set of Film Simulation Modes, including the gorgeous Classic Chrome which gives a slightly muted retro feel. In order to make selecting your most used functions quick and simple you can customize the function buttons on the body. My selections are ISO, self timer (usually set to 2 sec for tripod shooting), focus point, AF mode and metering mode. Of course you can also configure the Quick “Q” menu to your own specification. The new model also features an enhanced grip and a new user friendly interface for the menu system.

20151107_lakes_0314-Edit

20151107_lakes_0402-Edit-2

For those that are new to Fuji or thinking about making the move across there are a few other key points I should highlight.

As with the X-E2 the X-E2S offers the user the opportunity to manage the “exposure triangle” of aperture, shutter speed and ISO together with exposure compensation easily on the camera without the need to dive into endless menu’s. Manual focusing is a breeze when using the focusing aids of digital split image and focus peaking. I find that setting my focus peaking to flash the highlights in red works best. If you shoot JPEGS rather than RAW, or want a very pleasant surprise, the Fuji cameras deliver stunning JPEGS straight from camera. There is a lovely, almost film like feel to them and you can fine tune them in camera to suit your style, they really do have to be seen to be believed.

20151109_lakes_0191-Edit

20151109_lakes_0261

20151111_lakes_0741-Edit-Edit

A final point is that Fujifilm have earned deserved praise for their commitment to users buying into their system to ensure that they are not disadvantaged by the steady stream of technological improvements. In this case existing X-E2 users can update their camera’s firmware at no cost delivering the new AF system updates, performance improvements and the new graphical interface introduced in the X-E2S.

X-E2 firmware can be downloaded for FREE here.

_DSF1624-Edit2

_DSF1812-Edit

_DSF1799-Edit

So in summary whilst the X-E2S does not incorporate all the latest technology from Fujifilm it does offer a lightweight, compact rangefinder style body, awesome autofocus system with a proven 16.3mp sensor delivering stunning image quality at a very keen price making this a very attractive proposition indeed.

_DSF1730-Edit

_DSF1689-Edit

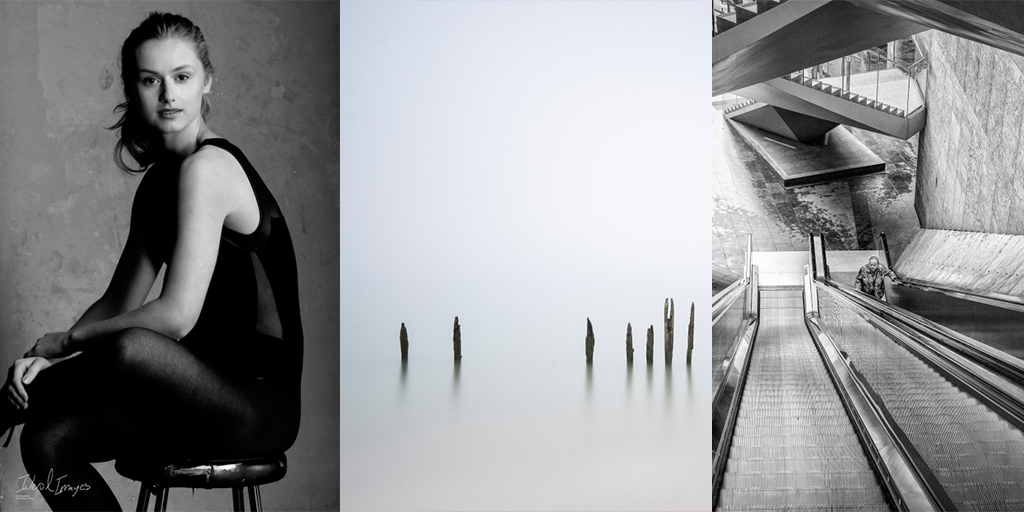
All images were shot using the Fuji X-E2S


Make a home studio – in your bath!

DSCF0214

Written by Roger Payne

The time had come. I’d been trying to justify keeping my X100S and X100T for some time but, in reality, since T had arrived, S had been spending increasingly lengthy spells in the cupboard. So, with a heavy heart, I decided to sell. The obvious route was on eBay, so I cleaned the camera up and took a couple of snaps before preparing my listing.

DSCF0197

My initial shot (above) was very typical of the sort of image you see on eBay – lit with flash from the front, it hardly shows my lovely X100S in the best light, while the background is distracting. I didn’t think it would appeal to buyers, so I decided to try an alternative tack and headed upstairs into my bathroom…

DSCF0179

Admittedly, this isn’t the most obvious room in the house to start taking product pictures but, in reality, it’s got a ready made studio for product shots – the bath. White, with a nice curve, the bath bounces plenty of light around to get even coverage and it has a clean, uncluttered background that won’t distract from the item on sale.

DSCF0184

Using an X-T1 with an XF18-55mm lens, I positioned the X100S at the opposite end to the taps, flicked out the X-T1’s rear screen and used the lens cap under the end of the lens to keep everything nice and straight. The X-T1’s screen is perfect for images like this, although fixed screen X-series models will be fine – you might just have to contort yourself into the bath a little! I chose an aperture of f/11, ISO 1600 and used the two second self-timer for hands-free shooting and took a shot.

DSCF0208

Not bad. Considering this was under tungsten light in my bathroom, I instantly had a better image than my earlier front-on flash lit effort. There was, however, a slight orange colour cast as I’d left the X-T1 on the Auto white-balance setting. I switched to the Incandescent white-balance option and took another.

DSCF0206

Better. The colour cast has now all but gone, but I still thought it could be improved further – the highlight on the lens and on the handgrip were distracting, caused by the main light above and to the left of the camera as you look at it. To overcome this problem, I deployed a diffuser on the bath over the top of the camera. I had a ready-made one, but you could use a large sheet of tracing paper to get a similar effect.

DSCF0192

DSCF0209

Hey presto, the distracting highlights had disappeared! But I still wasn’t completely happy, so I tried one more option, leaving the diffuser in place and attaching an EF-42 flashgun on to the X-T1. I pointed the flashgun head straight up so the light bounced off the ceiling and switched the white-balance back to Daylight.

DSCF0194

The result is below. Good isn’t it? And you’d never know it was taken in a bath. Naturally, you don’t have to use this idea purely for auction site listings, you could be far more creative, but there’s little doubt that this is a great way to boost the look of items you’re selling. I posted the listing and sold the camera for the price I wanted within a couple of days. What did I use the proceeds of the sale for? To buy an X70, of course!

DSCF0214

Buy an X-Pro2, win a workshop with an X-Photographer

Pretty simple right?

If you buy an X-Pro2 and register the warranty on our website before the 8th April 2016, you could win a place on one of our fantastic workshops.

Image by Dave Kai PiperDSCF4552-Edit-

1st May – Portrait workshop with Dave Kai Piper – (4 delegates)

Location: Amersham Studios

Being a photography lecturer, Adobe Community Pro and Fujifilm X-Photographer, Dave Kai-Piper will take you on an exciting journey into portrait photography.

His workshop starts off with a conversation with each participant discussing individual goals for the day alongside a group objective. As part of the morning set-up you will have a look at some iconic images from influential photographers. Then he will break down what makes those images work & talk about how different lighting types can create moods and styles. You will learn how to build on simple lighting styles like Butterfly lighting, Split lighting and Rembrandt lighting and then put them into practice using live demonstrations with a stunning model.

Once your objectives are set, you will jump into the studio full of the newest WiFi controllable Broncolor lighting to put your new Fujifilm X-Pro 2 through its paces. You will look at ways to shape, control and create that perfect image. Within this workshop you will also learn the best way to communicate and pose your subject to get the best from your model.

Whether you have spent a lot of time in the studio using lighting or have never used additive / flash lighting in your photography before, each attendee will leave the workshop with a broader knowledge of various techniques from lighting your subject, creating a scene and directing your model.


Matt-Hart

4th May – Street workshop with Matt Hart – (4 delegates)

Location: Liverpool

Spend the day with Street, Event and X-Photographer Matt Hart in this candid street photography workshop. It is here that Matt will give you an insight into the way he works and how to shoot his style of street photography.

He will show you how to anticipate and capture decisive moments, how to be invisible in public spaces to get the best images and how to to develop confidence shooting street photography. He will show you the best places in Liverpool to capture great street images – so in the future you can come back and have another go!

Matt’s workshops are always fun, informative and relaxed whilst at the same time challenging and have been designed to stretch your imagination.


Winchelsea-1

7th May – Landscape workshop with Paul Sanders – (4 delegates)

Location: Dungeoness and surrounding areas

Your day will be spent with Fujifilm X photographer and landscape artist Paul Sanders, he will help you develop your own way of seeing the landscape to create images that resonate with how you feel about the location.

Paul’s specialty is long exposure photography, he will take through a natural and easy to follow workflow that enables you to get to grips with the technical side of this style of photography. He will have some Neutral Density filters and graduated filters for you to use on the day. Filtration is one of the key aspects of landscape photography, it allows you to control contrast, mood and exposure time. Paul will explain all of the pros and cons of using filters and the different types of filters available.

The day will be split into two sessions – one at Dungeness and the other at Winchelsea beach.

Dungeness is the only classified desert area in the UK, its flat bleak landscape has inspired photographers, artist, writers and filmmakers for many years. The beach is a detritus of fishing boats and fleet. The decaying hulls of boats are left on the shingle, nets, huts and machinery make this a photographers dream location. Paul will explain that landscape photography isn’t always about the big vista but also lies within the details and the abstract he will guide you around the area so that you don’t miss anything.

Winchelsea Beach is a long exposure dream, lines of decaying groynes stretch along the beach. These make the perfect subjects for getting to grips with the minimalist style that long exposure work generates. Paul will also pay special attention to composition and exposure time to create beautifully minimal images.


Register your X-Pro2 warranty here


Terms
  • Only X-Pro2 cameras purchased from Authorised UK Dealers are eligible to win.
  • Each workshop has 4 spaces available.
  • Winners will be notified by the 13th April.
  • Prizes are not transferable and does not cover the cost of travel and accommodation.
  • Lunch and refreshments will be provided

Big tips for shooting small

header image
w360_6415757_tutorialbannerfordotmailerWhat’s not to like about macro (close up) photography? Getting closer to your subjects to see them in greater detail will always appeal, so picking up a few techniques to help you get better at shooting close ups is always worthwhile. Before we get down to the picture taking, let’s cover off the basics.

First, to get the best results you’re going to need a macro lens. That doesn’t mean a lens that has a macro setting, it means a proper macro lens. Such optics aren’t only suitable for close up work. The FUJIFILM XF60mm F2.4 Macro lens that we’re using here, for example, doubles as an excellent lens for shooting portraits, but it’s optically engineered to excel at close ups.

When it comes to macro lenses you’ll often hear the term ‘reproduction ratio’, such as 1:2 or lifesize. Put simply, this refers to the size the lens can reproduce what it’s being pointed at. A macro lens that offers a lifesize (or 1:1) ratio will reproduce the subject at the same size on the sensor as it is in real life. 1:2 means the subject will be reproduced at half lifesize, and so on. The XF60mm offers a 1:2 reproduction ratio.

Finally for now, it’s important to know that the closer you get to a subject, the smaller the area that appears in sharp focus. Given this, focusing has to be extremely precise, which is why a tripod or some other form of support is recommended.


Scenario 1: Shooting macro outdoors

With spring just around the corner, it’s obvious to brush up on your macro skills so you can shoot flowers. Indeed, for this very blog, I found a clump of snowdrops in my local park. Shooting macro images outdoors brings a number of challenges. The light levels vary which can cause exposure issues and, on the day I shot, it was windy, which causes delicate flowers like this to blow around a lot. That means you’ll need to shoot plenty of images, so make sure your battery is fully charged and you there’s plenty of room on your memory card.

I used an X-T1 for all these images as the fold out LCD is an absolute godsend. As I was working at ground level, it avoided me having to lay down on the cold ground. Instead, I popped out the LCD and rested the camera on a rolled up coat for support as my tripod didn’t go low enough.

I picked my subject carefully, finding one bloom that was isolated away from a larger group so I could focus attention on it and still get some complementary colours in the background; always check what is behind your subject before you shoot.

DSCF0131

The first shot I took (above) was with the XF18-55mm set to 55mm and at its closest focusing distance. To be fair, this isn’t a bad result at all, but doesn’t really have a huge amount of impact as the bloom is quite small. So I reached for the macro lens and took this:

DSCF0137

It’s a big improvement with the bloom occupying more of the frame, but the light is a little flat, so I used a small silver reflector placed under the snowdrop to push some more light in and get an even better shot:

DSCF0140

I could have stopped there and been happy, but I also had the FUJIFILM MCEX-11 and MCEX-16 extension tubes with me, so I gave them a try. The tubes fit between the lens and body and allow you to focus even closer. Both tubes maintain all functionality between lens and camera including autofocus, but the focus can hunt a little more and as I was getting so close to the snowdrop I opted to switch to manual focus and use Focus Assist to enlarge the subject on the X-T1’s rear LCD for focusing accuracy. AF hunting isn’t the end of the world, but means you can end up with shots like this where it’s focused on the background rather than the single bloom.

DSCF0142

I took three further sets of images, one with the 11mm, one with the 16mm and then one with the two combined, which got me closest of all. The reflector stayed in place for each image, but the sun was in and out hence the variations in light levels. Take your pick!


Scenario 2: Focus stacking indoors

Time to warm up and head indoors to try another macro technique: focus stacking. Here, you take a range of shots with the lens focused on different parts of the subject before using Photoshop to stack them all together and get one super sharp image.

As previously mentioned, the closer you get to the subject, the smaller the zone of sharp focus so it can be difficult to get the image sharp from front to back. One solution would be to put the camera on a tripod and use a small aperture. But this could make for a long exposure, plus lenses aren’t always at their optical best at smaller apertures. It’s better to pick a central aperture – here I used F5.6 – and stack the images together.

DSCF0192

To make this technique work, you’ll need something called a focusing rail. This attaches to your camera and allows you to make precise incremental changes by using the measure on the side of the rail. I used the 454 Micropositioning Sliding Plate by Manfrotto. I attached this to the X-Pro2 and XF60mm with MCEX-11 extension tube I was using inside, then put both on a tripod and framed up my subject – a dusty snooker scoreboard. In case you wondering why I didn’t remove the dust, this is purely to show how much detail you can get using the stacking technique.

DSCF8664

With the XF60mm set at F5.6 and manually focused on the number 9, here’s the result I got (above). The 9 is nice and sharp, but the in focus area soon drops off on either side. Next, I didn’t touch the focus on lens and moved the focusing rail until the point nearest the camera came into focus. Noting the distance on the rail, I took a shot. I then moved the rail until the furthest point from the camera into focus and took another shot. Again, nothing on the camera was changed and I noted the distance on the rail.

The distance between the two focus points needed the rail to be moved by 4cm. So, again, by not touching any settings on the camera or lens, I moved the rail incrementally by 2mm at a time and took further shots. This gave me a total of around 20 images. Shooting over, I went to my computer and fired up Photoshop.

I opened all the files at once in Photoshop and then chose File>Scripts>Load File into Stack then on the dialogue box that opened, I chose Add Open Files and OK. With this complete, I then opened the Layers palette in the resulting image and selected all the Layers before choosing Edit>Auto-Align Layers. Once this was complete, I then selected all the Layers again and chose Edit>Auto-Blend Layers. On the resulting dialogue box, I chose Stack Images and then hit OK.

Screen-Shot-2016-02-17-at-07.08.32

Depending on how much RAM your computer has, these processes may take a while, but once Photoshop has weaved its magic, you should find a sharp image where all the frames are stacked together. There is a possibility that your image will have some odd overlapping elements caused by the slight variance in camera angle between each frame as you move the camera along the rail. In this case, I did, but I was able to crop in slightly to removing the offending areas. If that’s not an option, you’ll need to try a different subject matter and preferably shoot on a plain background such as white or black.

_Stacked

If you’re happy with the result, finish by choosing Layer>Flatten Image and you’re done!

So there you have it – macro in a nutshell. One final point to bear in mind, macro photography is time-consuming to get right. Don’t expect great results straightaway, although there’s little doubt that patience will be rewarded. So when it comes to macro ideas, think big!

Thoresby Colliery: The end of the mine

FujiGuy Marc meets with X-Photographer Chris Upton to speak about his current exhibition: Thoresby Colliery: The end of the mine. 

[youtube https://www.youtube.com/watch?v=m9ojZSFfI58?rel=0&showinfo=0&w=1280&h=720%5D

Details of the exhibition

Exhibition: Thoresby The End Of The Mine features around 50 framed images
Venue : Mansfield Museum, Leeming Street, Mansfield NG18 1NG
Dates : 9th January – 27th February 2016
Open : Monday – Saturday 10am – 5pm
Admission: Free

To see more of Chris’ work and to learn more, please visit: http://www.chrisuptonphotography.com/


Which shutter speed should I use?

w360_6415757_tutorialbannerfordotmailer

If you are like me, knowing what shutter speed to use when you are trying to capture a particular type of action can be confusing at times. So I’ve put together a little ‘cheat sheet’ to help you get a good idea as to which shutter speed to use for particular shots.

In terms of how to use this ‘cheat sheet’ I recommend you print it off, stick it in your camera bag and, whenever you get a chance to shoot something more tricky, have a look at it and try out the relevant shutter speed. Alternatively, find yourself a willing volunteer to practice with!

Before you get started; Put your camera into ‘Shutter priority’ mode; to do this set your aperture setting to ‘A’, the ISO setting to Auto and moving your shutter speed dial off the ‘A’ position. This ensures you only need to worry about the shutter speed that you choose and nothing else.

Download the ‘Shutter speed cheat sheet’ here


Star jumps at 1/4000 to freeze motion 

4000

Important tip! As a good rule of thumb, always use a focal length that is equal to or less than the shutter speed when not using a tripod – this will help against unwanted blur in your images. For example if the shutter speed is 1/30, you should shoot with a focal length of 30mm or wider (28mm, 18mm, 16mm etc).

Walking fast at 1/250 to freeze motion

250

Walking fast at 1/15 for motion blur effect – panning the camera with the subject

15

Walking fast at 1/4 for motion blur effect – camera on tripod

4

Important tip! If you find that using a slow shutter speed makes your image overexpose consider shooting with an ND filter or shoot at sunset/sunrise.


These are just a few examples to get you thinking about which shutter speed to use – the cheat sheet should assist with other types of shots.

The most important thing to do is just go out and try them, don’t worry about getting it wrong and blurring your shots, as over time with practice you will start to get the shots that you were hoping to get.

If you have a friend that is interested in photography go and learn this with them. You can bounce ideas off each other to create some great shots. And… you can get them to perform star jumps for you until you get them perfectly sharp and in focus!

Until next time

Happy snapping! 🙂

Dale