#X-Series

Why The X100F Is My Camera of Choice

by Mark Condon

As the founder of Shotkit, I’m in the fortunate position to have access to virtually any photography related product. Being a huge fan of the Fujifilm X Series cameras and lenses, I’ve handled every camera and lens in the line up.

Fujifilm X100F – 1/160 second – F4 – ISO 640


Herein lies the one thing that I actually dislike about the Fujifilm –series – there are just too many great cameras and lenses to choose from! With functionality which overlaps between camera models and excellent image quality across the board, choosing a Fujifilm X Series camera is a somewhat challenging process…


After almost a year of umming and ahing and reading countless online reviews (like this one on my own site!), I finally settled on one camera – the Fujifilm X100F.

Fujifilm X100F – 1/220 second – F4 – ISO 200


In this guest post, I’d like to go into the 3 main reasons why I decided upon this understated fixed lens camera as my camera of choice, and ultimately decided it was the best travel camera of 2017.

Fujifilm X100F – 1/2000 second – F2.5 – ISO 320


  1. Size


It’s no surprise that the number one reason for dSLR shooters to move to the mirrorless camera format is due to the smaller size of the camera and/or lenses.


All the camera bodies in the Fujifilm X Series line-up are smaller and lighter than dSLRs with equivalent APS-C sensors. This makes them very attractive to anyone who carries their gear for long periods of time, particularly professionals.

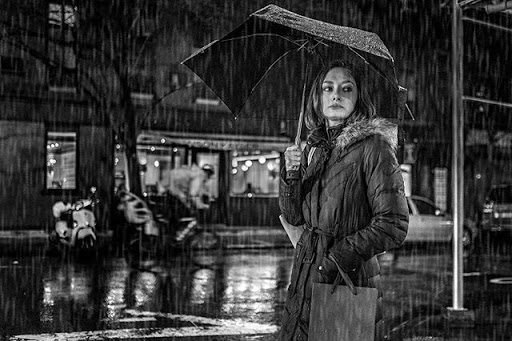
Fujifilm X100F – 1/160 second – F2 – ISO 640


In the Fujifilm X Series lineup, the Fujifilm X100F isn’t the smallest and lightest camera, but to me, its size and weight are perfect.


I have rather large hands, so anything smaller than this camera feels far too fiddly to use. In addition, I believe that a camera body needs to have a certain weight to it to be used effectively. The proportions of the X100F provide great balance in the hand, and its weight is reassuring – not too light to feel like a toy, but not too heavy to be cumbersome.


Another important factor that contributes to the compact size of the Fujifilm X100F is its fixed lens, which leads me on to point number 2.


  1. Lens


Having written extensively about the best Fujifilm lenses, I feel somewhat hypocritical choosing a camera which uses a fixed lens! With all that stellar Fujifilm glass on offer, why would I choose a camera with a fixed lens?!


Tying in with the point above, whilst I do love the Fujifilm (interchangeable) lenses, they do add size and weight to any Fujifilm camera body. Even the smallest, lightest Fujifilm prime lens will add bulk on to the front of the camera. Whether or not this is relevant to you is questionable, but for me, I love the fact that the Fujifilm X100F is (and will always be)… compact!

Fujifilm X100F – 1/1900 second – F5.6 – ISO 200


Aside from the size benefit of using a compact camera with one fixed lens, there are 2 other less obvious advantages of the XF23mmF2 lens of the Fujifilm X100F.


The first is somewhat subjective, but I absolutely love the images that are produced by the combination of this lens and the camera. I’m sure the boffins at Fujifilm HQ can elaborate, but there’s something about this combination that seems to be greater than the sum of its parts.

Fujifilm X100F – 1/160 second – F4 – ISO 320


I’ve shot with the Fujifilm X-T2 with a Fujinon XF23mmF2 WR lens attached, and whilst it’s an excellent combo, the Fujifilm X100F still beats it for me.


The other advantage is also slightly subjective, but having a fixed lens helps you improve as a photographer faster than any other accessory. Anyone who shoots with prime lenses (as opposed to zooms) will tell you something similar, but having a fixed focal length really allows you to visualise your scene and composition much easier, even before lifting the viewfinder to your eye.

Fujifilm X100F – 1/500 second – F4 – ISO 200


By having a prime lens that’s literally fixed to your camera body forever, you’ll get really good at this, and start seeing the world in 35mm. Also, by limiting your options with only one lens, you’ll push yourself harder to innovate and experiment with your photography – after all, restrictions encourage creativity.


  1. The Design


In my opinion, the Fujifilm X100F is the best looking camera available today. I have to say that all the X Series cameras look good, but for me, the Fujifilm X100F stands head and shoulders above the rest.


I used to own a black and silver Fujifilm X100S and received compliments on it wherever I went. When I upgraded to the Fujifilm X100F, I chose the all black version, and absolutely love how it looks.


I don’t receive many compliments on it anymore, but perhaps this is due to the fact that it’s more inconspicuous in jet black, which makes it perfect for photographing unnoticed, helping to achieve candid and natural-looking shots.

Fujifilm X100F – 1/250 second – F3.5 – ISO 200


The way a camera looks may seem insignificant, but I believe it’s actually very important. Whilst it bears no correlation to the image produced, having a camera that gives you pleasure to see and hold will make you more likely to pick it up and use.


Out of all the cameras I own, the Fujifilm X100F is the only one I display proudly in the open, as opposed to keeping it stuffed away in a camera bag. I actually have it hanging on a hook in my living room (much to my wife’s dismay!) It’s always the first camera I reach for when I need to capture a moment, and I never grow tired of looking at it.

Fujifilm X100F – 1/160 second – F2 – ISO 250


The other reasons I love my Fujifilm X100F are the features shared with most of the other cameras in the X Series line-up, including the excellent JPEG and RAW image quality; impressive high ISO performance; fun film simulations; fast auto-focus; fast start-up time, and much more.

Fujifilm X100F – 1/280 second – F4 – ISO 200

Fujifilm X100F – 1/420 second – F7.1 – ISO 200

It’s been a long process to find the one camera to document all my precious moments, but I’m confident I’ve chosen wisely with the Fujifilm X100F.

Fujifilm X100F – 1/1700 second – F6.4 – ISO 200


Guest review by Mark Condon, wedding photographer , author and founder of Shotkit.

IN FOCUS: Film Simulation modes used by the professionals

IN FOCUS is a series of articles where we ask some of the UK X-Photographers to give us advice, provide insight into their photography and share some of their favourite images of all time. In this blog, we asked our photographers what Film Simulation modes they use and why.


Provia – Mark Gilligan 

“I am a bit of a traditionalist and the phrase ‘is what you are looking at with your own eyes, the same as the camera is capturing?’ will be uttered by me during workshops. For that reason, I like to use the standard Provia Film Simulation because I want to be faithful to colour.

This image is as faithful as the real scene. It was taken looking across one of my favourite places in the Lakes called Birker Fell. I pass this view almost daily (not bad for an office view) and the sunsets are spectacular. Rich gold and orange hues that would look wrong if the colours were ‘riched’ up too much. Retaining the originality of a scene is very important and I find that Provia works for me.”


Velvia – Ben Cherry

“My standard film simulation is Velvia. It lends itself very well to nature imagery and I really enjoy the strong, bold colours, combined with a slight push on the highlights and shadows for punchy jpegs straight out of camera.”


Astia – Elli Cassidy 

“I love the Film Simulation modes and use the Astia filter for all my newborn work. It gives a beautiful neutral and soft skin tone, reducing any harsh contrast. This is particularly effective with babies as their skin is often different shades from head to toe and they can be quite blotchy, too.”


Classic Chrome – Derek Clark 

“I love the subtle film-like tones from Classic Chrome, especially with a setting of +2 for colour. The tones are still the same, but that extra bit of saturation really enhances the Classic Chrome look for my taste.”


Classic Chrome – Chio Fernandez

“My favourite is the one and only Classic Chrome. I love the soft and subtle tones and the detailed elegance of this Film Simulation. It’s a calming and soothing look, minimally intrusive. It almost doesn’t feel like I’m applying any film simulation to my photos, but enhancing them naturally.

It’s a versatile film simulation filter, it works great with landscapes, portraits or lifestyle shots and it’s the perfect fit for documentary.”


Classic Chrome or Velvia – Kevin Mullins

“I use film simulations a lot. A great deal of my work is shot in monochrome and I instantly fell in love with the Acros film simulation when it was first introduced. When shooting colour, I tend to use the Classic Chrome or Velvia film simulations.

For me, having a camera that can create gorgeous JPEG’s out of the can means I can allow the camera to do a lot of my post processing for me. Of course, there is no right or wrong as to whether RAW or JPEG should be used – it’s a photographers’ choice – but I do think, as we have an EVF in front of our eyes, we have less reason to get exposures wrong and it makes sense (to me at least) to shoot JPEG when I want the camera to process for me.”


Pro Neg. Hi – Saraya Cortaville

“I tend to use the Film Simulation modes in editing. I shoot RAW files and then process them in Camera Raw and assign a profile here. Depending on the style of the shot, I generally use either, Pro Neg. Hi or Classic Chrome, as these tend to compliment my style of portraiture, giving good skin tones and wonderful depth to the images.

This image was shot in RAW, and then processed afterwards as a Pro Neg. Hi profile. The contrast was then pushed slightly.”


Pro Neg. Std and Acros + Green Filter – Damien Lovegrove 

“The Film Simulation modes suit my way of working. I keep my photography very simple. I have always used Pro Neg. Std as my colour simulation on all the Fujifilm cameras that I’ve owned. I am also currently using Acros + G for my monochrome work. I love the skin contrast that Acros G gives my subjects. It makes everyone look healthy.”


Acros + Red Filter – Paul Sanders 

“My favourite film mode is Acros + Red Filter, simply because it gives me the mood and contrast I love.”


More from the X-Photographers

X-Photographers are the official Fujifilm ambassadors. To find out more about the global X-Photographers, visit fujifilm-x.com/photographers.


Shoot in RAW?

If you shoot in RAW but want to enhance your images with Fujifilm Film Simulations, our new X RAW STUDIO conversion software enables you to post-process your images either singly or in a batch.  Find out more and download this complimentary software. 

Note: X RAW STUDIO is compatible with GFX 50S, X-T2, X-Pro2* & X100F* with Mac OS X 10.10.5, 10.11.6, macOS 10.12.6 & macOS High Sierra. Windows 7 SP1, 8.1 & 10 compatibility will be available February 2018.

* Compatible firmware for FUJIFILM X-Pro2 and X100F will be available in December 2017

Wide vs Tele: From one extreme to the other

By Mark Gilligan

Everything we do in photography is a matter of perspective. My view is different from yours. We can stand side by side and look at the same thing but we don’t view it in the same way. We might recognise the exact features our eyes see but how we perceive and construct it is never the same.

Aren’t we lucky because if we all saw it exactly as each other surely the world would be a boring place? Read More

9 Ways to Gain Better Rainy Day Photos

That torrential downpour you see out the window some days could signal the end of your next big shoot — or it could indicate a new, albeit slushier, opportunity. Rain brings new possibilities for portrait, landscape and other genres of photos.


Take up some savvy ways to set up these rain shots so you and your subjects minimize time spent in puddles as you get the perfect pic.


Fear not — it’s just water.

If you want the best rain photography, you have to be willing to get wet. Dress for the weather, whenever possible, and embrace a bit of discomfort for the sake of perfecting your craft.

Photo by Nick Edmunson


Use microfiber cloths to keep your gear dry.

Just as you should dress for the weather, so too should your equipment. Even weather resistant gear is better off not getting drenched, and you are going to want your lens dry for most shots.


Create contrast by shooting in low light.

Raindrops are most apparent in twilight and nighttime shots, especially if the picture is eventually published in black and white. Viewers’ eyes are called to textures and patterns, like rippling puddles or splashing raindrops, with less light — and thus less colour.

Photo by Bob Cooley


Backlight your raindrops for visibility.

While low light calls attention to patterns, backlight makes subjects in its path more visible. Try shooting toward – though not directly into – a light source to see the raindrops against its luminosity. Streetlights are great for this approach.


Establish complementary light with your flash.

Yet another way to illuminate raindrops is to use your flash. It does not have to be your primary light source. Instead, it can be lowered by a few stops to supply complementary light that lets the precipitation glisten.


Research in advance for portraiture scenes.

Rain can be an interruption to portraiture sessions, but maybe your clients embrace its melancholy vibe. Survey your area for potential compositions where your subject could pose at length without getting soaked.

Photo by Jason Vinson


Place your subject beneath an awning or overhang.

Keep your subject dry for a portrait session by setting the shot beneath a covering on the street. This provides shelter, and the composition has a natural feel, seeing as people often wait out storms beneath these coverings.


Move out of the shower and behind the wheel.

Like awnings and overhangs, cars serve as adequate shelter and realistic scenes. Vehicles are good for more than composition, though. If the rain is too much for you and your equipment, and if you don’t have a sufficient umbrella, shoot from your car.


Capture the humanity in rainy day reactions.

It is difficult to be unaffected by rain. Reactions range from puddle dances to dread-faced power walks. Street photography on rainy days can highlight characteristics of joy, resilience and vulnerability in fresh ways.

Photo by Erwin T Lim


Rain does not have to be end of your shoot. It can be the beginning, so long as your eyes stay open to creative opportunities. To learn more about the cameras you could be using for your rain photography sessions, check out our eBook, Which X Series Should I Buy?


5 steps to create mouth-watering food photography

By Chio Fernandez

With social media and specifically the arrival of Instagram seven years ago, we have seen an increase in the amount of people sharing food images. And they aren’t all professional photographers sharing these images. Who hasn’t met with a friend for lunch and hasn’t been able to touch their food because they had to take the perfect shot? They will move the dishes closer to a window and step on a chair to take an aerial shot, sometimes using napkins as reflectors or smartphone flashes as filling light. From a cup of coffee to the most delicious high cuisine dish at that trendy Michelin Star restaurant or just some home baking, it is guaranteed that if you are scrolling through your Facebook, Instagram or Twitter feed you will come across a photo of food. Read More