If you are like me, knowing what shutter speed to use when you are trying to capture a particular type of action can be confusing at times. So I’ve put together a little ‘cheat sheet’ to help you get a good idea as to which shutter speed to use for particular shots.
In terms of how to use this ‘cheat sheet’ I recommend you print it off, stick it in your camera bag and, whenever you get a chance to shoot something more tricky, have a look at it and try out the relevant shutter speed. Alternatively, find yourself a willing volunteer to practice with!
Before you get started; Put your camera into ‘Shutter priority’ mode; to do this set your aperture setting to ‘A’, the ISO setting to Auto and moving your shutter speed dial off the ‘A’ position. This ensures you only need to worry about the shutter speed that you choose and nothing else.
Important tip! As a good rule of thumb, always use a focal length that is equal to or less than the shutter speed when not using a tripod – this will help against unwanted blur in your images. For example if the shutter speed is 1/30, you should shoot with a focal length of 30mm or wider (28mm, 18mm, 16mm etc).
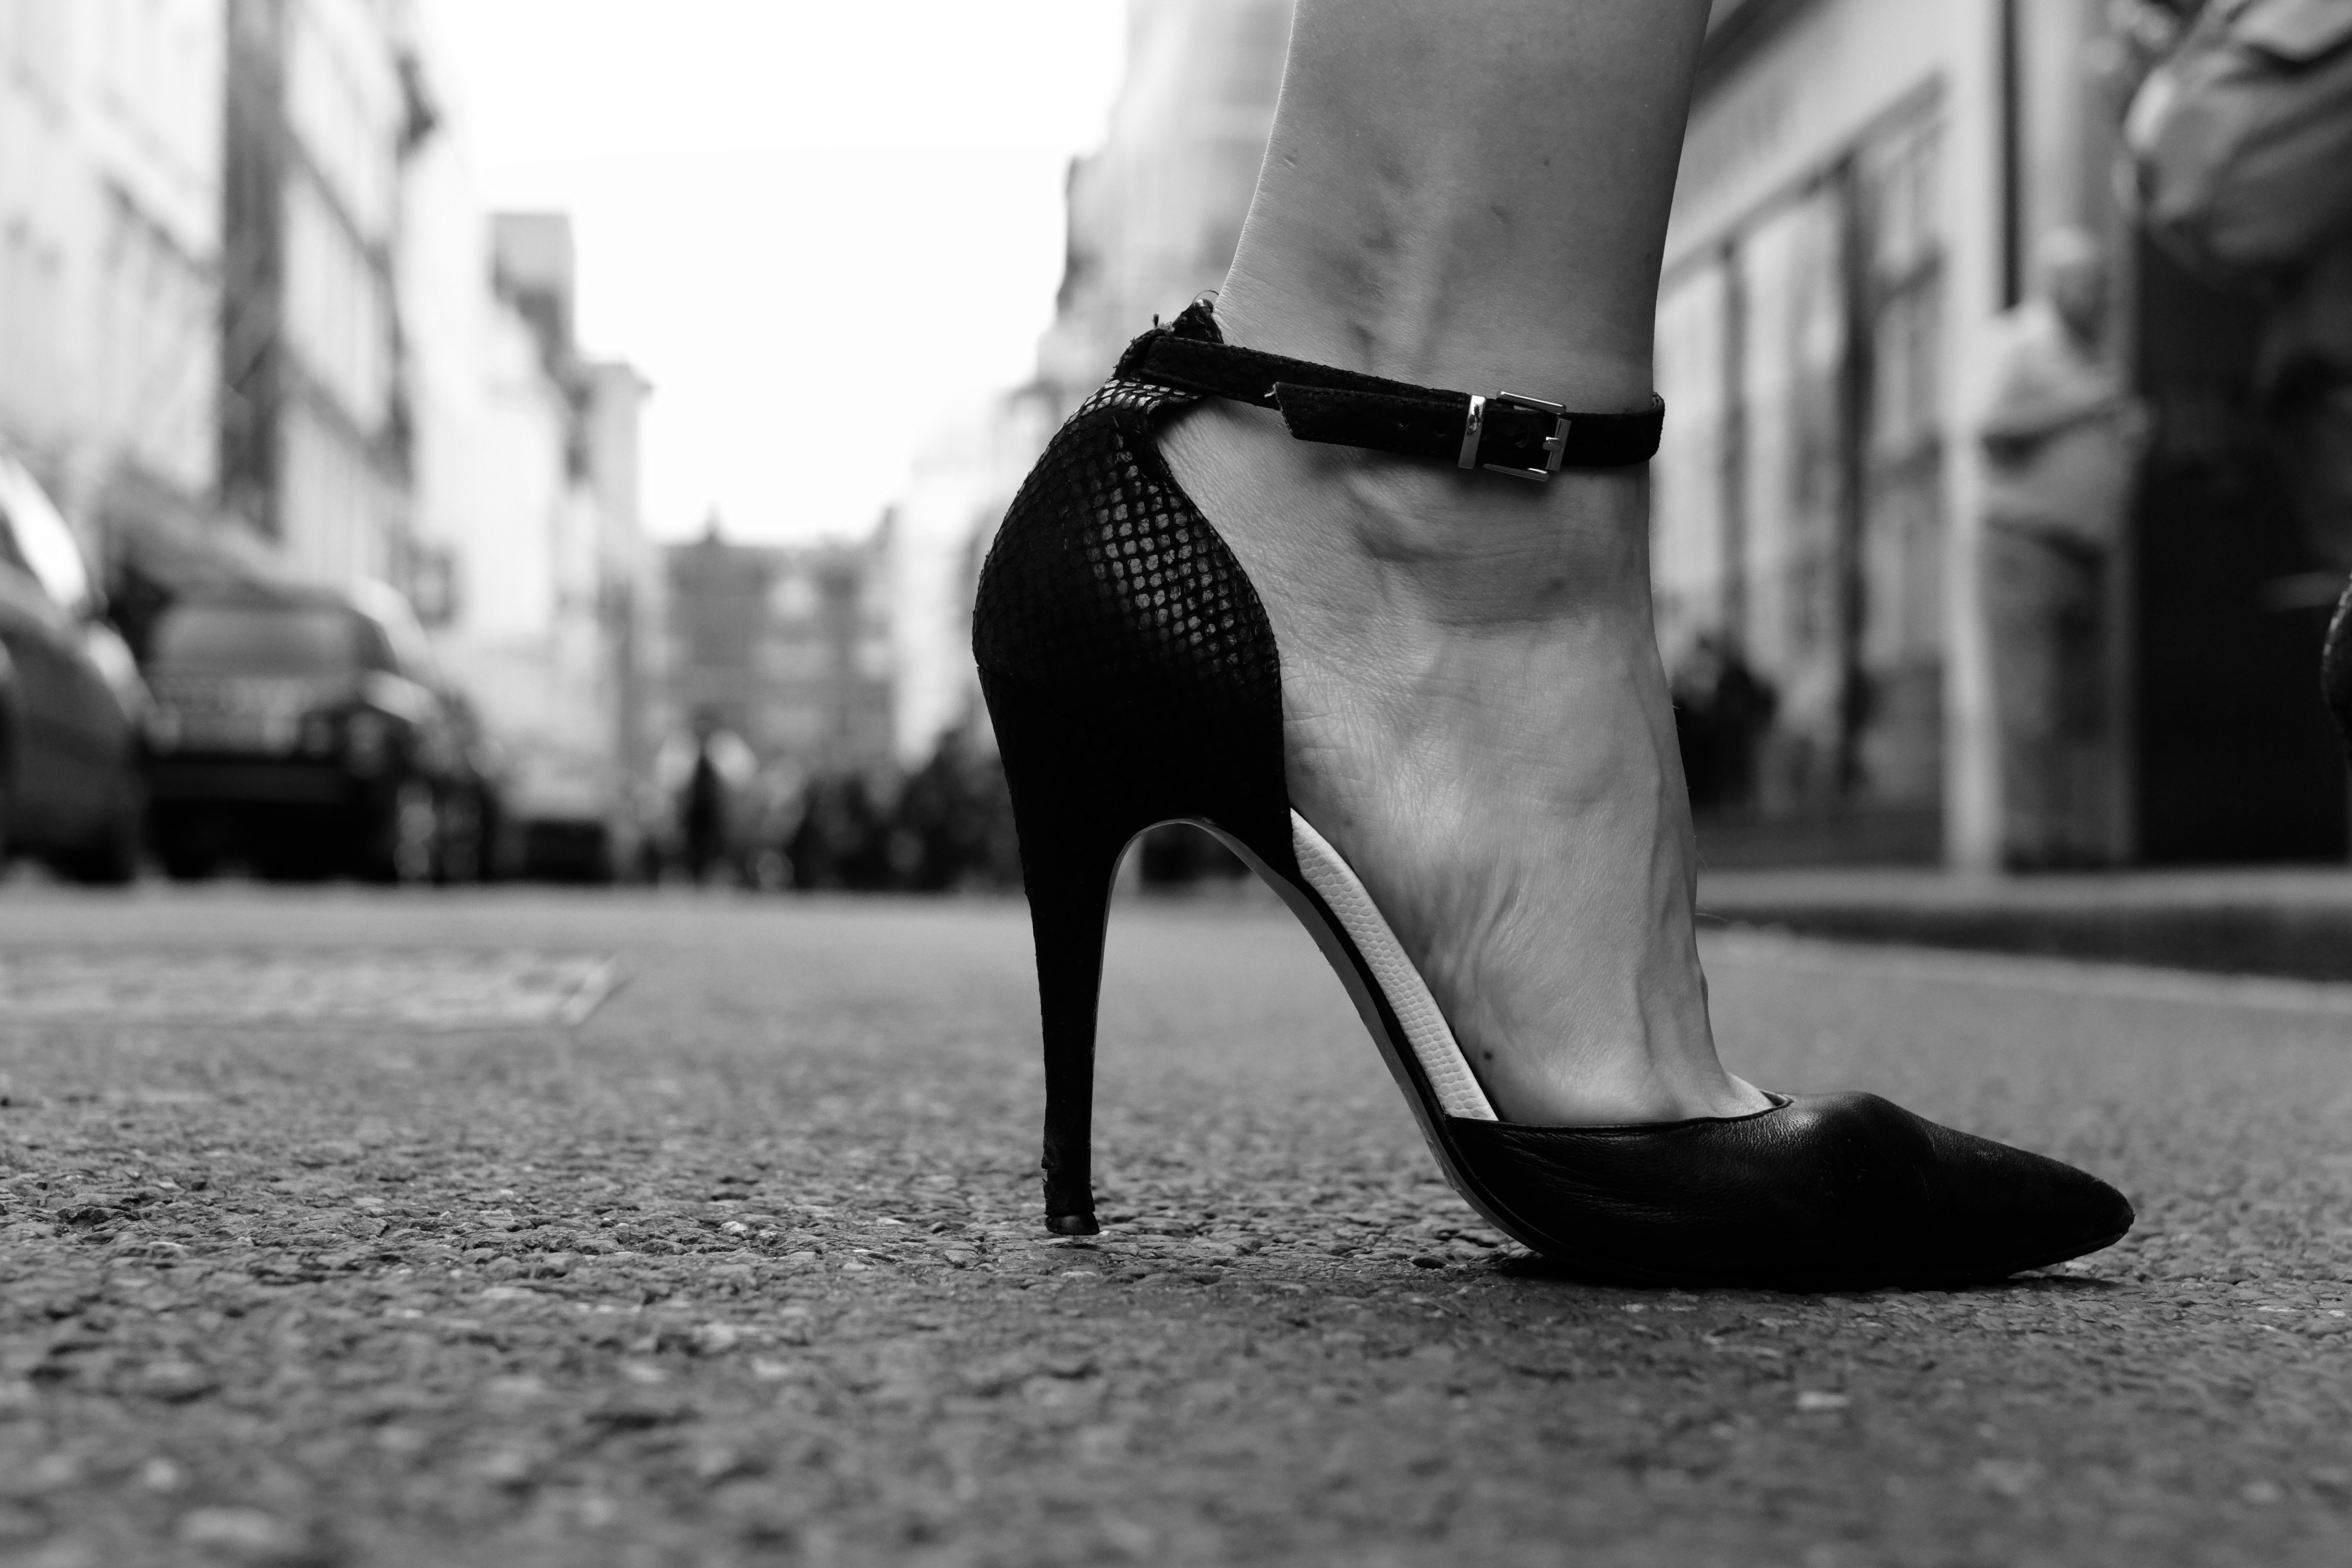
Walking fast at 1/250 to freeze motion
Walking fast at 1/15 for motion blur effect – panning the camera with the subject
Walking fast at 1/4 for motion blur effect – camera on tripod
Important tip! If you find that using a slow shutter speed makes your image overexpose consider shooting with an ND filter or shoot at sunset/sunrise.
These are just a few examples to get you thinking about which shutter speed to use – the cheat sheet should assist with other types of shots.
The most important thing to do is just go out and try them, don’t worry about getting it wrong and blurring your shots, as over time with practice you will start to get the shots that you were hoping to get.
If you have a friend that is interested in photography go and learn this with them. You can bounce ideas off each other to create some great shots. And… you can get them to perform star jumps for you until you get them perfectly sharp and in focus!
What better way to celebrate 5 years of Fujifilm X series than by hosting our own event at our head office in Tokyo?! I was lucky enough to be here so I’m sharing the experience with you.
The event started at 13:30 local time, while most (but not all) of you were probably tucked up fast asleep. We had a countdown that had been running on our X-Pro1 website for the last ten days.
Mr Nakajima explaining our company’s strategy since the decline of film sales
At 13:30 sharp [3m 9s], Fujifilm President Shigehiro Nakajima gave an introduction speech about how our company has evolved in recent years. Film sales peaked in the year 2000 and since then has quickly declined. We took our core competencies and technologies and the diversified our business to ensure survival of the company. At the heart of our company is, and always will be, photography. This is why the X series is so important to us.
Mr Takahashi makes a great case for using a smaller, lighter system
Afterwards, the top man in the whole Optical Division, Mr Takahashi, [13m 21s] took to the stage to explain in more detail about the last 5 years of X series. He explained the key benefits of using our APS-C system, including image quality, operability, and portability. He thanked all of the Fujifilm X users across the world, with a special nod to the Official X-Photographers, for not only using our products, but for helping us design future products. It has been the constant feedback that has enabled us to make these products we all love so much.
Toshi explained and demonstrated the advantages of the Hybrid Viewfinder. We all know that an EVF is great because it shows you the image you are going to get, including your exposure settings and any other Film Simulation or White Balance options you have changed. But in a world where EVF refresh rates and LCD resolution seem to make Optical Viewfinders redundant, why on earth would an OVF be required anymore? Toshi explained how having a Rangefinder style OVF allows you to see what is going on outside the frame. This is something that cannot be done on a D-SLR, nor by using an EVF.
Fujifilm X-Pro2 – the first and only Interchangeable Cameras with both OVF and EVF
Also, two ‘problems’ still exist with using an OVF: “Parallax”, where the angle of the Viewfinder is slightly different from that of the lens making it hard to know precisely where the edge of the frame will be, and Manual Focus is virtually impossible because changing the focus ring doesn’t affect the OVF on a rangefinder. The X-Pro2 has overcome both of these problems by displaying a small LCD panel in the bottom of the frame. This can be used to either show the entire frame in a miniature form, or it can be used to zoom in to the focus point to allow manual focus while in OVF mode.
Using the ERF to manual focus while using the OVF to frame the shot (image by Wex Photographic)
The X-Pro2 contains the new X-Trans CMOS III – the third generation sensor, which at 24-megapixels, has 50% more resolution that our current. It contains technology that allows faster transfer allowing lower noise at higher ISO.
80 years of film development gives us the expertise to recreate skin tones and other colours with exceptional realism. Toshi also talked about the new Acros film simulation monochrome mode that features smoother gradation, deep blacks and beautiful textures
Acros tone curve, as demonstrated by X-Photographer Patrick La Roque’s son
Next up, Toshi invited Magnum and National Geographic photographer David Alan Harvey onto the stage to talk about how he has found the X-Pro2 since using a prototype for the last few months. Here is the short movie that was played just before he joined Toshi on stage
David’s approach to photography is nothing short of inspiring. David likes simplicity. He wants his camera to be as simple to use as possible, while achieving the quality he needs to do his work. He used the camera in full-auto mode most of the time, wanting to spend more time worrying about the content of the image than what shutter speed to use. This attitude towards photography is exactly what we are trying to get to when we made this camera. We want people to enjoy photography and in order to do this you need to not think about the camera, and instead think about your art.
Next up, Toshi introduced the new X-E2S camera. It’s basically a rangefinder brother for the X-T10. All of the technical features that made the DSLR-style X-T10 a more attractive camera have been matched, leaving the user to choose between the style of camera rather than the specifications.
If you want to be able to shoot with your right eye leaving your face fully exposed to engage with your subject, or you want the classic retro look of a rangefinder of days passed, the X-E2S will be for you. If you prefer the more modern look of a D-SLR, plus the advantage of having a tilting screen for shooting high or low angles more comfortably, the X-T10 will probably be your preference.
Either way, you now get to choose your camera based on who you are, rather than which one was better on paper. Current X-E2 users can also rejoice in the fact that the software enhancements in the X-E2S will be coming to the X-E2 via a FREE firmware update in the very near future.
“This new 100-400mm lens looks like it was worth waiting for” – DPReview
Toshi showed a series of images [1h 13m 20s] that were all shot on the same camera + tripod. They were of a lighthouse and the showed the view at 10mm, and varying focal lengths right up to the final one showing the XF100-400 lens at its maximum zoom, with the XF1.4X converter on it. This did a great job of demonstrating just house varied our lens line up has become in the 4 years since the introduction of the X-Pro1. He then explained which of Fujifilm’s core technologies [1h 14m 0s] went into the creation of our new “Super Telephoto” lens, the XF100-400mmF4.5-5.6 R LM OIS WR.
Jeff Carter, talking about his switch from D-SLR to Fujifilm X
Jeff has been a professional photographer for many years and he switched to Fujifilm on a recommendation of a peer. His chosen subjects to shoot vary massively from shooting at The 24 Hours of Le Mans race, to shooting landscapes near his home in Scotland. He’s been fully converted to the X system since 2014 and has most of the lenses in our lineup and finds a use for all of them. They went through a number of Jeff’s shots and discussed the lens lineup and direction and also his reasons for making his final switch and going full-Fujifilm X.
Toshi ended his interview with Jeff by talking about a product meeting Jeff had attended a few months ago. (You may or may not know that Fujifilm REALLY listen to their users for product feedback). He asked him if he remembered a particular request that Jeff had. This particular request was for a flashgun that could fire continuously and would also be weatherproof to suit his X-T1. Jeff confirmed that he remembered the request, to which Toshi then presented the next product…
The only product not due to be released in February is the EF-X500 flash. Similar to our lens roadmap updates, we wanted our users to know that we listen to their feedback and we are working on a hotshoe mount flashgun to compliment the X series.
It’ll have a low-profile design that is perfectly suited to X-Series cameras, and will support high-speed sync up to 1/8000 sec. (the same speed as the shutter in the new X-Pro2). It will also be weather and dust resistant, just like the X-T1 and X-Pro2 cameras.
The final product that was presented was the X70,. This camera is essentially an X100T + WCL-X100, in a tiny body. It doesn’t have a viewfinder, which is the reason it can afford to be so small, but it does have a tilting LCD screen to compose your shot with.
“Awesome little compact camera” – Fujifilm UK’s Theo Georghiades
The same sensor as the X100T, the same processor as the X100T and an amazingly high-quality lens made by Fujinon (like the X100T). Now you can have a camera in your pocket at all times that won’t sacrifice image quality at all. Coupled with a 180° tilting LCD that’s pretty handy for selfies, the X70 really is the ultimate travel camera for someone that really needs to travel light but wants great results still.
Here’s the challenge – take ONLY three pictures in one hour – No deletes & no post-processing.
Today, the challenge was simple – at least with the rules anyway. You can only take three photos in one hour, you’re not allowed to delete, post process or even retake the photo. This meant you had to really think hard about the subject, the composition, all the camera settings combined and…. get it right, first time.
And for your info – all images are shot straight-out-of-camera.
Picture one
As my first image I wasn’t sure what to shoot, or when I should take my first image. This was easily solved however, when I wandered to the riverside and saw this beautiful light bouncing off the water. I took my time to find the right angle and also noticed this small bird sitting near the edge nearby. With this, I shuffled along on my knees (was definitely worth it) to incorporate him/her into the top left third of the image.
Fujifilm X-E2 XF35mm f/3.6, 1/1300th, ISO200
Picture two
This shot I couldn’t resist, the car belongs to a colleague of mine (*cough* Marc’s) and for me, it captures that humorous moment when you know you should re-park your car, but in Marc’s case… you just don’t. I also, from a photography aspect love the lines that flow from the back of the car and along the path to the left. I chose black and white to take the attention away from the colour of the scene and more to what is going on in the scene – being the damage to the rear bumper and ‘eccentric’ parking 😉
Fujifilm X-E2 XF35mm f/2.8, 1/125th, ISO200
Picture three
As my final image, I wanted to capture a peaceful mood. As we walked along Bedford Embankment I spotted this couple relaxing in the crisp winter air. I crept behind them and silently began looking through my camera settings to find the right choice. As there was so much contrast in the scene I jumped instinctively towards the black and white film simulations. This is where I broke the rules! I literally couldn’t decide which B&W filter to use, so, I shot the same scene three times (one on each B&W filter). I found that the B&W with red filter gave me the most pleasing tones so this was the keeper, and yes I did admit to Marc that I cheated slightly!
Fujifilm X-E2 XF35mm f/2, 1/2500th, ISO200
My thoughts
All in all, even though I cheated a bit, it was super exciting & an excellent exercise to undertake – I highly recommend it. It just turned my normal way of shooting on its head. I would normally frame up a shot and take a few images, experimenting with different apertures etc but with this exercise, I just needed to put my knowledge to the test. I looked through my camera menu selecting specific settings that would suit my style and thought much harder about the composition to ensure it was just the way I wanted it, first time.
It also made me connect more with the environment we were in, internal thoughts like “Where is the best light coming from?”, “What angle should I take this from?” & most importantly “What is actually interesting to shoot in my current area?”.
At one point I actually went right under the bridge to look for a new viewpoint, got my knees dirty, banged my head and came back out without an image! But this was worth it, for I knew that the shot I wanted, wasn’t there. My advice is to try strange angles & odd perspectives, this way you’re either eliminating bad shots or discovering great, new shots that you wouldn’t have known about before.
Happy Snapping! 🙂
Fujifilm X-T1 XF18-55mm at 55mm f/8, 1/1300th, ISO200Fujifilm X-T1 XF18-55mm at 18mm f/8, 1/60, ISO200Fujifilm X-T1 XF18-55mm at 35mm f/16, 1/420, ISO200
“Join me as I walk you through my photographic expedition into the world of street fashion photography with the masterful” – Alex Lambrechts.
In this ‘episode’, Marc and I were given an excellent opportunity to join the exciting Fashion X Street workshop with Alex Lambrechts. The aim of the workshop was to get photographers using the system in-the-wild, on the fly and to build upon an individual’s confidence in a shooting style, which is to my mind, full of adrenaline, passion and presence.
The group met inside a beautiful coffee/pizzeria house located in the heart of Soho, and it was here that Alex began to explain his craft and the general structure of the day. As part of the ‘FujiGuys UK’ we took along some of our new Fuji toys for the group to have a play with. These included the X100T, XF18-135mm lens and the pocket-rocket X30. After a coffee and a chat, we set out to the streets of Soho armed with our Fuji cameras in hand!
Alex led us to our first destination; a small, dark and empty alleyway – sounds ominous so far I know, but bear with me 😉 Alex showed us how the light between two buildings gave the perfect softbox lighting effect, and that this would prove excellent for the style we were going for.
He gave the client’s brief, which was what he wanted to see in our shots and practical suggestions as to how to achieve exactly that. The brief immediately grabbed my photographic appetite and I couldn’t wait to see what I could achieve.
The fictitious brief was this (not a word for word quote):
“Because the subject is a musician and a model. I want to see you capture and explore the human element within the shots, not just the standard model expressions but ‘who’ our client is. And as this is to be published in a fashion magazine, I want to see shots off-angle, gritty and real.”
You can probably see why I was excited; it was something completely new to me and just wanted to get as much experience out of it as possible.
This is where Alex’s stunning wife & professional model Jasmin Lambrechts came in, and what a combination! As they worked side by side, Alex explained things in an informal, yet very informative style. He gave some seriously useful tips on how to direct your model, how to set the camera and how to achieve the perfect lighting on the subjects face.
We started with some slow shutter speeds ‘1/30 to 1/60’ of a second panning shots, this was to capture movement and a unique style, only really achieved in this manner. I think we all found this a pretty tricky technique, but it was probably the most rewarding when you actually got a “YES, I got a good one!”.
X-E2 – XF35mm – 1/40 – ISO 200 – f4.5
As the workshop progressed, we started giving some direction to Jasmin, it was bits and pieces at first, and I’m sure this was down to some of us never having shot a model before. It did however, become more and more natural as we built a rapport with Jasmin and as we found what camera settings worked best.
One of the most helpful tips Alex gave in my opinion was regarding lighting. He really wanted to focus our attention to the exposure of the shot, to ensure we were exposing for the highlights of her face. It may seem an obvious piece of information, but I found really focusing on it turned images from delete to keep. It ensured all the detail was kept on the face, especially when dealing in this ‘contrasty’ environment.
The shot above is one of my favourites from the day. I asked Jasmin if she would throw her hair back so I could try and capture it in full swing. Here I used a fast shutter speed of 1/3000, a generally accepted no-no of ISO6400 (because I needed the fast shutter speed) and had the camera set to manual focusing to make the shot ‘instant’ when the shutter was depressed – and yes, this was not the first attempt, maybe more like the fifth to get it right! The ISO performance on the X-E2 is SO good.
This was another great tip from Alex in regards to action and street photography. He said if you pre-focus on an area where your subject is going to walk and then switch to manual focus, you know every single time that your image is going to be in focus when the subject / model hits that spot. This is particularly useful in street photography, it allows the photographer to frame up a shot and then simply wait for the subject to walk into that frame.
Here are other shots I took that ‘made-the-grade’, at least in my book anyway 😉
Alex had great presence when talking us through ideas as we shot in this environment, throwing us suggestions, checking our shots on the go and even highlighting some great shots our fellow photographers were getting whilst there. This all helped spur me on to try and get the best results I could.
Once we had shot this location from every possible angle, other than hanging off the side of the building (which I would have tried if I could have found a way!), Alex talked us through the next stage in this exciting photography voyage.
Basically, we were going to be on the move, shooting fashion in the streets of Soho amongst the general public. This was where my adrenaline levels went from 7 to 15 (out of ten!) in less than a second. Alex explained how he wanted us to capture the more human element in this environment, the ‘circus’ as he put it, and it really was just that.
Jasmin stepped into the busy, bustling streets of London and we needed to be ready. We were advised to keep ahead of Jasmin to ensure we could scope out the best framing, best angles and to be more aware of great photographic, candid moments. For me, this involved running like mad to stay ahead, trying not to get run over by cars, bikes or pedestrians, not photobombing other photographers shots and still find a good angle myself with the correct exposure! All in all, super exciting, very challenging and incredibly fun!
The reason it was such a circus is because we looked like the Paparazzi. Imagine 12 -14 photographers chasing a beautiful model down the street, all trying to get the perfect shot will certainly draw some attention. People were taking pictures on their mobiles, just-in-case she was famous, asking who she was & who we were – what a buzz I can tell you!
We even had a local restaurateur take to the street stage to grace us with his surprisingly good singing voice. These were the kind of quick paced moments you needed to really know your camera settings, luckily I was just about ready to capture this one below.
After the crazy, brilliant and thrilling roller coaster ride, it was nothing short of perfect to get back to the pizzeria for a beer, pizza and have a chat. The group mingled beautifully, each sharing our successes, failures and our ‘what we would try next times‘. Alex wrapped the day up nicely by highlighting things we did well, things we could improve upon and again, going through individual’s images to give personal feedback – this was a nice touch.
For me, I compare this experience to that warm fuzzy feeling you get at Christmas. I had been given the experience to meet our lovely photographers face-to-face, develop my skills as a photographer and share this experience with like-minded individuals.
The Gang
If you get the chance I highly, highly recommend going on this course and any other that gives you the chance to learn your photography with others. It not only is a great sociable experience, but most importantly, you get to learn how others seeshots that you, yourself may have missed.
If you have any thoughts, questions or comments, please do drop us a line below and we will try and assist where we can.
Click here to see images taken by other members of the group (Log into Facebook required to view).