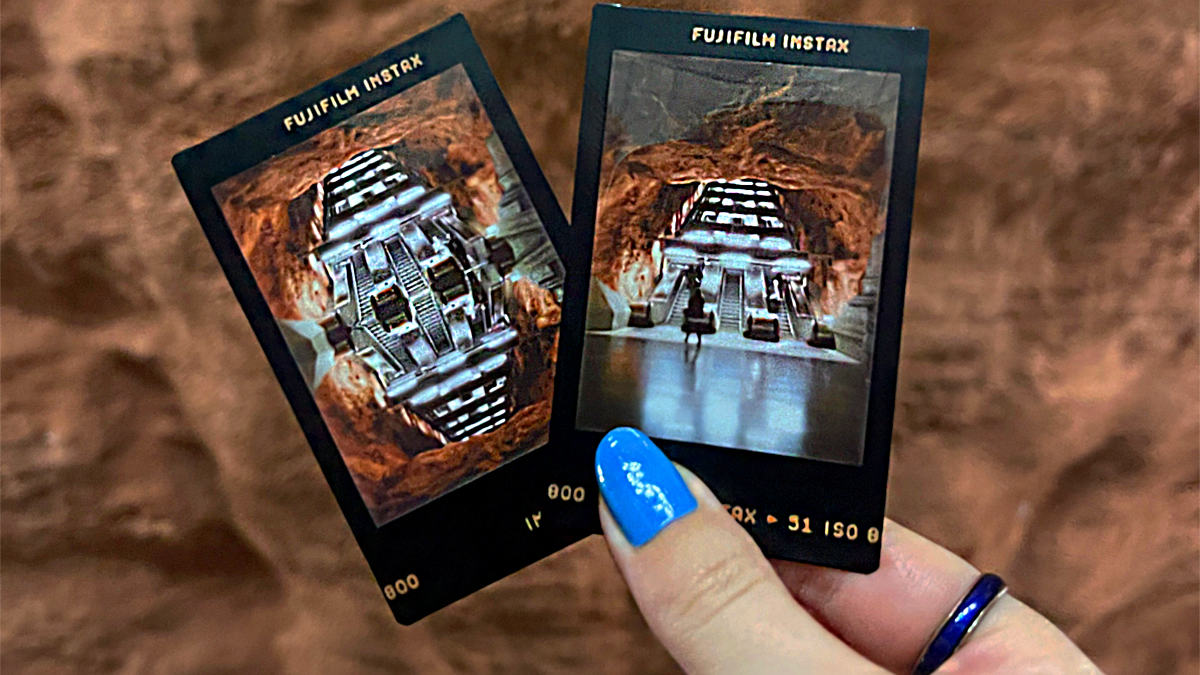
It is not always easy to find the perfect photoshoot spot in every city. To help you find the perfect shooting spot in Sweden’s capital city, Stockholm, our colleagues from instax have created a guide for you so you do not have to search for the perfect picture. Let’s get you inspired so that you only need to put on a cool outfit, grab a friend to bring with you, and you are ready to discover Stockholm in the best way!
Tag: guide
Sports Photography as a Spectator – Canoe slalom
X-Photographer Jeff Carter gives his guide to capturing great sports images with the Fujifilm X Series without the need for a media pass – in this first blog Jeff talks about shooting a canoe slalom.
By Jeff Carter
In a series of articles, X-Photographer Jeff Carter will be shooting at sports events in the UK and showing how to capture great images with the Fujifilm X Series without the need for a media pass.
Continue reading “Sports Photography as a Spectator – Canoe slalom”
Orcas. An Arctic fairytale of whales (which are actually big dolphins)
Norwegian X-Photographer Tommy Simonsen takes you on an adventure to meet Orca Whales in the Arctic. Not to be missed!
By Tommy Simonsen – Northern Norway, January 2017.
The air is crisp and cold, and the light is about to break as we speed through the strait, heading north. We freeze a little in our yellow safety suits; we are after all in an open boat hurtling through the winter darkness at 69”N. The 12 meter long black R.I.B. (rigid inflatable boat) is perfect for these arctic waters, and the feeling of cold doesn’t bother us too much on our way to a great annual adventure: the Arctic Orca Safari!
The dark season is about to come to an end at these latitudes. The region has been engulfed in darkness and passing winter storms since the end of November, when the sun broke above the horizon for the last time. The further north you get, the longer the darkness lasts. Today we got a vague sort of daylight between 11.00 and 13:30.
I have been tracking the weather forecast, and noted that the clouds are supposed to clear around this time. As the sun is about to make a return, that is an extra reward, whether or not we find any orcas. At this time of the year, sky at the top of the world turns a special shade of pastel pink.
Orcas and other whales arrive in the northern coast of Troms county from the end of October to February. They follow the large shoals of herring that come from the open waters into the fjords. Herring is food, so where there is herring, there are whales.
After an hour the R.I.B. suddenly slows down. It lies quietly in the water, with snow covered mountains rising in the distance. The light has turned an intense yellow in the southern sky, and in the north, deep blue has given way to pastel pink.
P-Tchhh! I look around; it’s close.
P-TCHHH!!!
It’s really close!
An orca pops up right next to our R.I.B., exhaling explosively, filling the air with the smell of digested fish.
There’s nothing like the smell of herring in the morning!
As the light gets stronger, we realize that it is a large family group we have found. A shoal of herring is present, and the family is in hunt mode, ignoring us completely. They work like a wolf pack, confusing the fish by blowing bubbles, working to keep the panicked herring close to the surface and then barrel through them, filling their great mouths with stunned prey. It is clamour and carnage on the surface, with seagulls and sea eagles swooping in to join the feeding frenzy. Pods of orcas zigzag, coming right towards the R.I.B., dorsal fins slicing the water.
P-Tchhh!
Orcas are everywhere. They dive under us, emerging on the other side of the boat. Close by us. Far away from us. Everywhere. It’s intense. I remind myself to breathe, to not forget why I am here.
To get extraordinary pictures.
How I create my orca pictures from a boat
Type of boat
I prefer to work from a small boat, so I can shoot from lower angles. But remember: salt water is certain death to your expensive electronic camera. It is extremely important to pack your gear in a waterproof Ortlieb, Lowepro or similar bag of another brand. And I mean really waterproof! If you’re not used to shooting from a small boat, keep the bag properly closed during transport. Learn to read the waves and how the boat responds to them. The waves might not splash you from the front, but come at you from the sides, or elsewhere unexpected.
When you use your camera, keep the bag closed. And NEVER leave the bag unattended on the boat deck. When I need to, I cover the camera under my arm or in a plastic bag when I wait for something to happen. Don’t put the camera against your body under the jacket. Remember it’s cold outside, and you are warm. When you take your camera out again, the lens and viewfinder will fog up.
Keep your gear cold. Only spare batteries should be kept warm in your inner pockets. On a trip like this, you should bring several batteries.
Position in the boat
Where you sit on an R.I.B. during a tour is important. If you occupy a front seat in the bow, you get a wide, panoramic view with no obstructions. But the bow gets the worst beating from the chop, and is also the one position where you are almost guaranteed to get wet if the sea is anything but calm.
On an R.I.B. during a whale safari, I prefer a seat at the rear, as close to the pilot / guide as possible. It makes communication easier, and is also the place where the boat’s rail is at its lowest, so I can lean over the side in calmer conditions, to get the lowest angle possible. Capturing whales high above the horizon line adds to the drama of my images.
Cameras and settings
I have two FUJIFILM X-T2 camera bodies with two 32 or 64GB SD cards in each. One with the XF50-140mmF2.8 WR on it, and the other with the XF16-55mmF2.8 WR.
Both bodies and lenses are weather sealed, which is necessary because you get a little wet working around waves and whales, and this equipment can take some some sea water without damage. And I always have the ever important, absorbent microfiber lens cloth. I have a couple of them in different pockets, so I can switch when one of them gets too wet.
The X-T2’s tilt screen is one of the reasons it is my preferred field camera. It’s perfect for shots at lower angles, especially with the vertical tilt for portrait oriented images.
Shutter speed and reaction time are vital to shooting whales. I prefer 1/2000 sec. If the sea is rough, shutter speed has to come up. All of these shots were made under lower lighting conditions, so my shutter speed varied from 1/500 to 1/1000 sec at ISO 1600 to 2500 in all of them. Imagine how the colors would have turned out at ISO 200? Fast lenses are certainly critical in these conditions.
Responsive auto focus is also important. I often use “single point” or “Zone” AF mode, normally on Single or Continuous tracking focus. Typically, I use “CL” or “CH” burst modes for whales. The AF point joystick is most important to me for quick composing and shooting.
Don’t forget to have fun
Remember to put your camera down once in a while. These Arctic orca safaris have a special place in my heart. I work very hard on these trips, but remind myself to put my cameras away sometimes, to fully enjoy the spectacle of these magnificent creatures in action.
Thanks for coming along on this Arctic journey with me.
Tommy
Arctic Orca facts
- The Orca is the largest of whales in the dolphin family, and like most other dolphin species, they live in social groups.
- There are about 3000 orcas in the Norwegian and Barents Seas.
- Females can be up to 7.7 meters, and weigh 3.8 tons, with an average life expectancy of 50 years, and a maximum of 80-90 years. After being pregnant for 15-18 months, a female gives birth in the late autumn to a 2.3 meter long calf that weights about 200Kg.
- Males can be up to 9 meters, and weigh 5.5 tons, with an average life expectancy of 30 years, and a maximum of 50-60 years. The dorsal fin is much larger on males.
- They live in family groups of females and calves, with only one or few adult males.
- Each group seems to have their own dialect for communicating.
- Orcas often collaborate to capture prey, which can be small fish like herring, or the large species like other whales. They have been observed herding fish into tight corrals, while other members of the group swim into its midst, stunning the fish with their tails to make feeding more efficient.
Facts source: Norwegian Polar Institute.
Sports Photography as a Spectator – Rugby
X-Photographer Jeff Carter gives his guide to capturing great sports images with the Fujifilm X Series without the need for a media pass – in this first blog Jeff talks all things Rugby.
In a series of articles X-Photographer Jeff Carter will be shooting at sports events in the UK and showing how to capture great images with the Fujifilm X Series without the need for a media pass.
With the 2017 RBS Six Nations Tournament in full swing, rugby union is once again Continue reading “Sports Photography as a Spectator – Rugby”
Have a little patience – a guide to successful long exposure images
Fujifilm X-Ambassador gives us a very comprehensive, yet easy to follow guide to long exposure – not to be missed..
By Paul Sanders
For me personally, long exposure (LE) photography allows me to explore a sense of calm, a visual relaxation that matches the way I feel when I look at the landscape. But for some, the technical side of this style of photography makes it incredibly frustrating and stressful.
Before we get into the technical side of LE photography and counting exposure increase on our fingers and toes, there is something that is far more important than the technical issues. It is vision, interpretation and connection with your subject.
Ansel Adams said “A great photograph is a full expression of what one feels about what is being photographed in the deepest sense and is, thereby, a true expression of what one feels about life in its entirety.”
Continue reading “Have a little patience – a guide to successful long exposure images”
How to capture an atmospheric Autumn
Probably the most in-depth guide to shooting gorgeous Autumnal images you will read this year by X-Photographer Chris Upton.
By Chris Upton
Halloween, the time of ghosts, ghouls and bewitching conditions to create wonderful atmospheric autumnal images!
After a few summer months of long, warm days, harsh light and of course some rain (I am in the UK!) we are longing for misty mornings, low raking light and sunrise and sunset at sensible times of day. For many photographers, especially landscapers, autumn is simply the best time of the year.
So how do we make the most of these opportunities and capture some stunning images?
THE WEATHER
Well it all starts with the planning and we’ll begin with the weather. Keep an eye on the forecast and if you’re looking for a misty start ideally you need cool temperatures after a period of wet, mild weather with little or no wind. Check the sunrise time and be prepared to be on location at least 30 mins prior. When the sun pops up it starts to warm up the landscape and gradually burns off the mist. Depending upon the amount of mist it may take a while to clear so you may have an hour or more to capture your shots.
I use BBC Weather, Met Office and WeatherPro apps to check the forecast though it’s not foolproof and the conditions might not turn out as you were hoping for. In those circumstances it’s important to keep a positive view and think about the things you can shoot.
This was the case recently when I went down to the River Trent for what I hoped would be a misty sunrise. When I arrived it was thick mist and even when the sun came up it didn’t burn off. Walking along the bank I noticed the leaf, grass and reed details and decided to shoot some high key images. So although I didn’t get what I had expected I was pleasantly surprised by the results.
Whilst strong sunlight is best early and late, during the day bright overcast conditions with its soft lighting will enable you to capture the beautiful autumn colours without harsh shadows and excessive contrast. Take care to avoid large areas of bland blue or grey sky which add nothing to the image.
In certain circumstances the weather can be especially challenging. However “every cloud ….…” The fact is that “bad weather” can provide you with great opportunities to capture some unique shots as many photographers don’t venture out in inclement conditions. The benefit of much of the Fujifilm equipment is that it’s weather sealed (check yours) so as long as you can keep the front element dry you’re good to go! It’s a good idea to have an umbrella handy, though the ability to grow another hand would be extremely useful too! I recommend the Gustbuster umbrella which is large, robust and is tested to withstand winds of 55mph.
These next few shots were taken on an extremely challenging day in the Lake District. It was pouring with rain, visibility was poor and light levels were low. Despite sheltering under a large umbrella that flipped inside out twice (hence the Gustbuster purchase) it felt like a contest between me and the elements and I was determined to get some pictures.
This shot was also taken in pouring rain. The soft, diffused light and low contrast really suited a long exposure and providing you meter carefully to retain detail in the highlights you can get super images in these conditions.
EARLY & LATE
Usually the best times to shoot atmospheric landscapes is at the beginning and end of the day, that magical period when the sun is rising or setting but is still below the horizon giving a soft, warm light.
Mornings take more effort and you have to walk to your location in the dark but there are fewer people around and there is something special about witnessing the start of a new day especially when the conditions are just right. Plan to be at your location at least 45 minutes before sunrise. If you want to get a starburst effect as the sun pops over the horizon shoot at f16 or f22 but make sure your front element or filters are clean!
For sunset ensure you stay until at least 30 minutes after the sun has gone down because that’s the time when the sky is backlit with, hopefully, an amazing display of colour.
Another benefit of shooting early or late is that usually the wind drops at these times enabling you to capture lovely reflections.
The blue hour is a great time for city shots but don’t stop then because city streets late at night can provide many other opportunities especially when it’s wet and the pavements reflect the vibrant artificial lights. Try converting to black and white to give a colder, more intimidating feel to the image.
LOCATION, LOCATION
Great autumn shots can be had all around the country in local parks, woods and by the rivers. However, in the UK, there are a few stunning locations such as Perthshire, Lake District, Thorp Perrow N. Yorks, Peak District, Clumber Park, Westonbirt Arboretum, Ashridge forest, and Stowe.
Rivers, canals, lakes and marshes all offer great potential for atmospheric misty shots. Look for some added interest like boats, jetties or rocks to aid your composition.
Fields heavy with morning dew also produce mist. Add backlit trees and you have the recipe for some stunning pictures. Think about your viewpoint, try and find an elevated view so that you are above the mist.
Other great places for spooky, ethereal shots are graveyards!
Here are a couple of images I took in Edinburgh using the multiple exposure feature on my X-T1. When you set the drive dial to ME you shoot the first image as normal and the screen will then show you the image and ask if you are happy with it. If you are you get a faint overlay of your original image to help you superimpose with the second. Take that shot and your combined image shows on your screen. However if you’re not happy with the second shot you can delete that one, keeping the first, and then reshoot.
In these shots I took one image of the row of grave stones then the second shot was a close up of the inscription from one of the stones. If you’ve not tried this give it a go you can get some great effects!
Why not also try the Advanced Modes for achieving some creative pictures? Many photographers bypass these but I would urge you to give them a try, the high key or soft focus mode are especially good for misty shots.
Of course the colour at this time of year can be amazing and forests and woods can provide countless opportunities with shafts of early morning light streaming through the trees illuminating the forest floor or feathering the light across branches laden with morning dew. Keep to the edges of the woods to get the best effects.
EQUIPMENT
The choice of lens can also have a dramatic effect on your image. I find that this time of year is ideal for using a longer lens which I use to compress perspective or isolate detail. Perfect for enhancing a misty scene adding drama and intrigue to your shot.
As the light is low at this time of year or day ensure that you use your lens hood to cut out any unwanted flare and again make sure your lens and filters are spotless.
You will be amazed at the difference a Polarising filter makes to your autumn pictures, reducing glare and increasing colour saturation. A circular polariser allows you to fine tune the effect but take care not to overdo it especially if you have blue skies in your picture.
Other filters that are useful are Neutral Density filters in 3, 6 or 10 stops to extend the exposure time and 2 and 3 stop Neutral Density Graduated filters to control the dynamic range in your picture, usually darkening the sky or areas of water.
TECHNIQUE
In order to achieve the best quality files I prefer to shoot at low ISO (usually 200) and for a landscape will select f8 or f11 unless I want to intentionally reduce the depth of field.
Depth of field (the area of the picture that is acceptably sharp in front and behind the point of focus) is determined by focal length, aperture and focus point.
With a small aperture eg f11 and a wide angle lens eg 14mm focusing at 1m everything will be sharp from 47cm to infinity. There are various DOF apps you can use on your smartphone to ensure accuracy. Alternatively you can simply focus ⅓ into the scene and check your EVF, zooming in to assess sharpness.
Using the AF joystick on the X-Pro2 and X-T2 makes focus point selection a breeze and it’s another favourite feature of mine. Trying to use AF in mist is challenging to most cameras so I recommend switching to Manual focus. There are several different manual focus aids on Fuji cameras, I prefer focus peaking and set my highlights to Red, white highlights in mist might prove a little tricky!
Low ISO and small apertures usually mean a longish shutter speed which makes a tripod an essential part of my kit. But there are many other benefits to using a tripod not least that it slows you down so that you can search the frame carefully and fine tune your composition. Using Neutral Density Graduated filters is also much easier when your camera is tripod mounted. That said there are many people who prefer the freedom of shooting handheld and are happy to use wider apertures or higher ISO’s. There really is no right or wrong as long as you capture the image you’re looking for.
Although I have a cable release I prefer to use the 2 second timer unless I am using B (Bulb mode) for long exposures or want to capture a specific point in time ie waves.
For metering I will use Evaluative or Spot depending on the subject and the style I am looking for. Be aware that mist will fool your camera into underexposing resulting in dull, grey images. You will need to use your exposure compensation to increase the exposure by by around 1 stop though this may vary depending on the amount of mist in the shot. The live histogram on your camera will help you ensure the correct exposure, aim to expose more to the right without clipping the highlights.
One of my favourite features on the X-Pro2 and X-T2 is the front exposure compensation dial which you rotate to deliver up to 5 stops more or less exposure, once you have set the top dial to “C”.
As I shoot in RAW I leave my White Balance set to Auto and then fine tune later in Lightroom if required. That said I find that my Fujifilm cameras deliver excellent white balance on auto. Just be aware that with mist your images may look a little cool. So if you are shooting JPEGS try Daylight setting or, if you want to really warm up those rich autumnal colours try Cloudy. Your Fuji camera may allow you to auto bracket the WB, you get three different settings from the same image!
Finally don’t forget to prepare yourself for your autumn shoot. It’s essential to be comfortable when standing around for long periods in the cold allowing you to concentrate on the images rather than trying to keep warm. Boots or wellies (with decent soles), down jacket, hat and gloves are essentials as are a flask and some energy bars. Oh and if you’re venturing out into the great outdoors on your own make sure you tell someone where you’re going. Most of the best locations have no mobile signal!
So I hope that this has given you some inspiration to wrap up, get out shooting and make the most of the best time of the year!
You must be logged in to post a comment.