Roger Payne

Crafty little number

DSCF9407

One of the reasons I turned to photography is because I was completely hopeless at any other form of art. My paintings look like they’ve been done by a three year-old and even my stickmen are proportionally challenged.

My wife, on the other hand, is the complete opposite. Anything she turns her hand to creatively, she’s very good at. Recently, that creativity has been directed towards old pieces of furniture that she’s revived using the ‘shabby chic’ technique. Don’t worry, she’s not taking beautiful mahogany pieces that she’s daubing in chalk paint and then sanding them to within an inch of their wooden lives. Nope, we’re talking unloved bits of furniture that most people would just take to the skip.

I’ve suggested to her on more than one occasion that when she creates these pieces, she should photograph the progress and blog about how they’re created. So when she tackled her latest project, I offered to shoot the images for her – using a Fujifilm X-A2 – just so she could see what was possible.

Here’s how the shoot evolved…

DSCF9371Getting established

The work is normally carried out in our garage, but given that various rusting bicycles, cardboard boxes and garden equipment don’t create a very flattering backdrop, I convinced her to do this little milking stool in our back garden, wrestling the kitchen table out there to provide her with a working surface. Once that was done, I quickly set up this establishing shot, which shows the constituent parts and the stool before anything was done.

DSCF9363Going through the motions

Over the next couple of hours, my wife went about weaving her artistic magic on to the stool and I busied myself taking photographs every step of the way. Naturally, these shots could be put into a specific order for a detailed blog, but this selection primarily shows some of the steps and the different angles I chose. I rarely asked her to pose, instead it was just a case of observing what was going on and moving into the right position to get the best angle.

Pass the time shooting incidentals

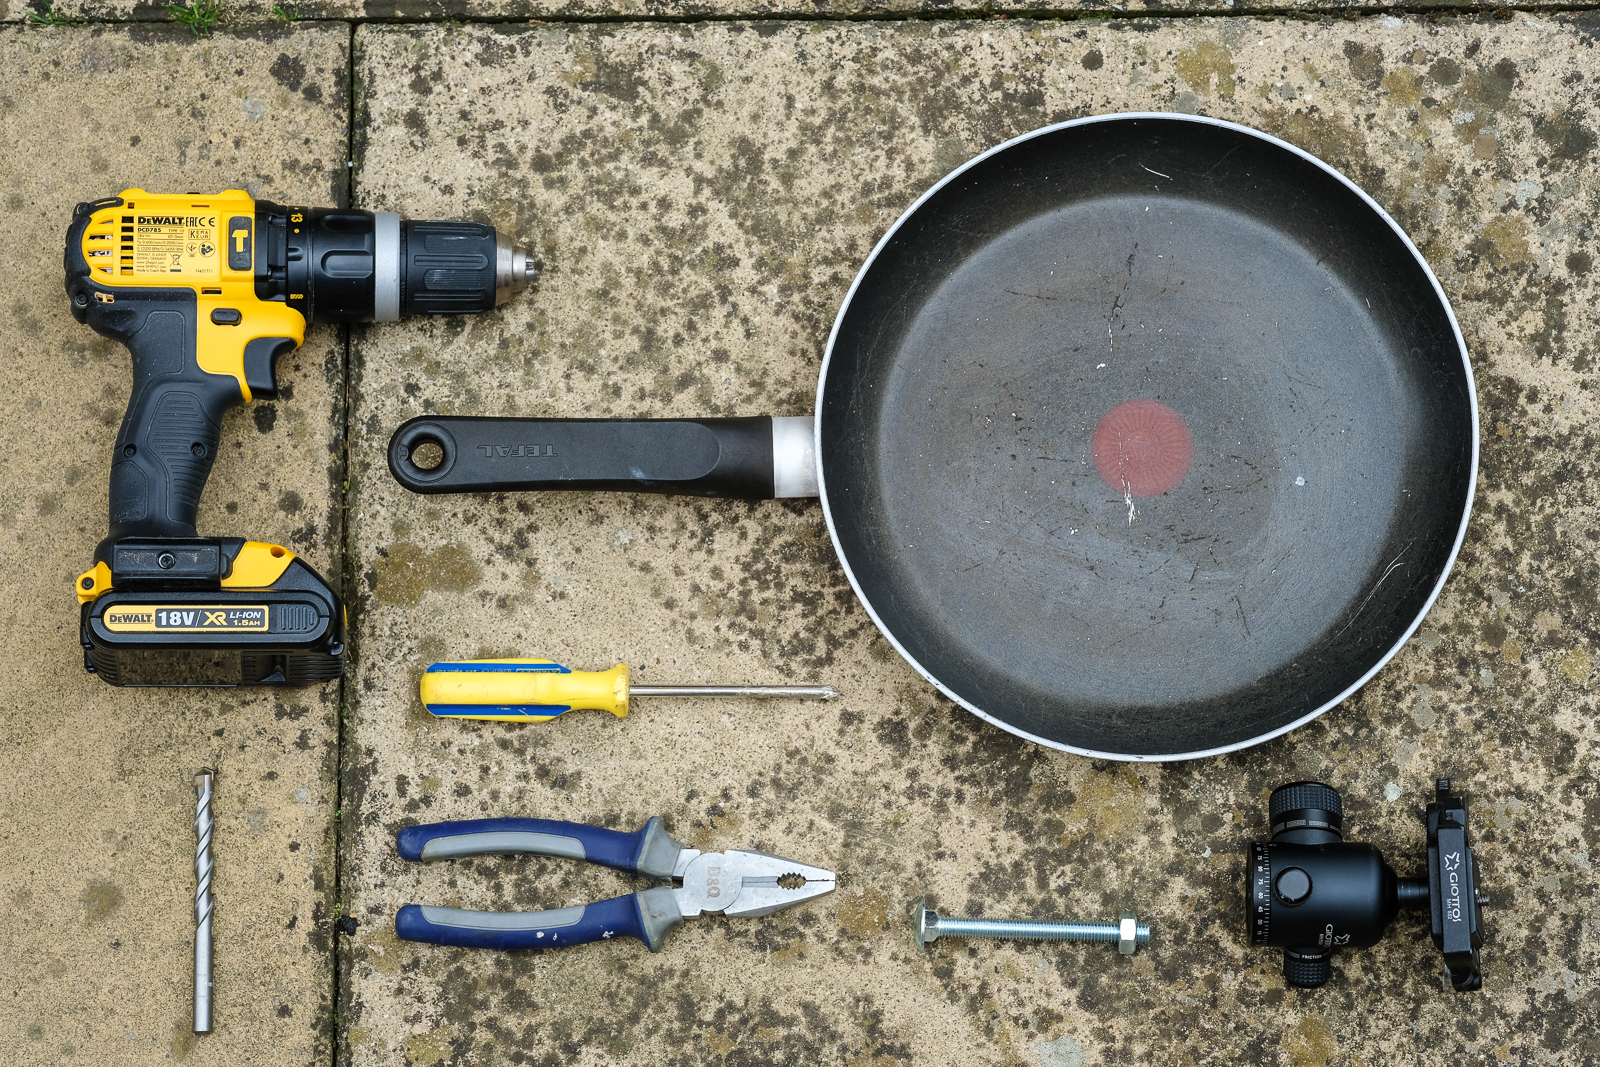
Although the chalk paint she used dries very quickly, there was still time to capture some incidental images as we waited for the paint to dry properly. This gave me the perfect opportunity to capture various detail images that add a lifestyle look and feel to the shoot. There was no setting up, I just shot all these objects as I found them, opting instead to change lenses and vary viewpoints to create interest.

Finished work

Once she’d done, I took a final shot in the same place as the starting shot and then took a second shot using a chair that she’d created a few days earlier. All ready to blog and sell!

DSCF9473

DSCF9480The camera

xa2 screenV2Along with the Fujifilm X-A2, I shot using three lenses – the standard XC16-50mm, the XF60mm macro and the XF35mm F2. I think the results speak from themselves. Minimal post production was required and the images are bright, vibrant and super-sharp. The flip out screen on the camera was ideal, giving me the option to shoot down low and also hold the X-A2 above head out and shoot straight down on to the table. The version I used – black & silver – appealed to my wife’s artistic eye too, plus with the WiFi functionality, she was able to transfer shots to her smartphone and share them quickly and easily on social media.

Funnily enough, a couple of days after I took these images, I found my wife using the camera and it has since been found along with her paints and brushes. I’m expecting a blog to be started imminently!

Fun in the sun

DSCF9203Is there anything better than a family day out at the seaside? For kids it’s an opportunity to run, jump, swim, dig and generally mess about. For adults, it’s an opportunity to sit around, chat, eat, drink and watch kids do all of the aforementioned. Perfect. 

As all of our  ‘kids’ are now old enough to drive themselves to their own day out, I had to borrow someone else’s to take these photographs. So say hello to Harrison (white T-shirt) and his younger brother Oli, and thanks to Paul and Nicola for letting me use them as subjects during our day out.

There are, of course, some extremely talented kids photographers out there who make a living out of creating stylised images with the subjects looking straight at the camera. I have great admiration for people who can do this but I didn’t want this fun day out to turn into a boring photo shoot. So, with Fujifilm X-A2 in hand, along with the XC16-50mm and XF90mm, I chose to adopt a more candid approach, snapping away as Harrison and Oli got busy enjoying themselves.

DSCF9221

Creative candids

The X-A2 proved ideal for capturing candids. It’s small and discreet so the boys probably don’t notice me taking half of these images. The camera’s fold out screen was an absolute godsend as well, helping me to get some low angles. Despite the bright conditions, I didn’t miss a viewfinder one bit. I did have to turn up the screen brightness a little as it was a very bright day, but this made the screen easy to view even when the sun was out.

Don’t forget the details!

While it’s great shots of your kids that you’re after on a family day out, it’s often the little details that get forgotten, so I concentrated on getting those shots as well. For this, I think anything goes, just as it would if you were photographing details at a wedding. You’ll soon start seeing images everywhere.

Keep shooting

When we’d finished at the beach, we headed to the pub, but rather than put the camera away, I kept taking pictures of the boys. The clip on mouths, by the way, came on a birthday card and I knew they’d make for some great shots of the boys. By the time we get to the pub, they were more than used to me taking pictures, so I just fired away as and when I saw a nice shot.

DSCF9326

DSCF9317

The camera

xa2 screenV2I hadn’t used the X-A2 before our trip to the seaside. Admittedly, this was largely because it doesn’t have a X-Trans sensor in it, but I was truly impressed with the quality of images it delivered, even with the standard XC16-50mm lens. Just like other X Series cameras, it produces superb images packed with colour and detail and the images you see here are virtually straight from the camera. I’ve only made minor crop changes, plus added a minor boost to the shadows and contrast here and there.

When I showed the resulting shots to Nicola and Paul after the day they both said the same thing: ‘Nice shots, great little camera’. Says it all really.

How a frying pan can help with your picture taking

After my last blog encouraged you to make a tripod using a piece of string, I’m going to go a little more surreal this time by explaining how an old frying pan can be used to get dramatic low angle images. The standard route to getting a low viewpoint is either to lie on the floor, use a camera with a tilting screen or mount the camera on a tripod that can be dropped to ground level. The first two options can involve you getting wet and don’t work if you want to use a longer exposure as you’re hand-holding. The latter can be a real fiddle. My frying pan groundpod, however, overcomes all of those issues.


So here’s what you need. An old frying pan, a tripod ball & socket head, a nut & bolt and tools including a drill with a 10mm bit that is suitable for going through metal.

DSCF0004

First up, you need to check what size screw thread the ball & socket head has. The standard size is ⅜” but you can also get little inserts – as I have here – that converts the thread to a ¼”. In either case, these imperial sizes are not readily available in DIY stores as the world has gone metric, but they can be found online. You’ll need both nut and bolt.

DSCF0006

Raise the frying pan off the ground and drill a hole in the centre. It doesn’t have to be absolutely central. Take care if you’re drilling through a Teflon-coated non-stick frying pan like me and, as you’ll discover, this can take some time as frying pans are pretty tough. Once you’re through, tap any sharp edges of metal down with a hammer.

DSCF0014

Now take your tripod head, pass the bolt through the hole and screw it into the base of the head. If you have a long bolt like me, cut the excess length off with a hacksaw and then secure it all with the bolt. Your frying pan pod is now ready for action. Obviously, with a bolt in the base, this can’t be used on a solid surface, but it’s perfect for grass, soil, pebbles, mud and sand. I headed to the beach to try mine out.

DSCF0021

With an X-T10 attached to the tripod head and its LCD screen flipped out it was easy to frame up my shots exactly as I wanted them at the water’s edge. The sides of the frying pan kept both sand and sea away from the camera so I was able to try a variety of images.

DSCF0044

Here’s one of my favourites, I think the sail on the horizon makes it.

DSCF2677

Finally, just a couple of notes. While the groundpod can help you get some great low angle images, I can’t be held responsible for any funny looks you might get while using it – it does look as though you’re frying your camera! Also, if you are taking pictures at the sea be aware that cameras and saltwater are uneasy bedfellows.


img_main01


For more information on the Fujifilm X-T10 click here.


Banish camera shake with a stringpod

Tripods. They’re very useful when it comes to avoiding camera shake, but they can be quite bulky things to lug around – even the lighter carbon-fibre versions. But while Fujifilm have created impressive Optical Image Stabilisation systems in their lenses, there is a way of beating the shakes using nothing more than a piece of string and a tripod quick release plate. Better still, you can fit this set up in your pocket so you’ll never have an excuse for leaving it at home.

These are the constituent parts needed to create your stringpod. String (funnily enough), a tripod plate and a pair of scissors (unless you’ve got very strong teeth). I’ve used green garden twine largely because it’s easier to see in these pictures. Normal string does the job just fine.

DSCF0084Start by passing the string through the oval handle on the bottom of the quick release plate.

DSCF0090

Now, pull a double length of string out and place it under your foot. Don’t cut the string just yet, you’re just sizing up at this stage.

DSCF0093

With the string under your foot, hold the plate so the string is taut and make sure it’s at eye level. It’s worth screwing your camera on to the plate and repeating this process, varying the length of string as required until you get the height perfect for you. Only when you’re happy, cut the string.

DSCF0094

Being a failed boy scout, I only know one type of knot, so I tied it here once I had the height right for me. My stringpod was now ready for use.

DSCF0111

If you want to use the stringpod standing up and have a Fujifilm camera with a tilting rear LCD, you have two options. First, just place it under one foot, pull the string tight and use the camera’s viewfinder. Alternatively, to shoot at waist level, flip the screen out, stand with your feet around shoulder width apart, pass the string under both feet and, again, pull it tight to create a triangle.

Finally, if you want a lower angle, wrap the string around one wrist, pass it under both knees and pull the whole set up tight. The key to reducing camera shake, is keeping that string tight.

DSCF0129

So, how well does it work? Due to a motorbike accident some few years ago, I have the weakest wrists known to man so I don’t really like to stray below 1/60sec when I’m hand-holding. This shot was taken at 1/20sec at f/22 and, as you can see, it’s all over the shop.

DSCF0140

Using my stringpod, however, I was able to get a shake free result using the same exposure combination. I’m not saying it’s going to work with ten second exposures at night, but it could well get you out of a tight spot when you’ve left the tripod at home.

DSCF0133


Get creative with a window lightbox

DSCF3962

Written by Roger Payne

After my bathtub antics last time round – you can read that here if you missed it – I’d got the taste for creating studio quality results on the cheap. I spotted my chance when my wife bought some colourful tulips into the house and within seconds of them being put in a vase, I snaffled them to get shooting.

Aside from the flowers themselves, I used two sheets of white A3 paper, which I taped to a north-facing window. I used two sheets as a single sheet tends to show the pulp in the paper when lit from behind and then put a couple of paper clips on the bottom just to hold the sheets together and add a little weight. A couple of bulldog clips would be just as effective. With my X-E2S mounted to a tripod with the XF60mm macro lens attached, I started my shoot by selecting a custom white-balance setting; effectively to tell the camera the white point in my set-up to guarantee accurate colour reproduction. This was done by choosing White Balance in the menu, then one of the custom options before following the simple on-screen instructions. With that done, the flowers were placed in front of the paper and I got this.

WILL9101

It’s hardly inspiring, is it? Composition aside, the biggest problem is the fact that the white paper has gone grey. This is because metering systems are calibrated to 18% grey. This is not a problem when shooting most standard scenes, but when you have white (or black) subjects they need a helping hand. I tried two options. First, I switched to spot metering and took a reading from the shadow area of the central yellow bloom. The result was better, but was starting to bleach the highlights, so I dialed in +1.3 stops of exposure compensation instead. Better.

The fact remained that the collection of tulips weren’t really working together, so I started trying individual flowers, placed in a toothbrush holder and held in place with a piece of scrunched up paper – no expense spared! I moved the focusing point to the flower head and tried a range of framing options.

If you’ve ever used the XF60mm Macro, you’ll know that it’s optically superb, and as the lens focused I found myself liking the abstract-like shapes in the out-of-focus bloom areas. So I switched to manual focusing, deliberately defocused and then took a range of images varying the aperture from F2.4 to F11, which altered the amount that was sharp. This one at F3.6 suited me best.

I swapped to another flower and did the same, shooting some in sharp focus and some defocused. This was repeated on the third bloom with which I also tried a few Film Simulation modes, including basic Black & White and Classic Chrome.

Shooting done, when I came to edit the images, I really liked the defocused shots and thought they could create a piece of abstract art if I created a triptych, which was easy enough to do in Photoshop. I simply created a black background, then dropped the images on in turn before shuffling them around until I got the position right.

Final-image

What do you think? I rather like the look. My wife, however, was a little less impressed. Turns out tulips don’t like being man-handled a great deal and the ones I’d photographed individually soon wilted.

Back to the shops for me!

Make a home studio – in your bath!

DSCF0214

Written by Roger Payne

The time had come. I’d been trying to justify keeping my X100S and X100T for some time but, in reality, since T had arrived, S had been spending increasingly lengthy spells in the cupboard. So, with a heavy heart, I decided to sell. The obvious route was on eBay, so I cleaned the camera up and took a couple of snaps before preparing my listing.

DSCF0197

My initial shot (above) was very typical of the sort of image you see on eBay – lit with flash from the front, it hardly shows my lovely X100S in the best light, while the background is distracting. I didn’t think it would appeal to buyers, so I decided to try an alternative tack and headed upstairs into my bathroom…

DSCF0179

Admittedly, this isn’t the most obvious room in the house to start taking product pictures but, in reality, it’s got a ready made studio for product shots – the bath. White, with a nice curve, the bath bounces plenty of light around to get even coverage and it has a clean, uncluttered background that won’t distract from the item on sale.

DSCF0184

Using an X-T1 with an XF18-55mm lens, I positioned the X100S at the opposite end to the taps, flicked out the X-T1’s rear screen and used the lens cap under the end of the lens to keep everything nice and straight. The X-T1’s screen is perfect for images like this, although fixed screen X-series models will be fine – you might just have to contort yourself into the bath a little! I chose an aperture of f/11, ISO 1600 and used the two second self-timer for hands-free shooting and took a shot.

DSCF0208

Not bad. Considering this was under tungsten light in my bathroom, I instantly had a better image than my earlier front-on flash lit effort. There was, however, a slight orange colour cast as I’d left the X-T1 on the Auto white-balance setting. I switched to the Incandescent white-balance option and took another.

DSCF0206

Better. The colour cast has now all but gone, but I still thought it could be improved further – the highlight on the lens and on the handgrip were distracting, caused by the main light above and to the left of the camera as you look at it. To overcome this problem, I deployed a diffuser on the bath over the top of the camera. I had a ready-made one, but you could use a large sheet of tracing paper to get a similar effect.

DSCF0192

DSCF0209

Hey presto, the distracting highlights had disappeared! But I still wasn’t completely happy, so I tried one more option, leaving the diffuser in place and attaching an EF-42 flashgun on to the X-T1. I pointed the flashgun head straight up so the light bounced off the ceiling and switched the white-balance back to Daylight.

DSCF0194

The result is below. Good isn’t it? And you’d never know it was taken in a bath. Naturally, you don’t have to use this idea purely for auction site listings, you could be far more creative, but there’s little doubt that this is a great way to boost the look of items you’re selling. I posted the listing and sold the camera for the price I wanted within a couple of days. What did I use the proceeds of the sale for? To buy an X70, of course!

DSCF0214