Dale Young

Dale works at Fujifilm UK HQ in the marketing department. He is an amatuer photographer & musician that loves to be creative and expand his own skills. With all that he learns he tries to give back to the creative community.

That photographer friend…

As an amateur photographer like many of you, I’m always looking for an excuse to shoot. Whether it be a day out, a wedding (as a guest), birthday party and the list goes on..

Because of this, the people close to me are used to me carrying a camera everywhere and posting out of context, random images to my personal Facebook wall on a very regular basis. I think as a result of this I have made it a bit of a personal responsibility to document events in my life and for others close to me. Maybe it’s so in the future I can look back happily nostalgic, or even to review my own photography, but for whatever reason it means that if you invite me to a party, gathering, or day out, you will end up with some images to remember it.

I think everyone has someone like this in their family or their group of friends and when I think back, my Grandad was that person. He would film all the family occasions with his cine-camera and every now and again we would have an evening to enjoy the images & film he’d taken on his slide projector.

These images are demonstrating exactly the kind of documentary photography that I have come to love. The opportunity came about when I was kindly invited as a guest to a birthday party. I even remember saying to my better half whether I should take the camera and “Do you think they would mind if I took images for the evening?” but then I answered my own question with “Why wouldn’t they? It’s capturing a beautiful moment in their life.” So I packed as light as I could, as after all, I was a guest as well as the unofficial photographer.

DSCF2917-11

Once I arrived, I set up the basic camera settings that I would use for the night. In my case this meant classic chrome, ISO AUTO, shutter set to AUTO and aperture set to f/1.4 (to keep the ISO to a minimum in the low light environment).

I started by enjoying a snack or two (of course!) and then looking around the room for the best costumes (fancy dress theme was the letter ‘T’), best expressions and where the best lighting was in the room. As you may or may not know my favourite set up is the X-E2 with XF35mm lens, this night was no exception. I had only this gear with me and a spare battery just in case.

DSCF2913-9

DSCF2927-15

After the initial ‘Venue set up shots’ I began to focus my attention to people, being people – looking for those little moments and expressions that may otherwise be missed. From the happy & silly to the indifferent, any moment that could portray emotional involvement with the event would be snapped.

DSCF2937-22

DSCF2932-19

DSCF2920-13

The evening was going well and mingling had just started to make good pace when something brilliant happened – a magician turned up! And what was even better? Simple, this guy was superb. He immediately had people huddled in small groups laughing and puzzling over his close-up magic wonderment. This was the perfect element for me to focus on, I wanted to capture the suspense, surprise and bemusement that followed after each and every trick.

My approach here was to keep an eye on where the ‘actual’ excitement was in each moment. For example it could be the expression of an individual, the trick itself, the movement in the image etc. These are some of my images hopefully showing just that.

DSCF3010-42

DSCF2953-26

DSCF3028-47

I did occasionally stray away from the automatic focus and automatic shutter to help capture this fast fingered magician in motion.

DSCF2981-33

DSCF3032-48

DSCF3126-84

What is the next essential part of any family party?…. Yes, you’re right, it’s dancing! 😉 And not just any old songs either, it had to be the ‘classic’ Macarena.

DSCF3057-56

DSCF3052-55

It’s all about those little moments that create one collage of memories and emotions caught in time.

DSCF3062-58

DSCF3088-69

DSCF3093-70 (2)

And most importantly, trying to capture the single most significant moment that sums up the whole event. The shot below shows my best attempt at this. Here you can see the family coming together after a rousing speech and the DJ reflects perfectly how their emotion is shared outwards by others around them.

DSCF3168-96

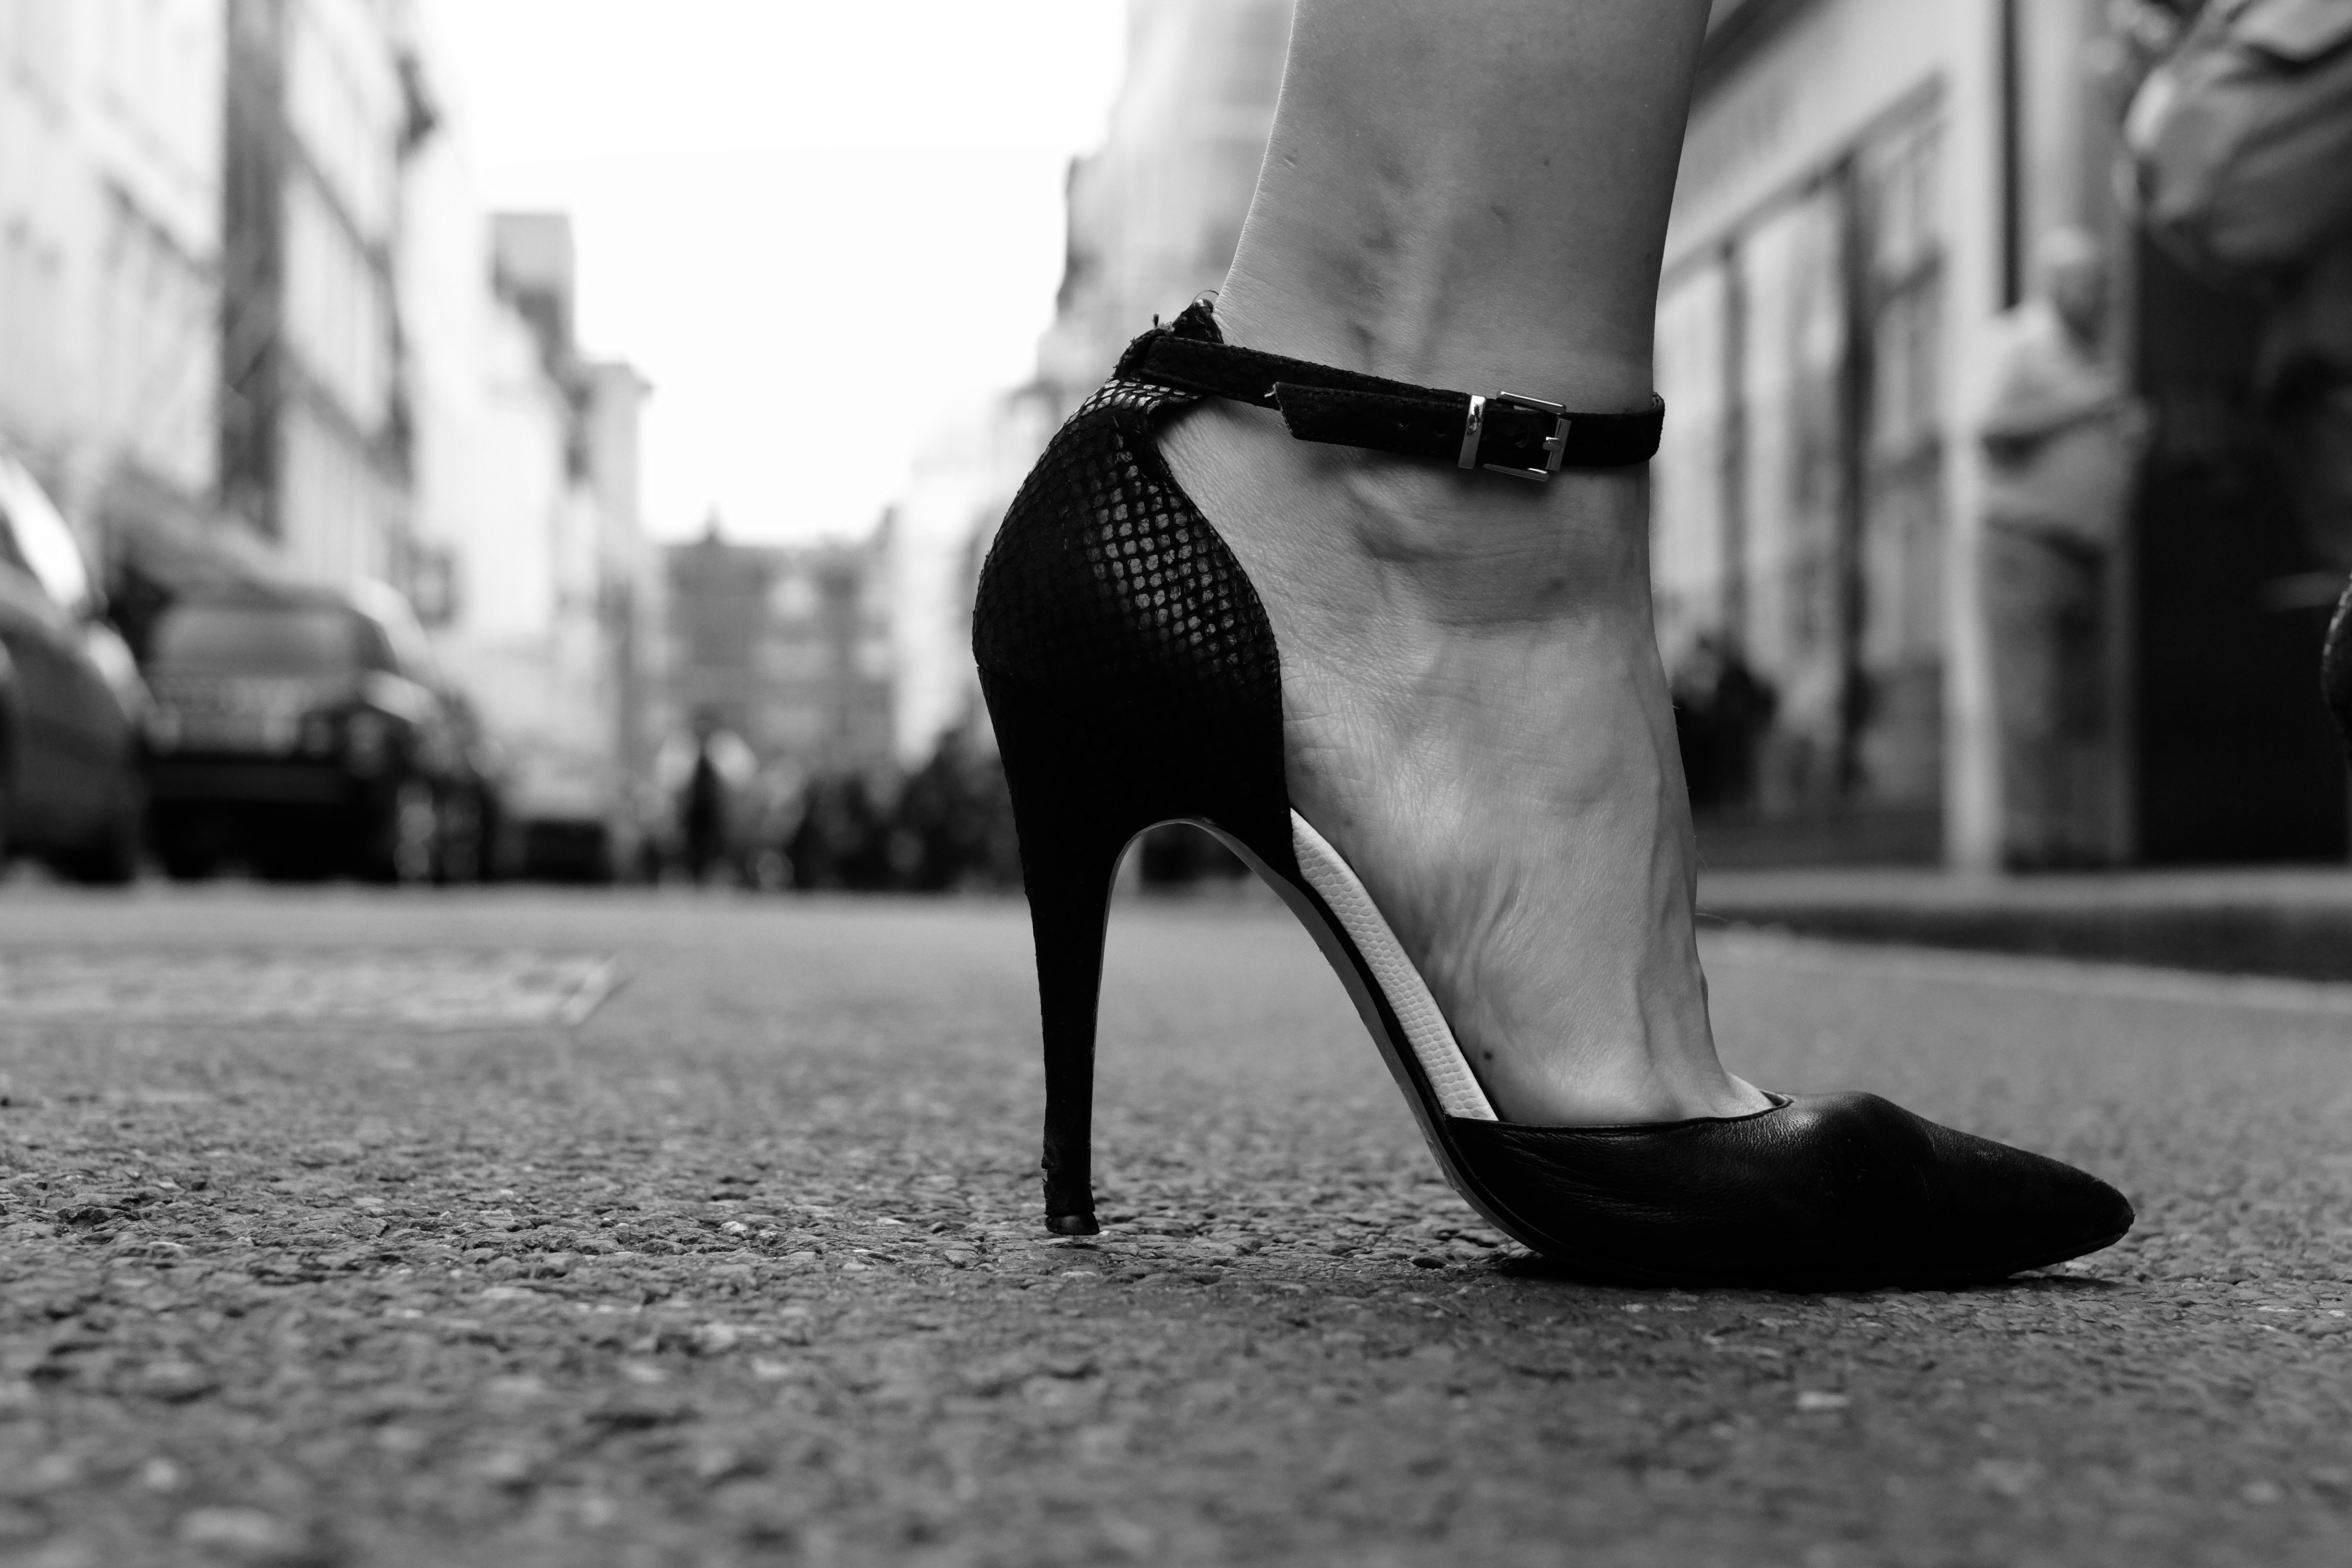
So the question is… are YOU that photography friend that everyone knows? Are you the one who makes it your passion to capture life as it happens for you and for your family? If so, I salute you! If your answer is no, why not give it a go? It will expand your skills, your confidence and very importantly it will develop your own style further. For me, if you haven’t noticed, I can’t help but shoot a lot of Dutch Angle style, rightly or wrongly, this is part of my style that has developed over time.

Please share your own experiences and thoughts in the comments below.

Happy Shooting! 🙂

Three pictures in one hour. Can you do it?

Here’s the challenge – take ONLY three pictures in one hour – No deletes & no post-processing.

Today, the challenge was simple – at least with the rules anyway. You can only take three photos in one hour, you’re not allowed to delete, post process or even retake the photo. This meant you had to really think hard about the subject, the composition, all the camera settings combined and…. get it right, first time.

And for your info – all images are shot straight-out-of-camera.

Picture one

As my first image I wasn’t sure what to shoot, or when I should take my first image. This was easily solved however, when I wandered to the riverside and saw this beautiful light bouncing off the water. I took my time to find the right angle and also noticed this small bird sitting near the edge nearby. With this, I shuffled along on my knees (was definitely worth it) to incorporate him/her into the top left third of the image.

Fujifilm X-E2 XF35mm f/3.6, 1/1300th, ISO200
Fujifilm X-E2
XF35mm
f/3.6, 1/1300th, ISO200

Picture two

This shot I couldn’t resist, the car belongs to a colleague of mine (*cough* Marc’s) and for me, it captures that humorous moment when you know you should re-park your car, but in Marc’s case… you just don’t. I also, from a photography aspect love the lines that flow from the back of the car and along the path to the left. I chose black and white to take the attention away from the colour of the scene and more to what is going on in the scene – being the damage to the rear bumper and ‘eccentric’ parking 😉

Fujifilm X-E2 XF35mm f/2.8, 1/125th, ISO200
Fujifilm X-E2
XF35mm
f/2.8, 1/125th, ISO200

Picture three

As my final image, I wanted to capture a peaceful mood. As we walked along Bedford Embankment I spotted this couple relaxing in the crisp winter air. I crept behind them and silently began looking through my camera settings to find the right choice. As there was so much contrast in the scene I jumped instinctively towards the black and white film simulations. This is where I broke the rules! I literally couldn’t decide which B&W filter to use, so, I shot the same scene three times (one on each B&W filter). I found that the B&W with red filter gave me the most pleasing tones so this was the keeper, and yes I did admit to Marc that I cheated slightly!

Fujifilm X-E2 XF35mm f/2, 1/2500th, ISO200
Fujifilm X-E2
XF35mm
f/2, 1/2500th, ISO200

My thoughts

All in all, even though I cheated a bit, it was super exciting & an excellent exercise to undertake – I highly recommend it. It just turned my normal way of shooting on its head. I would normally frame up a shot and take a few images, experimenting with different apertures etc but with this exercise, I just needed to put my knowledge to the test. I looked through my camera menu selecting specific settings that would suit my style and thought much harder about the composition to ensure it was just the way I wanted it, first time.

It also made me connect more with the environment we were in, internal thoughts like “Where is the best light coming from?”, “What angle should I take this from?” & most importantly “What is actually interesting to shoot in my current area?”.

At one point I actually went right under the bridge to look for a new viewpoint, got my knees dirty, banged my head and came back out without an image! But this was worth it, for I knew that the shot I wanted, wasn’t there. My advice is to try strange angles & odd perspectives, this way you’re either eliminating bad shots or discovering great, new shots that you wouldn’t have known about before.

Happy Snapping! 🙂


Fujifilm X-T1 XF18-55mm at 55mm f/8, 1/1300th, ISO200
Fujifilm X-T1
XF18-55mm at 55mm
f/8, 1/1300th, ISO200
Fujifilm X-T1 XF18-55mm at 18mm f/8, 1/60, ISO200
Fujifilm X-T1
XF18-55mm at 18mm
f/8, 1/60, ISO200
Fujifilm X-T1 XF18-55mm at 35mm f/16, 1/420, ISO200
Fujifilm X-T1
XF18-55mm at 35mm
f/16, 1/420, ISO200

Shooting street fashion portraits with Alex Lambrechts

“Join me as I walk you through my photographic expedition into the world of street fashion photography with the masterful” – Alex Lambrechts.

TFST0017

In this ‘episode’, Marc and I were given an excellent opportunity to join the exciting Fashion X Street workshop with Alex Lambrechts. The aim of the workshop was to get photographers using the system in-the-wild, on the fly and to build upon an individual’s confidence in a shooting style, which is to my mind, full of adrenaline, passion and presence.

The group met inside a beautiful coffee/pizzeria house located in the heart of Soho, and it was here that Alex began to explain his craft and the general structure of the day. As part of the ‘FujiGuys UK’ we took along some of our new Fuji toys for the group to have a play with. These included the X100T, XF18-135mm lens and the pocket-rocket X30. After a coffee and a chat, we set out to the streets of Soho armed with our Fuji cameras in hand!

TFST0098


Alex led us to our first destination; a small, dark and empty alleyway – sounds ominous so far I know, but bear with me 😉 Alex showed us how the light between two buildings gave the perfect softbox lighting effect, and that this would prove excellent for the style we were going for.

He gave the client’s brief, which was what he wanted to see in our shots and practical suggestions as to how to achieve exactly that. The brief immediately grabbed my photographic appetite and I couldn’t wait to see what I could achieve.

The fictitious brief was this (not a word for word quote):

“Because the subject is a musician and a model. I want to see you capture and explore the human element within the shots, not just the standard model expressions but ‘who’ our client is.  And as this is to be published in a fashion magazine, I want to see shots off-angle, gritty and real.”

You can probably see why I was excited; it was something completely new to me and just wanted to get as much experience out of it as possible.

This is where Alex’s stunning wife & professional model Jasmin Lambrechts came in, and what a combination! As they worked side by side, Alex explained things in an informal, yet very informative style. He gave some seriously useful tips on how to direct your model, how to set the camera and how to achieve the perfect lighting on the subjects face.

We started with some slow shutter speeds ‘1/30 to 1/60’ of a second panning shots, this was to capture movement and a unique style, only really achieved in this manner. I think we all found this a pretty tricky technique, but it was probably the most rewarding when you actually got a “YES, I got a good one!”.

TFST0070
X-E2 – XF35mm – 1/40 – ISO 200 – f4.5

As the workshop progressed, we started giving some direction to Jasmin, it was bits and pieces at first, and I’m sure this was down to some of us never having shot a model before. It did however, become more and more natural as we built a rapport with Jasmin and as we found what camera settings worked best.

TFST0134

One of the most helpful tips Alex gave in my opinion was regarding lighting. He really wanted to focus our attention to the exposure of the shot, to ensure we were exposing for the highlights of her face. It may seem an obvious piece of information, but I found really focusing on it turned images from delete to keep. It ensured all the detail was kept on the face, especially when dealing in this ‘contrasty’ environment.

TFST0159

The shot above is one of my favourites from the day. I asked Jasmin if she would throw her hair back so I could try and capture it in full swing. Here I used a fast shutter speed of 1/3000, a generally accepted no-no of ISO6400 (because I needed the fast shutter speed) and had the camera set to manual focusing to make the shot ‘instant’ when the shutter was depressed – and yes, this was not the first attempt, maybe more like the fifth to get it right! The ISO performance on the X-E2 is SO good.

This was another great tip from Alex in regards to action and street photography. He said if you pre-focus on an area where your subject is going to walk and then switch to manual focus, you know every single time that your image is going to be in focus when the subject / model hits that spot. This is particularly useful in street photography, it allows the photographer to frame up a shot and then simply wait for the subject to walk into that frame.

Here are other shots I took that ‘made-the-grade’, at least in my book anyway 😉

TFST0147 TFST0165 TFST0138 TFST0126 TFST0127

Alex had great presence when talking us through ideas as we shot in this environment, throwing us suggestions, checking our shots on the go and even highlighting some great shots our fellow photographers were getting whilst there. This all helped spur me on to try and get the best results I could.

Once we had shot this location from every possible angle, other than hanging off the side of the building (which I would have tried if I could have found a way!), Alex talked us through the next stage in this exciting photography voyage.

Basically, we were going to be on the move, shooting fashion in the streets of Soho amongst the general public. This was where my adrenaline levels went from 7 to 15 (out of ten!) in less than a second.  Alex explained how he wanted us to capture the more human element in this environment, the ‘circus’ as he put it, and it really was just that.

Jasmin stepped into the busy, bustling streets of London and we needed to be ready. We were advised to keep ahead of Jasmin to ensure we could scope out the best framing, best angles and to be more aware of great photographic, candid moments. For me, this involved running like mad to stay ahead, trying not to get run over by cars, bikes or pedestrians, not photobombing other photographers shots and still find a good angle myself with the correct exposure! All in all, super exciting, very challenging and incredibly fun!

TFST0171

The reason it was such a circus is because we looked like the Paparazzi. Imagine 12 -14 photographers chasing a beautiful model down the street, all trying to get the perfect shot will certainly draw some attention. People were taking pictures on their mobiles, just-in-case she was famous, asking who she was & who we were – what a buzz I can tell you!

TFST0221TFST0185

We even had a local restaurateur take to the street stage to grace us with his surprisingly good singing voice. These were the kind of quick paced moments you needed to really know your camera settings, luckily I was just about ready to capture this one below.

TFST0206

After the crazy, brilliant and thrilling roller coaster ride, it was nothing short of perfect to get back to the pizzeria for a beer, pizza and have a chat. The group mingled beautifully, each sharing our successes, failures and our ‘what we would try next times‘. Alex wrapped the day up nicely by highlighting things we did well, things we could improve upon and again, going through individual’s images to give personal feedback – this was a nice touch.

For me, I compare this experience to that warm fuzzy feeling you get at Christmas. I had been given the experience to meet our lovely photographers face-to-face, develop my skills as a photographer and share this experience with like-minded individuals.

10712395_10152550311853579_9169321068005723950_o
The Gang

If you get the chance I highly, highly recommend going on this course and any other that gives you the chance to learn your photography with others. It not only is a great sociable experience, but most importantly, you get to learn how others see shots that you, yourself may have missed.

If you have any thoughts, questions or comments, please do drop us a line below and we will try and assist where we can.

Click here to see images taken by other members of the group (Log into Facebook required to view).

Thanks for reading

Dale


What focal length should I use and why?

w360_6415757_tutorialbannerfordotmailerHere’s a quick, hopefully informative snippet as to why you might choose one focal length over another, and why.

The idea for this blog came about when I was asked recently “Why don’t you just zoom-out to get the person in the frame?”. This is a very good question and I felt it needed a mini demonstration to really help answer it. All one needs to conduct this experiment is the following:

  • A willing volunteer – I had a Marc
  • A zoom lens of any kind – In my case, the XF18-135mm lens
  • Oh, and a camera!

The experiment is simple; frame your subject (Marc) the same each time and take a picture at different focal lengths. I chose four focal lengths along the barrel of the lens to best demonstrate. With this, we had the ever-helpful Terry to hand with a camera to capture the experiment from the third person perspective.

Hopefully what you will notice is that the wider the angle, (18mm) the more clutter there is in the image whereas at the 135mm setting, pretty much all clutter has ‘disappeared’.

Why does this happen?

Without going into huge mathematical detail (that I don’t even fully understand) it is because wide angle shots will achieve a larger angle of view and long zooms won’t. This is how much ‘fits’ into the shot – peripheral vision if you like.

As a rule of thumb, wider angle lenses work great for landscape photography and indoors (where you don’t have a lot of room to manoeuvre) as they can fit more in. Wider angles, however, are not great for portrait shots as they will pull the centre of the frame forwards creating distortion in perspective – example image below.

Longer zooms on the other hand work great for de-cluttering a frame to create stunning portraits. This is because the angle of view is smaller, and more importantly, they have a compressing effect. In essence, a long zoom pulls the background closer to the foreground and can give a more natural, slim looking head shape whilst also helping aid the bokeh effect – increasing the focal length of a lens decreases the depth of field.

Here are two example shots I took that hopefully help demonstrate the difference:

The image on the left (135mm) shows Marc’s head in proper perspective. However, the right shot (18mm) shows the nose being ‘pulled’ forward towards the lens and his head being turned into a rugby ball! You will also notice there is more of Marc’s surroundings in the wider angle shot – this diverts some attention away from his face, which, in a portrait shot we don’t want to do.

I hope this post gets you thinking more about which focal length to use rather than just zooming in and out for convenience.

Having a zoom lens is incredibly helpful at times, but it would best to think of your zoom lens as a series of prime lenses. Most photographers, if not all, use specific focal lengths for specific purposes; this is due to the individual optical effects each focal length provides. It really does make a difference to the end result – as (hopefully) shown above 😉

If you can, please go and try this yourself to get a real feel for it. It will help with your own understanding as to what focal length you might want to use, and for which subjects


Why do I love the XF18-135mm lens? Composition.

Good day everyone, I will have to call this a mini-blog as normally I ramble on for ages and bombard you with images – who knows, maybe I still will 😉

1504372_10154010549280534_5836271885610257265_oAs you may or may not know I’m an amateur photographer who loves to try out new types of photography – I’m sure this is not to different from many of you out there. When I first started out with photography I was educated that the more zoom you had the better. So when I was given the X100 for the first time I was quite baffled as to how to work a fixed prime lens. I felt restricted and puzzled as to why I would want one. Of course once I looked at the pictures from it, I was sold and this opened my eyes to the real aspects of what makes a great camera. The images were crisp, clear and full of vibrant colour, all I had to get used to was zooming without a telephoto lens – AKA the Hokey Cokey. Once I got this down though, there was no stopping me, I was out with my original X-E1 and 35mm prime lens and I loved every minute of it!

This leads me to the XF18-135mm. This time I had the promise of excellent image quality but with that lovely versatility of a zoom lens. When I first clicked it into position on the camera body and fired up the camera I was taken back by just how much I could see or not see depending on the focal length. It was something that took me back to the olde days of me using a camera, I was VERY excited to get out and use this new kit.

I decided upon a location in the local area that always seems to make a good picture, this being the Stevington Windmill. I looked at when the sun was going to set and got there about 50 minutes earlier to allow time for running across fields, fumbling with tripods and such like. Once I got a good position near to the windmill I shot this image.

TFST0106 - Copy
Focal Length: 49mm – f/5.6 – ISO200

I shot this image at the slightly wider-side of the lens to open up the landscape a bit – this to me gives a very peaceful feel to the shot. Compositionally (is that really a word?) I have dedicated two thirds of the frame to the sky as it is a sunset after all, and I think this really helps the landscape silhouette ‘POP-OUT’ from the skyline.

This next shot I really wanted to focus on the windmill and give a more intense feel. To do this I have used the lens at a longer focal length as this has a very clever effect on the composition. The more you zoom towards a subject, the more the background and foreground are compressed together. So this in turn pulls the Sun closer to the windmill and vice-versa. Not only that, but it also reduces the angle of view – cutting out all the peripheral stuff we perhaps don’t want in our shot.

As a side note – To get the composition I wanted using more zoom, I did have to move further back to accommodate the extra focal length. Basically this means I had to run like crazy across a field and keep checking to see if the composition was right as every moment I wasted meant the sun was getting lower and would soon disappear behind the hillside.

TFST0109
Focal Length: 98.6mm – f/7.1 – ISO200

These next two shots show this compression effect quite well I feel. It really brings the background closer to the foreground making for a more intense composition that would not have been possible with my 35mm prime lens.

And in case you were wondering, this is my better-half with her camera at her side relaxing whilst I’m running about like a madman saying things like “That’s great, just don’t move. Pretend I’m not here..” which was all great fun. Photography should be fun and if you can get your friends and family involved, so much the better.

TFST0092 TFST0089

Here’s a playful shot of some hot air balloons in the distance. I framed it up so that they sat on the furthest third of the frame to sweep your eyes across the beauty of the landscape. Because of the compression effect (pulling the background and foreground together) I could give the hot air balloons a bit more presence in the shot, especially when you consider the real distance between the main tree and the hot air balloons.

TFST0083

I really hope this inspires you to go out and have a play with your camera, shoot a sunset, bring a friend, mix up your compositions and most of all have fun. When you do all that great pictures will naturally follow.

P.S: Seems I managed to get a good ramble and bombardment of images in after all 😉


Capturing Croyde and Lundy Island with the XF10-24mm & X-E2 combo

Follow Dale as he takes a journey round Devon’s beautiful Croyde Bay & Lundy Island.

As you may or may not know the XF35mm is my ‘everyday’ lens but when it comes to landscape photography the XF10-24mm is my next ‘must-have’ lens. I used to use the XF14mm lens – which by the way is superb, but I’ve realised that I just cannot get enough of that ultra-wide 10mm setting.

I have only been delving into the landscape photography world of late and am still very much finding my feet. When looking back through my landscapes I have noticed that I clearly love the slightly stranger viewpoints, mainly from a wide-angle, ground-up perspective. It may be that the world is just more interesting down there!?

DEVN0154
Focal Length: 10mm (XF10-24mm) – ISO200 – f/4.5 – 1/950 – Ilfracombe Harbour

I like trying to ‘add a little epic’ to my landscapes. The way I have found myself doing this is to locate a small object, whether it be a footprint, a rock etc and get it right up close to the lens. This distorts its perspective and makes it a real important part to the composition. It’s very easy to miss the small details in a beautiful view, so doing this can really shake-up the images and give a new feel to your photography.

DEVN0064
Focal Length: 10mm (XF10-24mm) – ISO200 – f/4 – 1/950 – Lundy Island

We’ve always been told practice makes perfect right? Well, I don’t know if it makes ‘perfect’ but it certainly helps with repetition. I find that the more I shoot, the more I know how a shot is going to turn out before I’ve even turned the camera on. It can give great insight as to whether I should get set up for a shot or move on to a new area / viewpoint.

DEVN0116
XF35mm – ISO200 – f/4 – 1/2900 – Lundy Island – Had to sneak my XF35mm lens into this blog somewhere! 😉

In an effort to create better landscape images I have been using the Rule of Thirds more and more consciously. Across the board this has rewarded me with more “That’s a keeper!” shots.

In addition to this, I’ve been thinking more carefully about where to ‘put’ the horizon line. I usually just ponder which is more interesting – the sky or the foreground? If the sky is more interesting it takes up two thirds of the image and vice versa. I thought the scene below had a more interesting foreground to shoot, so the foreground takes prominence.

DEVN0033
Focal Length: 10mm (XF10-24mm) – ISO200 – f/11 – 1/420 – Ilfracombe Harbour

On the opposite side of things, I found this sky (below) to be more dramatic and I loved how the church had an on-the-edge-of-the-world feel to it. So, I gave the sky two thirds of the frame and the church the lesser attention to increase this on-the-edge-of-the-world theme. I post-processed this one to give it a more matte-like / painted finish.

DEVN01212
XF35mm – ISO200 – f/11 – 1/420 – Lundy Island

The XF10-24mm isn’t just for landscape either, it worked perfectly inside the Lundy Island lighthouse to capture the whole winding staircase – which on a different note, was very steep!

DEVN0096
Focal Length: 10mm (XF10-24mm) – ISO6400 – f/4 – 1/56 – Lundy Island

Sunsets, anyone?

The next few images are some of the best I could get while shooting in the ‘golden hour‘. It’s not an area I have had great amounts of experience with, but, I wanted to share a few tips that could save you some stress as I found out the hard way.

Firstly, give yourself lots of time to get to the location you are going to shoot. Set up and relax way before the sun has started setting. Otherwise, you may find yourself fumbling with ND grad filters and tripods like I was.

I always thought a sunset was a peaceful, enjoyable thing, but when you are trying to shoot it the sun seems to set faster than you can say Usain Bolt!

DEVN0163
Focal Length: 18mm (XF10-24mm) – ISO200 – f/9 – 1/38 – Croyde Bay

The second piece of advice is to know where the sun is going to set. One night I literally found myself running across a beach. I had the camera attached to a tripod while dangerously navigating slippery rocks pools and small sand holes that the kids had dug during the day! I must say though it was some of the most exciting photography I have done in a long time.

DEVN0170
Focal Length: 24mm (XF10-24mm) – ISO200 – f/8 – 1/60 – Croyde Bay

On the bright side, the running down the beach to capture the sunset actually made a picture in itself. Again, emphasising the foreground subject by getting on my hands and knees to put the lens right up close. DEVN0176

I hope you have enjoyed taking my very short tour of some truly photogenic places. Here are some other shots I captured from the trip away that you may like. Any questions, feel free to leave a comment below.

Happy Shooting

Dale