Month: April 2017

Shooting architecture with the Fujifilm X Series

For as long as I can remember, architecture has been my interest in photography.

By Felix Mooneeram

Before becoming a photographer, I worked as a designer. I’ve always had a great appreciation for architecture and what architects do. I love thinking about the tools in their bag when I shoot buildings. It could be a simple application of a beautiful material, a playful means of connecting two spaces; or just a way of adding natural light to a space. All of these things can influence the way people engage with a building – and that is what I try to think about when I am Read More

Through a Photographer’s Eye: Harmeet Gabha

through-a-photographers-eye

Through a photographer’s eye is the first in a series of interviews featuring Australian photographers. In each interview, we learn about the person behind the camera and how they use Fujifilm X Series cameras to photograph the world around them. Our eighth interview is with Sydney based photographer, Harmeet Gabha.

profile-xf56mm1-4

Harmeet, can you tell us about how you got into photography and why you pursue it?


I got into photography in 2005 when a colleague handed me his DSLR to take some pictures at a work cruise. The sun was setting and the Sydney Harbour Bridge was in the backdrop. I took the picture and he showed me the image on the LCD. As soon as I saw that, a spark lit up in my mind and I was hooked. I wanted to capture my own images like that. Later that year I saved up and bought my first Digital Camera a Fujifilm FinePix S5000, a 6 Megapixel camera.

I started taking pictures of friends and family during my travels. The more I photographed the more I realised that the world around me is changing so rapidly. Without images, we have no documented history of our lives. Now as a father, I have so many images of my daughter that when I look back at her early years as an infant, many beautiful memories keep flooding back. The joy and the memories that photography preserves are priceless.

Being able to freeze time with your camera is what keeps me excited about pursuing my passion.

casa-batllo-barcelona

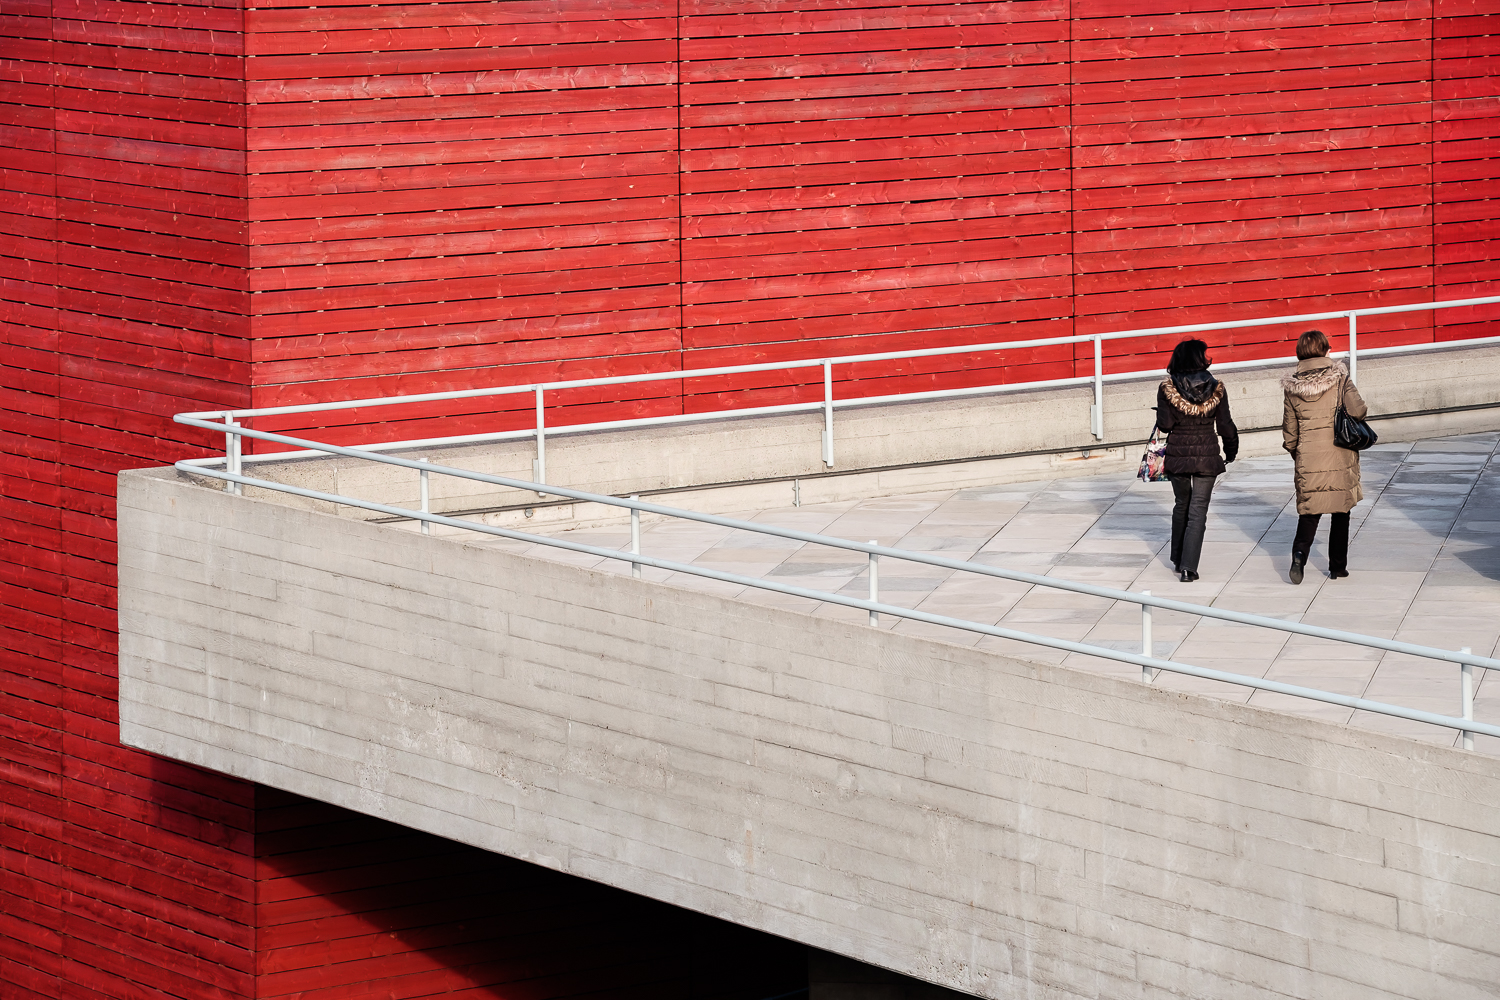
“Casa Balto, Barcelona” – Fujifilm X-T1 – XF18-135mmF3.5-4.8 – ISO 400 – F3.5 – 1/180 second

The advancement in the photography field is just astonishing and, at the same time, I see people being scared and feeling lost when they buy their first camera. I enjoy helping others when they need help and sharing what I have learned throughout my journey. I get a sense of fulfilment when I see that by helping someone I have helped them get to their next level in their own journey. All this keeps me going.


After viewing your blog and vlog we see you travel quite a bit, what Fujifilm equipment do you take with you on these trips and why?


I’m using an X-T1 and XF18-135mmF3.5-5.6 lens as my primary combo for travel. The camera is absolutely fantastic and the lens is versatile for a lot of shooting situations. I can use it for wide-angle photos through to the telephoto range without having to swap the lens. I can just throw the camera over my shoulder and I go out and shoot. Also being weather resistant I don’t have to worry about the occasional shower.

hobbiton-nz-hdr

“Hobbiton, New Zealand” – Fujifilm X-T1 – XF18-135mmF3.5-4.8 – ISO 400 – F6.4 – 1/2200 second

I also carry in my bag a XF23mmF1.4 which is an awesome prime lens and works beautifully indoors in low light conditions. Coupled with the X-T1 it has such brilliant performance at high ISOs, I can easily push the camera to ISO 3200 and shoot handheld. After dragging 10kg+ backpacks through airports loaded with DSLRs, batteries & lens and a hernia operation something had to change! The X-T1 was the perfect solution and a welcome change on my back.


Can you provide some insight into how you best process a RAW image taken by a Fujifilm X-T1? What software do you use and are there any settings you set on the camera for optimal colour?


I use Adobe Photoshop Lightroom for processing my RAW files from the X-T1. Lightroom has an easy to use interface that lets me create the final image I want. I always apply the desired camera profile like Vivid or Pro Neg. Hi to my images in Lightroom before proceeding with my edit.

I have tried using Capture One Pro, which a lot of X Series shooters use but it’s too clunky and complex to learn. I have tried using it several times but the User Interface (UI) just puts me off. Additionally, to Lightroom, I use software such as Luminar, Aurora HDR 2017, Photoshop, Google Nik Collection and currently testing On1 Photo Raw.

While shooting in Camera, I mostly shoot RAW+JPEG and I set Velvia as the Film Simulation for the JPEG. I find that the jpegs straight out of the camera are also great for sharing on social media using the WiFi feature of the camera. It’s so convenient and easy! I also enjoy editing RAW images directly on the Fujifilm X-T1.

For HDR (High Dynamic Range) photos, I just turn one mode dial and I am ready to shoot bracketed images. I will import the images for initial adjustments in Lightroom, followed by Aurora HDR 2017, which processes the 3 images to create the final HDR image.

la-sagrada-familia-before

“la sagrada familia – before” – Fujifilm X-T1 – XF18-135mmF3.5-4.8 – ISO 200 – F3.5 – 1/500 second

la-sagrada-familia-after

“la sagrada familia – after” – Fujifilm X-T1 – XF18-135mmF3.5-4.8 – ISO 200 – F3.5 – 1/500 second

So depending what I want to create, I use different tools for processing my RAW images. However, I’d say the majority of them just require Lightroom edits and I’m done.


How did you find the transition from your previous camera to Fujifilm mirrorless?


As I mentioned earlier, my back thanks me for making the change, however, the transition from Canon DSLRs was a very pleasant surprise. I quickly adapted to the X Series system. All the major controls for image capture are at your fingertips. With the dials and buttons, it makes it easy to setup for any scene. I suppose, what I like about it most is in order to shoot you don’t have to dig into the menus or press multiple buttons to take a photo.

bondi-sculptures

“Bondi Sculptures” – Fujifilm X-T1 – XF18-135mmF3.5-4.8 – ISO 200 – F8 – 2.8 seconds

The Fujifilm X-Trans sensor is brilliant; there is so much detail in the shadows that you can pull out from the RAW file. And I don’t mean just light shadows; I mean really dark almost black areas in the image can be lighted up via RAW processing. Best thing is the image quality is quite clean and noise free. On my previous camera that was not the case, shadows could not be pushed as much as the X-T1 and if you did noise would appear. However, I have to say the X-T1 doesn’t recover highlights as well as my previous camera. So I tend to underexpose my image when I have some bright spots in the image, by doing this I can be confident that shadows can be recovered easily.


If you have some advice for someone starting out in photography what would it be?


Don’t be scared, just do it (as the Nike ad says). There are so many free resources available online that you will be able to learn and pick up any area of photography very quickly and easily. Google is your best friend; just type in what you are looking for and you’ll find the answer within minutes.

la-sagrada-familia-barcelona-hdr

“la sangrada familia, Barcelona” – Fujifilm X-T1 – XF18-135mmF3.5-4.8 – ISO 800 – F3.5 – 1/50 second

I’m also focusing more on my blog (photoinsomnia.com), by creating content for people just starting out in photography. It’s a resource where they can learn some techniques quickly that will make them more confident and inspired.


What sort of misconceptions do you hear (in conversation or online) when talking about mirrorless?


I’ve heard two main misconceptions; People think that mirrorless cameras won’t produce as good quality images as a DSLR but the fact is that my X-T1 produces much better images than many DSLRs. In my opinion, on Fujifilm cameras, the colours are richer and real. The sharpness of the images is amazing even at a very shallow depth of field e.g. F1.2 or F1.4.

park-guel-barcelona

“Park Guel, Barcelona” – Fujifilm X-T1 – XF18-135mmF3.5-4.8 – ISO 400 – F8 – 1/400 second

The second one misconception is that the ‘battery life on mirrorless is crap’. I agree that battery life is not as long as DSLR. I get 350-400 images on full charge whereas on a DSLR you can expect 600-700 images. But people forget battery capacity is proportional to its physical size. Smaller camera, smaller battery.

I’ve even taken 600+ images out of one charge with the X-T1 when shooting a Time Lapse sequence, probably because the LCD wasn’t being used and the camera was just firing off images for 30-40mins.

Also, I’d like to point out the benefit of the Electronic View Finder compared to an optical one – “what you see is what you will get”. By having one on the X-T1 you tend to shoot less wasteful frames, you only capture exactly what you want. In a DSLR you will have more throwaway shots, as the mirror will show you one thing while your result might be totally different if you get your settings wrong. But with the X-T1, what you see is what you get, so the shutter is only pressed when you are happy with your settings and what you are seeing through the camera.


Being a Fujifilm X-T1 user, where you excited to see the X-T2 arrive and do you think it met your expectations in a newer model?


Indeed, it was exciting to see the brand new camera packed with features and improvements released in the X-T2. I attended its launch event in Sydney and had an exclusive opportunity to try out the camera before it hit the market.

It was great to see that Fujifilm was listening to its market and incorporated the feedback to improve the next camera. On the X-T2 dials, it now has a locking mechanism, the camera has a new focus lever, tripod thread position and exposure compensation making an overall improvement to the useability.

new-plymouth

“New Plymouth” – Fujifilm X-T1 – XF18-135mmF3.5-4.8 – ISO 400 – F8 – 1/750 second

They improved the video capabilities of the camera to 4K so people wanting to film can be confident in capturing video. The one thing that still disappoints me is that Fujifilm doesn’t believe much in bracketing features as still you can only bracket -1 & +1 exposures and no more. I would love to see one of the firmware updates to just extend this range.


Answer this: If you could have your dream Fujifilm kit, what would it consist of?


My dream gear would be an X-T2 with an XF18-135mm lens and an X-Pro2 with an XF23mmF1.4 lens. But for the moment I’m very happy with what I’m using. The camera delivers the results for what I do and is rock solid.

burning-man-sculpture-reno-nevada

“Burning Man Sculpture, Reno, Nevarda” – Fujifilm X-T1 – XF18-135mmF3.5-4.8 – ISO 1000 – F3.5 – 1/2400 second


To view more of Harmeet’s work visit his blog or visit any of his social channels: Facebook, YouTube, Twitter or Instagram.

Other interviews in this series

Through A Photographer’s Eye: Drew Hopper

Through A Photographer’s Eye: Alamby Leung

Through a Photographer’s Eye: Ian Tan

Through a Photographer’s Eye: Dale Rogers

Through a Photographer’s Eye: Josselin Cornou

Through a Photographer’s Eye: Chris Hopkins

Through a Photographer’s Eye: Anirban Chatterjee

Capturing the Beauty of Spring’s Bluebells

Chris Upton Bluebells

Chris Upton Bluebells

By Chris Upton

Spring is sprung in the UK and nothing signifies that more obviously than a rich carpet of bluebells under a vibrant canopy of lime green beech leaves. Walk into a forest early in the morning and the wonderful fragrant smell hits you, the scene simply begs to be photographed. So, how do you capture this beauty? Well here are a few tips to help you achieve some stunning bluebell shots.

Read More

The Best Fujifilm Travel Lenses for Your Next Trip

By Stefano Ferro

I have been running a travel photography website for few years. In conjunction, I also run some workshops and commonly receive many photography questions; however, there is one which comes up frequently:

What is your favourite camera for travelling today?

Fair enough, people want to upgrade or just change the model. I find however strange that I almost never get this question:

What lens should I buy for my next trip? Or what lens would you suggest for my travel adventure?

It seems that lenses always come second, based on what is left from the initial camera budget. It’s not uncommon to hear “the kit lens will do” when someone goes travelling.

But is it the right choice?

Maybe not. I may be too drastic, however, I believe that lenses are even more important than the cameras when talking about travel photography. I was once watching a lecture from Prof. Marc Levoy on lenses and differences when using the same camera, it was very interesting. It was part of an 18-lecture workshop that I would suggest everyone watches if they have some spare time. From this I have one lens buying tip: if you buy only one lens then allocate a budget at least similar, if not higher, to the one allocated to the purchase of the camera.

Do not buy a Ferrari with a FIAT engine (although the FIAT Group actually owns the Ferrari brand)!

Sunset on Southgate with the helicopter surprise
Fujifilm X-T1 – XF16-55mmF2.8 – F2.8 – 1/400 second – ISO200

How to choose the best travel lens?

If it is true that the best camera is always the one with you then the best lens is the one that will help to capture the majority of your photos in your trip. 

Think about what lenses to take when travelling. For example, you should take multiple lenses that will cover a wide focal length through to a telephoto length, but also take into consideration the following:

  • Weight of the lens
  • Cost of the lens
  • Risk of theft

I am in love with the Fujifilm X Series cameras. One of the reasons beside the light weight is the compact size, for instance, I can take a Fujifilm X-T2 in my bag for a full day of shooting and almost not feel it.

This is the way I want to travel. It’s important for me to keep my gear light, which is why I take a maximum of two lenses with me. When I travel on my own I usually change location every 2-3 days. Packing multiple lenses and transporting many of them is just not an option.

When I travel with my child I usually stay in a place for seven or more days. To be honest, I already have so many things that taking several lenses is simply not ideal. There is also a simple equation to think about as well, the more lenses you buy the higher the total cost of them. The risk factor of leaving multiple lenses in a hotel room is something you simply should not do.

So what do I do nowadays?

I just take two lenses with me and in some rare cases a third one. I make sure to include an all round zoom lens, a prime and an ultra wide angle or super zoom when absolutely needed.


Walking through the tiles
Fujifilm X-T2 with XF35mmF2 R WR – F2 – 1/40 second – ISO800

Recommended All Round Zoom Lens for Travelling

My favourite all-round lens for travelling is in the 24-80mm or 24-100mm focal range (35mm equivalent). As a rule of thumb, the wider the aperture the better, as this typically increases the photo opportunities. Personally, I would suggest using a lens that has an aperture of F2.8 or even lower.

Why such a wide aperture for travel photography?

  1. To have a narrow depth of field. Think of photos of architectural details or simply portraits of local people with a lovely blurred background.
  2. To make photos in low light environments, as the local markets, without pushing the ISO too high. I still remember how dark the fish market was in Port Louis (Mauritius)!
  3. To shoot without a tripod at sunset or at night. The wider you can go with the aperture the more light you will receive on your sensor without the need to use higher ISO levels.

Why as wide as 24mm (35mm equivalent)?

Because it’s a nice average wide angle to capture most of the typical photos you might come across when visiting landscapes, lanes/alleys or a new city.

Why 80mm or 100mm?

Because honestly, you will hardly need more than that. Let’s remember that we have legs too and we can move closer to the subject in most cases. Of course, there will be the time when you will regret that you have left behind the longer lens or you have not bought the lens that has a focal length of 400mm. Compromise compromise…

So, what all-round lens works best for a Fujifilm X Series camera?

I am personally in love with the Fujinon XF16-55mmF2.8 R LM WR lens. This lens provides a super fast F2.8 aperture that delivers beautiful bokeh (35mm equivalent focal length of around 24-85mm). This is my favourite all-round Fujinon lens that I would highly recommend for travel photography.

City view from St.Kilda, Melbourne
Fujifilm X-T1 with Fujinon XF16-55mmF2.8 R LM WR – 55mm – 2 seconds – F3.2 – ISO200

I had the lens for testing and review. I was really impressed with its sharpness across the entire focal range without compromising on the corners. The autofocus was quick and silent too, which is really a feature you want when travelling. I always try to be invisible when taking photos by not making any noise that would alarm people around me. I found the zoom and aperture rings were very smooth and easy to operate. Lastly, the combined weather resistance was also really important when travelling in unpredictable weather conditions.

The only drawback of this lens is that it does not have image stabilisation. If you really want this feature you should check the XFujinon XF18-55mmF2.8-4 R LM OIS.

If you still think that the focal length of 80mm (35mm equivalent) is still not enough when travelling I would recommend the Fujinon XF18-135mm R LM OIS WR which, with a focal length of around 24-200mm (35mm equivalent), should cover everything you want to capture. The lens also is more affordable as well, however, you have to compromise with a slower aperture that offers F3.5-F5.6.

Fujifilm X-T2 with XF35mmF2 R WR – 35mm – 10 seconds – F16 – ISO100

Recommended Prime Lens for Travelling

Why buy a prime lens with a single focal length?

These are my four main reasons:

  • Generally cheaper
  • Offers great image quality
  • Light in weight
  • Smaller in size

A prime lens essentially has only one unique focal length which usually performs at the highest professional level. When travelling, I photograph quite a lot of markets that form an essential part of my work. If you have a mirrorless Fujifilm X Series camera with a small prime lens mounted you will be able to walk around unnoticed. If you arrive at a public place like a market with a zoom lens mounted on your camera then suddenly people around you might start thinking you are a professional photographer with expensive gear. This sort of attention is not something you want, especially in some countries where theft is common.

For a prime, I would suggest going for a focal length in the range of 50mm to 85mm (35mm equivalent). This will allow the most natural portraits to be captured. I personally use a 50mm focal length (35mm equivalent) as I like to get close to my subject, possibly have a talk, even if just with my hands (my Italian background helps a lot).

Love is our truth
Fujifilm X-T2 with Fujinon XF35mmF2 R WR – 35mm – 1/13 second – F2 – ISO3200

I personally suggest the Fujinon XF35mm F2 R WR for a prime lens. I used this lens with the Fujifilm X-T2 and I could only love it. The small package was great to shoot with. Fujifilm does also offer the F1.4 version, however, for travelling, I do not feel I can justify the higher price.

Resting time for the chef
Fujifilm X-Pro2 with Fujinon XF35mmF1.4 R WR – 35mm – 1/40 seconds – F2 – ISO5000 – handheld

Alternatively, you can look also into the Fujinon XF50mmF2 R WR if you prefer a longer focal length.

Recommended Ultra Wide angle and Super Zoom Lens

I own an ultra wide angle lens and I sometimes rent or borrow a super zoom one.

Why an ultra wide angle lens?

I mostly use it for interior and architectural photography. If I am going to explore a city for a long weekend I may take it with me if I plan to visit churches, cathedrals or unique buildings. I use it also for some landscape photography, however mostly when my subject is actually in the foreground. For example a stone formation at a beach.

The Fujinon XF10-24mm F4 R OIS lens is the widest you can get in the XF range. It’s also optically stabilised which comes in handy when photographing in buildings or places where the tripod is not allowed.

Why a super zoom lens?

I need it rarely and that is why I have not bought it. It’s really mostly needed when travelling on a safari, photographing sports or wildlife. Last year, for instance, I used the super zoom for photographing a zoo safari in the middle of Australia – it definitely came in handy. The new XF100-400mm F4.5-5.6 R LM OIS WR lens is probably all you need if you are photographing any of the mentioned subjects. An important note is that it is also a stabilised lens, something that is really a must for this focal length.


Sali e Tabacchi

Fujifilm X-Pro2 with Fujinon XF35mmF1.4 R WR – 35mm – 1/40 second – F2 – ISO1000 – Handheld

Final thoughts

An equal budget should be allocated for the camera and the all-round lens. If there is any spare money left over then I would recommend investing in a prime lens as the secondary option. Any other lens can wait or can be rented. Remember that a good lens can always be used on a newer camera. Great lenses will always stay with you.

Happy travelling and enjoy your photography.

7 Tips For Macro Photography With Fujifilm X Series

Some images are larger than life. Macro photography, at its most technical definition, involves capturing something bigger in your frame than it appears in reality. Think of a tiny bug filling a large print, for instance. But used loosely, macro photography describes anything close to a 1:1 ratio of reproduction.

To get into macro photography with your Fujifilm X Series camera, keep in mind these seven tips.

Purchase a macro lens for larger reproduction.

The easiest way to take macro photos is with a macro lens, which is designed to have a short minimum focus distance. Macro lenses come in different focal lengths, from 50mm to 200mm, and magnify at a large reproduction ratio, though not always 1:1. For the Fujifilm X Series, there is the XF60mmF2.4 R macro lens, which mounts onto each camera in the series.

Experiment with an extension tube.

If you do not feel ready to invest in a macro lens, work with your current lens and add an extension tube, a light-tight accessory that fits between the mount and the lens. By shifting your lens farther from your body, the extension tube allows you to increase magnification. The Fujifilm MCEX-11 and MCEX-16 are built specifically for X Series cameras and attach sturdily to their bodies.

Photo by Ivar Fjeldheim (@ivar_fjeldheim), Fujifilm X-Pro2 with XF90mmF2 R LM WR + MCEX-16

Use ring flash or a softbox.

Flash lighting can be too harsh for many macro photography shots. Instead, shoot with a ring flash or a softbox. If you must use flash lighting, set up a reflector to help you fill light evenly throughout your frame.

Be adventurous with unconventional angles.

Getting your small subject to fill the frame is nice, but don’t let that be the only intriguing element to your shot. Work from different angles. Try filling the frame diagonally with your subject. Shoot with front lighting to emphasise the subject’s colour and with side lighting to emphasise its detail.

Photo by Leigh Diprose, Fujifilm X-A1 with XF60mmF2.4 R Macro – F5.6 – 1/150 second – ISO800

Hold frail photo subjects in place with a clamp.

For macro pics of flowers or other outdoor objects, you may want a way to steady your subject from wind gusts. A plant clamp sometimes called a “plamp,” keeps them in position while you take your shots.

Steady your shot with a remote release.

Great macro photography shows intricate detail on its subject. To get minuscule attributes to appear clearly in the image, you want to avoid camera shake. Use a remote release to reduce the possibility of blur.

Photo by Leigh Diprose, Fujifilm X-T1 with XF60mmF2.4 R Macro – F2.4 – 1/1000 second – ISO200

Stack images to bring focal points into one shot.

Some of the fun in macro photography happens in post-production. Take many pictures of your subject, with the composition maintained in each photo but with slightly different focal points. Then, using software such as Adobe Photoshop, “focus stack” the images to see all of the focal points present in one image.

Photo by Leigh Diprose, Fujifilm X-A1 with XF60mmF2.4 R Macro – F5.6 – 1/170 second – ISO1000

Macro photography takes practise, but with effort and with the right accessories for your X Series system, you will soon have some great big images of the tiniest things.