It’s that time again. A new Fujifilm X Magazine issue is ready to your reading and viewing pleasure.
Interview with Merhdad Samak-Abedi
This issue features an interview with pro photographer Merhdad Samak-Adebi who travels the world as part of his job (working for a German airline) and therefore is lucky enough to get the opportunity to shoot his passion – landscape photography.
Merhdad Samak-Abedi interview
Merhdad Samak-Abedi interview
Merhdad Samak-Abedi interview
Take a walk around Varese, near Milan
This issue’s “X Marks The Spot” features some fantastic street photography by Italian photographer Emanuele Toscano in and around Varese, Italy.
Emanuele Toscano
Emanuele Toscano
Emanuele Toscano
Be inspired
Issue 6 also contains the other usual features; “What to Shoot Now” provides you with inspiration on what subjects to shoot during the summer holiday months, “Get more from your X series” takes a look at bracketing functions that feature on most Fujifilm X cameras and the “Exhibition” shows a fantastic array of colourful images, plus the stories behind them, shot by our readers.
What to shoot now
Get more from your X series
X Magazine exhibition – Colour
Competition time
Fujifilm X Magazine competition – win a Fujifilm XQ1 underwater kit
And finally, you could win a fantastic XQ1 underwater kit in our competition. For a chance to win, send us your best holiday shot. More details in the magazine itself!
Follow Dale as he takes a journey round Devon’s beautiful Croyde Bay & Lundy Island.
As you may or may not know the XF35mm is my ‘everyday’ lens but when it comes to landscape photography the XF10-24mm is my next ‘must-have’ lens. I used to use the XF14mm lens – which by the way is superb, but I’ve realised that I just cannot get enough of that ultra-wide 10mm setting.
I have only been delving into the landscape photography world of late and am still very much finding my feet. When looking back through my landscapes I have noticed that I clearly love the slightly stranger viewpoints, mainly from a wide-angle, ground-up perspective. It may be that the world is just more interesting down there!?
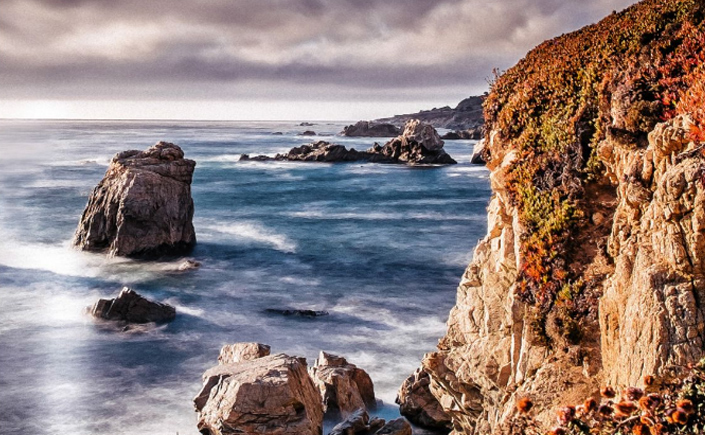
I like trying to ‘add a little epic’ to my landscapes. The way I have found myself doing this is to locate a small object, whether it be a footprint, a rock etc and get it right up close to the lens. This distorts its perspective and makes it a real important part to the composition. It’s very easy to miss the small details in a beautiful view, so doing this can really shake-up the images and give a new feel to your photography.
We’ve always been told practice makes perfect right? Well, I don’t know if it makes ‘perfect’ but it certainly helps with repetition. I find that the more I shoot, the more I know how a shot is going to turn out before I’ve even turned the camera on. It can give great insight as to whether I should get set up for a shot or move on to a new area / viewpoint.
XF35mm – ISO200 – f/4 – 1/2900 – Lundy Island – Had to sneak my XF35mm lens into this blog somewhere! 😉
In an effort to create better landscape images I have been using the Rule of Thirds more and more consciously. Across the board this has rewarded me with more “That’s a keeper!” shots.
In addition to this, I’ve been thinking more carefully about where to ‘put’ the horizon line. I usually just ponder which is more interesting – the sky or the foreground? If the sky is more interesting it takes up two thirds of the image and vice versa. I thought the scene below had a more interesting foreground to shoot, so the foreground takes prominence.
On the opposite side of things, I found this sky (below) to be more dramatic and I loved how the church had an on-the-edge-of-the-world feel to it. So, I gave the sky two thirds of the frame and the church the lesser attention to increase this on-the-edge-of-the-world theme. I post-processed this one to give it a more matte-like / painted finish.
XF35mm – ISO200 – f/11 – 1/420 – Lundy Island
The XF10-24mm isn’t just for landscape either, it worked perfectly inside the Lundy Island lighthouse to capture the whole winding staircase – which on a different note, was very steep!
The next few images are some of the best I could get while shooting in the ‘golden hour‘. It’s not an area I have had great amounts of experience with, but, I wanted to share a few tips that could save you some stress as I found out the hard way.
Firstly, give yourself lots of time to get to the location you are going to shoot. Set up and relax way before the sun has started setting. Otherwise, you may find yourself fumbling with ND grad filters and tripods like I was.
I always thought a sunset was a peaceful, enjoyable thing, but when you are trying to shoot it the sun seems to set faster than you can say Usain Bolt!
The second piece of advice is to know where the sun is going to set. One night I literally found myself running across a beach. I had the camera attached to a tripod while dangerously navigating slippery rocks pools and small sand holes that the kids had dug during the day! I must say though it was some of the most exciting photography I have done in a long time.
On the bright side, the running down the beach to capture the sunset actually made a picture in itself. Again, emphasising the foreground subject by getting on my hands and knees to put the lens right up close.
I hope you have enjoyed taking my very short tour of some truly photogenic places. Here are some other shots I captured from the trip away that you may like. Any questions, feel free to leave a comment below.
Is it just me, or have other people experienced a weird phenomenon when they start using Fujifilm X-series cameras? I’m not talking about aesthetics here, I’m talking more fundamental, cerebral kinda stuff.
Lately, thanks to the nice people at Fujifilm UK, I’ve been able to get my hands on some of the X-series models. I’ve tried the X100S (it’s very nice), the X-T1 (it’s very nice) and, most recently the X-E2 (it’s, erm, very nice). But when I’ve gone back and looked at some of the shots I’ve taken with this trio of models they all bear the hallmarks of me transforming into some wannabe reportage-come-street photographer. It’s really quite alarming.
Orange umbrella – I followed this lady for ages, think she rumbled me in the end. XF10-24mm, 1/125sec at f/22, ISO 400.
Tourists – the very first shot I took when I arrived. XF18-55mm, 1/100sec at f/7.1, ISO 200
Beggar at the Collosseum. Sadly, there are a lot of these. XF10-24mm, 1/240sec at f/5.6, ISO 400.
Tourists at the Collosseum – a flip out screen would have been handy. XF10-24mm, 1/1900sec at f/5, ISO 200
To understand the full gravitas of this situation, it’s important for you to understand what sort of a photographer I was before I started using X-series cameras. The immediate word that springs to mind is ‘safe’. Technically adept, but safe. I photographed landscapes because they don’t move, buildings because they don’t talk back to you and my dog, because he’ll do pretty much anything with the promise of a treat. The idea of photographing a fellow human being filled me with fear while the very thought of photographing a fellow human being in a candid way would have me blowing into a paper bag to calm my nerves.
But Fujifilm cameras have changed all that.
Vatican gift stall (2). XF10-24mm, 1/140sec at f8, ISO 200.
The Vatican, this is a heavy crop, but the quality remains. XF18-55mm, 1/80sec at f/10, ISO 200.
The Vatican. XF18-55mm, 1/80sec at f/10, ISO 200
Vatican gift stall. One of at least 100. XF10-24mm, 1/140sec at f/8, ISO 200
I’d borrowed the X-E2 to go on a short city break to Rome. It was accompanied by an XF18-55mm and an XF10-24mm. Ordinarily on a trip of this type, I would have sought out the tourist hot-spots, documented them in my technically adept way and then gone home to bury them on an external hard drive, never to be seen again. But with the X-E2 in my hand, I became some kind of gung-ho street photographer, snapping pretty much anything that moved, and some things that didn’t. Within minutes, Rome went from a selection of photo locations carefully plotted on a tourist map to a photographer’s playground. My playground, to be precise.
Fiat 500. XF10-24mm, 1/50sec at f/5.6, ISO 800.
Graffiti, apologies if it’s rude. XF10-24mm, 1/60sec at f/11, ISO 200.
The pictures I’ve brought home are unlike anything I’ve ever captured in a foreign city. They include people; people I’ve never met before, nor will I ever meet again. As you can see, they do also include a few shots where I lapsed into capturing subjects that didn’t have the ability to talk to me, but even these are a little different. They’re not hackneyed scenes photographed millions of times before by others, they’re my interpretations of the locations I visited; they communicate how I was feeling and how I viewed the area.
How was the X-E2? Well, it was excellent. Sure, it could do with an articulated rear screen, but I also enjoyed not having an optical viewfinder option to choose from; the finder in the X-T1 is fantastic, but I didn’t miss its functionality. In fact, I preferred the X-E2’s viewfinder simplicity (just don’t tell Fujifilm, OK?). The lenses were great, too – sharp, easy to use, no complaints.
So, am I alone, or have other experienced feeling of photographic invincibility with an X-series camera in their hands? Oh ok, just me then.
Who doesn’t love a little adventure from time to time?
My adventure begins with simplest of texts: “Fancy coming to Wales for a week, for free?” sent from my Mum on a weekday morning. Well who could pass on an opportunity like that? I hadn’t done a great deal of landscape photography and knew that this was a great chance to up my skills in this area.
I mentioned my trip to a few colleagues and they suggested I grab some ND Graduated filters to give me more control over the exposure of sky and land. I had never used an ND Filter before, but was excited to give them a go. I knew I couldn’t afford anything decent so I simply bought some £15 (delivered) ND filters with holders on Ebay.
So a few weeks later, fully prepared with all the bits and bobs (tripod, batteries, etc) we set off. I had only been to Wales once as a kid and didn’t remember it that well. All I knew was that I would see LOTS of sheep. Here was a little snap I caught and loved of one of the first sheep I saw there.
Blowing raspberries?
After settling into our holiday home, we planned out the week ahead. This included going into the underground mines, climbing Snowdon, visiting Anglesey and other holiday-type locations.
Destination number one had to be Snowdon as the weather forecast was looking good and we wanted the best visability when we made it to the top. My Fiancée and I decided to take the Snowdon Ranger path as it was recommended as beautiful and not too difficult.
Here are some of the shots going up the mountainside.
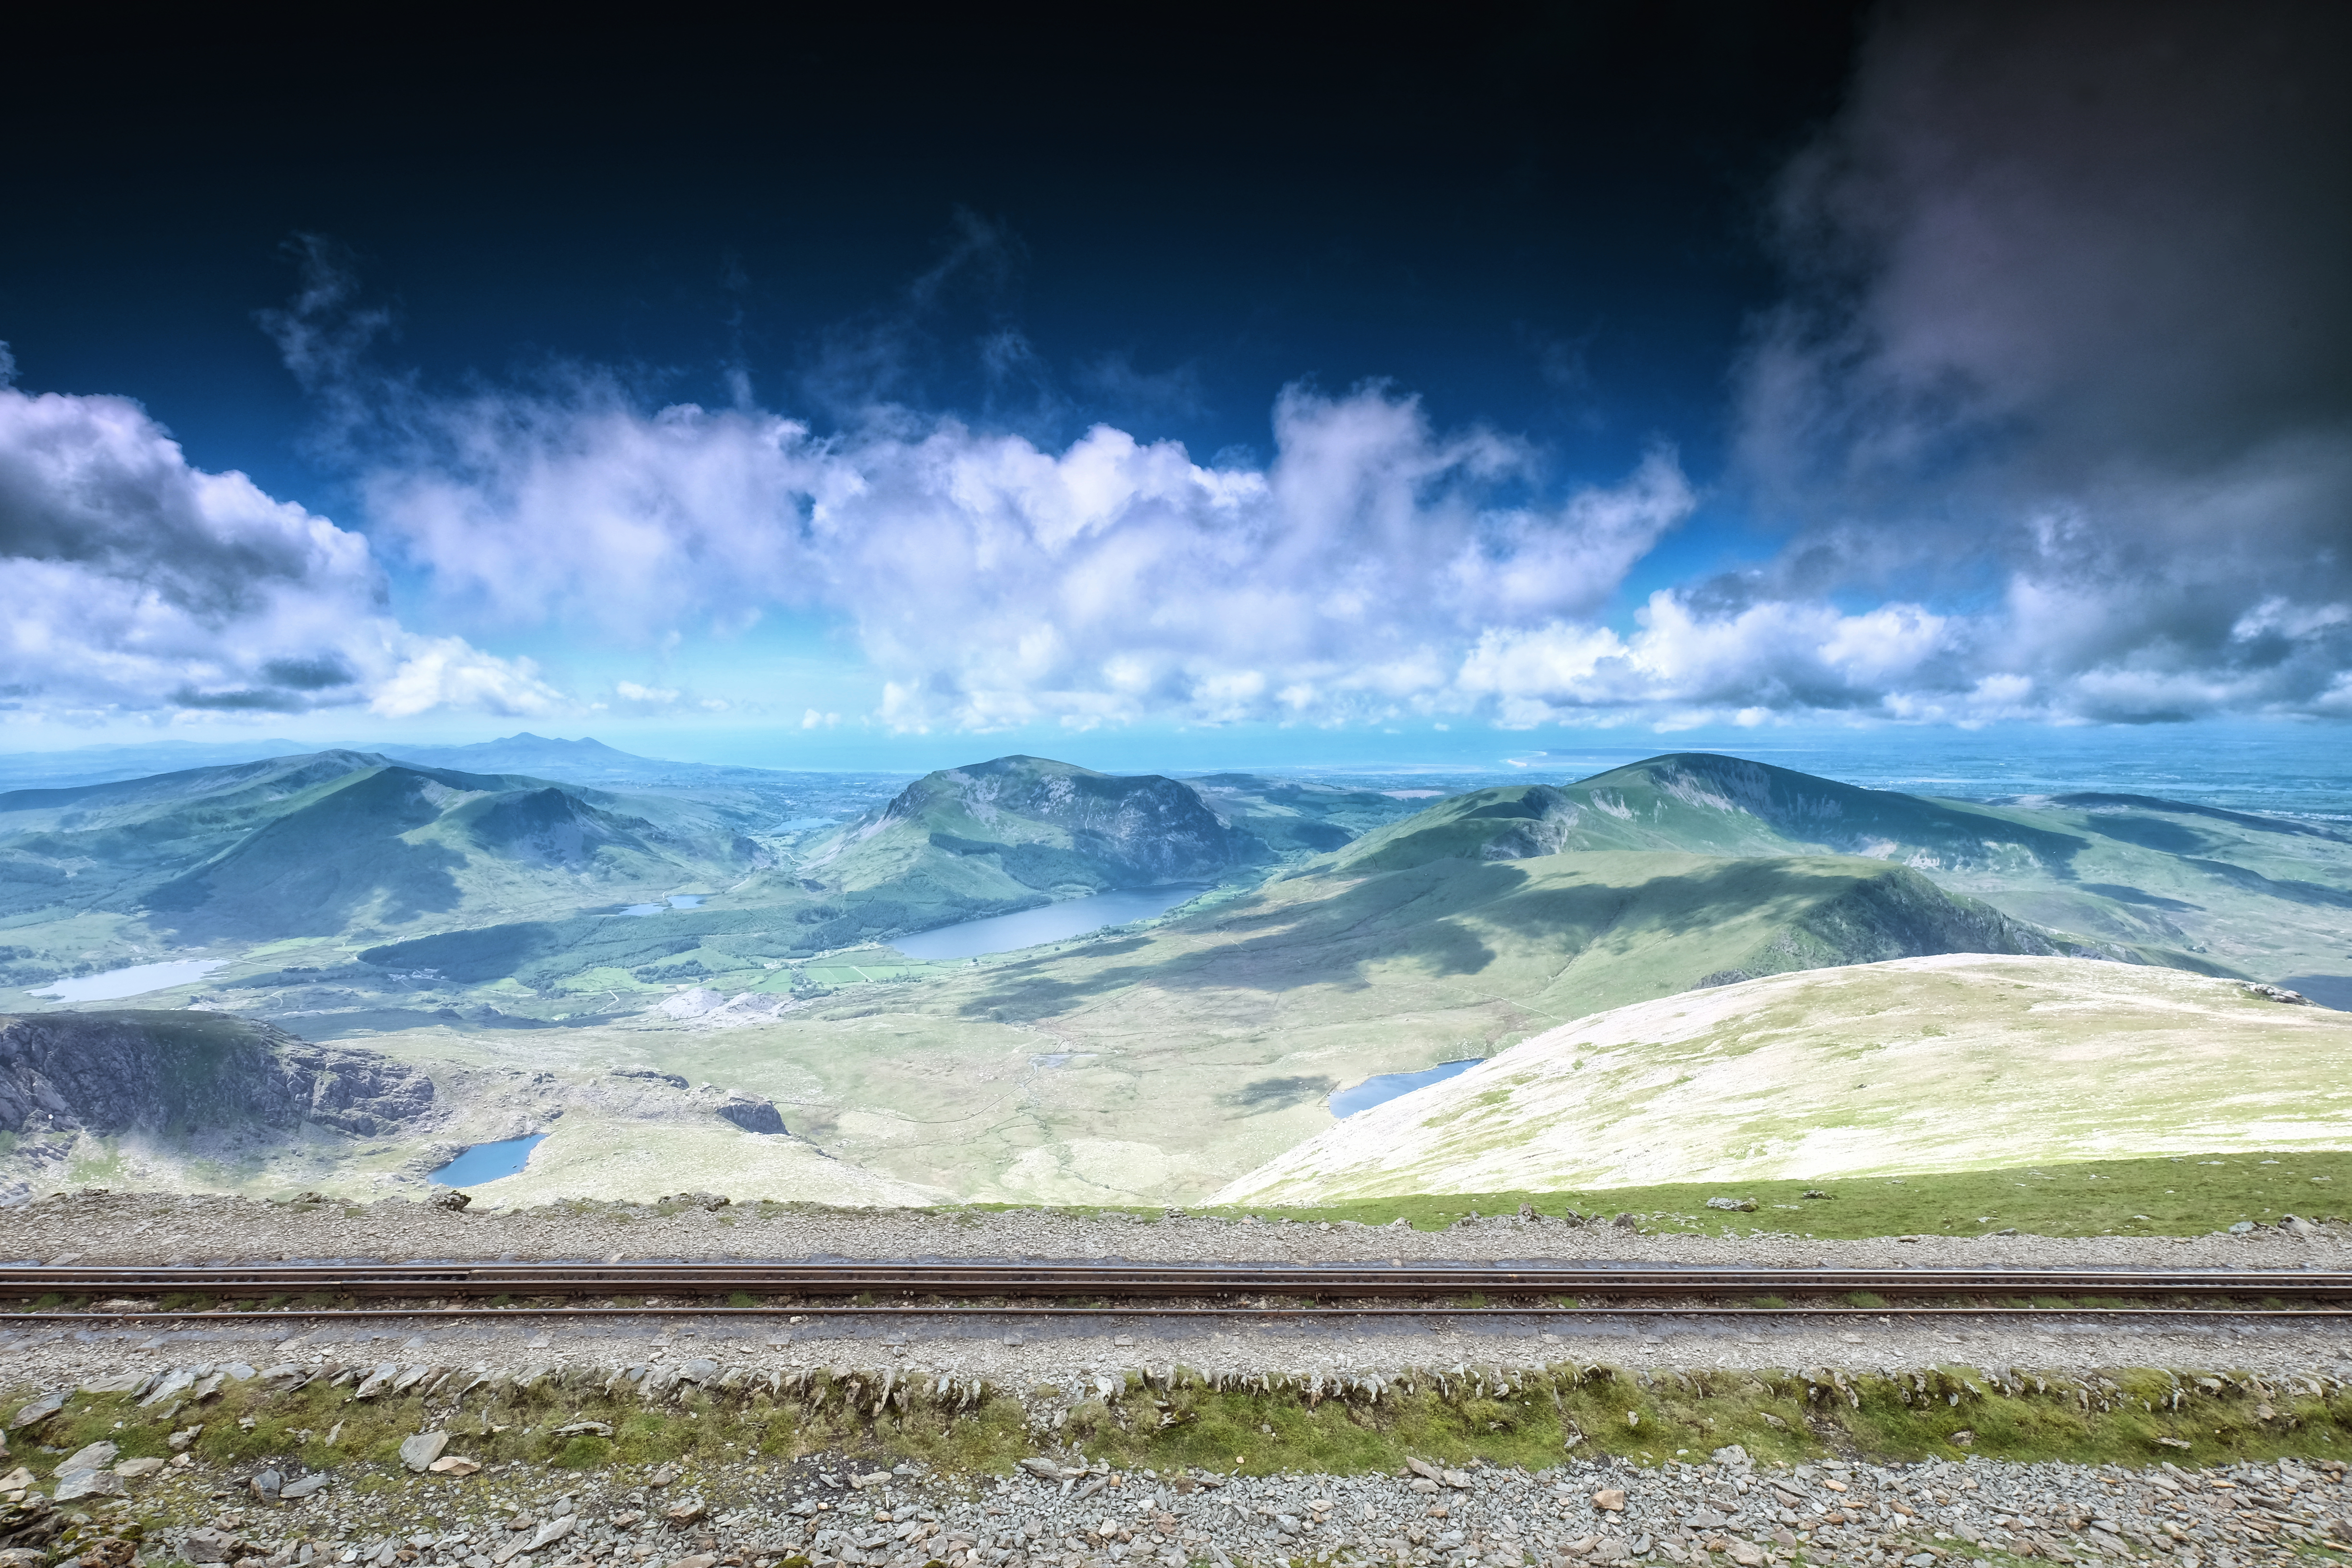
You may notice that the sky has that slight layered darkness to it, that is the ND grad filters. They help darken the sky area so the whole picture can be exposed correctly. Without them the sky would have been bright white and the colours would’ve been washed out. One problem I did face with the ND filters was that because they were cheap, they had a tendency to give a magenta colour cast on the image. To combat the issue, I used Photoshop to target problem areas using a Solid fill layer set to overlay and then picked a more suitable colour.
Once we made it to the top we saw the train that runs alongside the Llanberis path. A beautiful train though it was, I am glad we walked up for the sense of achievement and also the train did seem rather old and clunky! Made for a great snap though.
Here is the view from the very top. I boosted the colours a bit in Photoshop but it really was that clear and that beautiful. I highly recommend taking a visit if you can.
Now I love visiting Castles, something about the history and the medieval era interest me somewhat. So it is not surprising that we had to take a trip to the recommended – Conwy Castle. Unfortunately I didn’t get many good shots of the castle itself as I would have wanted to take them from the sea as a landscape shot and we didn’t come in from that side. However, it did give me an excellent viewpoint to trial the ‘Miniature’ mode on the camera. Here are some of the shots taken from the top.
One of my favourite days out had to be travelling round Anglesey. It was my turn to drive out of the family and I must say it was truly excellent. The roads were full of interest with their twists & turns, cliff edges and mountainous surroundings and the views were simply picturesque – everywhere. I remember I kept saying “We will get a picture here on the way back”, I said that about 20 times as pretty much every corner I turned there was another shot waiting to be taken.
One of the first places we stopped was a little place on the coast that I cannot remember the name due to it being “Oh that looks nice, let’s stop here for a minute and take some snaps”. A couple of hours later we were still there enjoying the views and wandering along the coastline.
Here are a few shots from this ‘unknown’ location using the ND grad filters again.
Once we had eaten some lunch here we knew it was time to move on to get the ‘necessary’ holiday ice-cream’ from a beach nearby, we chose the beautiful Beaumaris Pier in Anglesey (shot below).
Pier at Beaumaris – Anglesey
We also visited some other piers and beaches on the day. Here are two shots that I was really lucky to find. The first image is of a pier, my feet/shoes were pretty soaked after this one as the sea water was coming up from under the wooden beams! I have post-processed this image firstly into black and white and then colourised it with a blue tone to add to the drama of the shot.
ISO 200 – f/9 – 1/250 – XF10-24mm
The second image was shot on a pier that had this impressive looking building attached, I just loved the look in black and white with all the lines created in the flooring. Again using the ND grad filter to pull some contrast into the sky.
ISO 200 – f/4 – 1/550 – XF10-24mm
The final part of the day was to track down a good lighthouse image. I found the best one near to us to be South Stack Lighthouse. It was pretty difficult to find and quite a walk to it but it was well worth the effort. As mentioned previously in this blog the ND grad filters gave a magenta cast to all my images. With this particular image I didn’t filter much of it out as I loved the colour with this composition.
I have come to the end of my mini adventure and I hope you enjoyed being a part of it. Hopefully it will inspire you to go out and venture among these beautiful landscapes and just have fun.
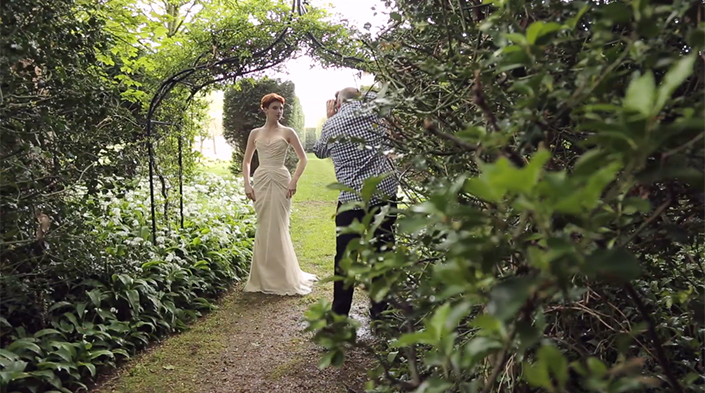
We’ve been working with professional portrait photographer Damien Lovegrove to bring you some videos that will inspire you to get more from your camera and help you take your photography to the next level.
Part 5 of 5
Damien finds that the available natural light in the garden is enough for close up portraits of Claire, but decides to use a flash system to brighten up some wider shots and provide some more “sun light”.
We hope you enjoy and please feel free to share with other people who might also like it.
About Damien
Damien Lovegrove is a renowned photographer and lighting guru. He specialises in portrait and beauty photography and teaches professional photographers his craft across the world.
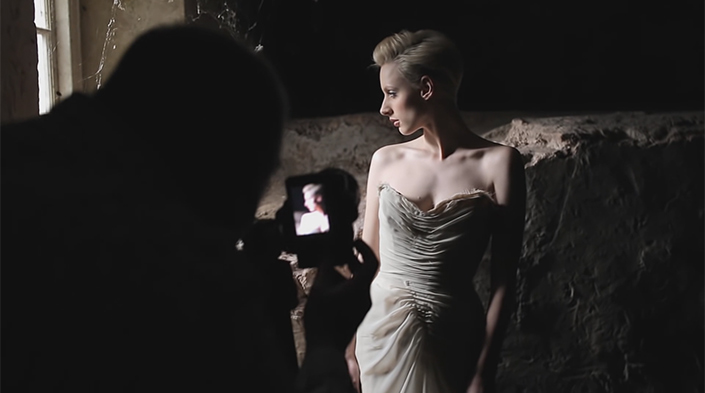
We’ve been working with professional portrait photographer Damien Lovegrove to bring you some videos that will inspire you to get more from your camera and help you take your photography to the next level.
Part 4 of 5
Damien goes down into a darker basement to make use of the ambient light to create some wonderful portraits.
We hope you enjoy and please feel free to share with other people who might also like it.
About Damien
Damien Lovegrove is a renowned photographer and lighting guru. He specialises in portrait and beauty photography and teaches professional photographers his craft across the world.