Month: May 2014

The camera really does matter – Philip Ewing shares his experience with the X100s


About the author

Philip Ewing has been an enthusiastic amateur photographer since his 35mm days on the university student newspaper. Today he works as a journalist in Washington, D.C. You can find more photos at
http://metrocommutr.tumblr.com/

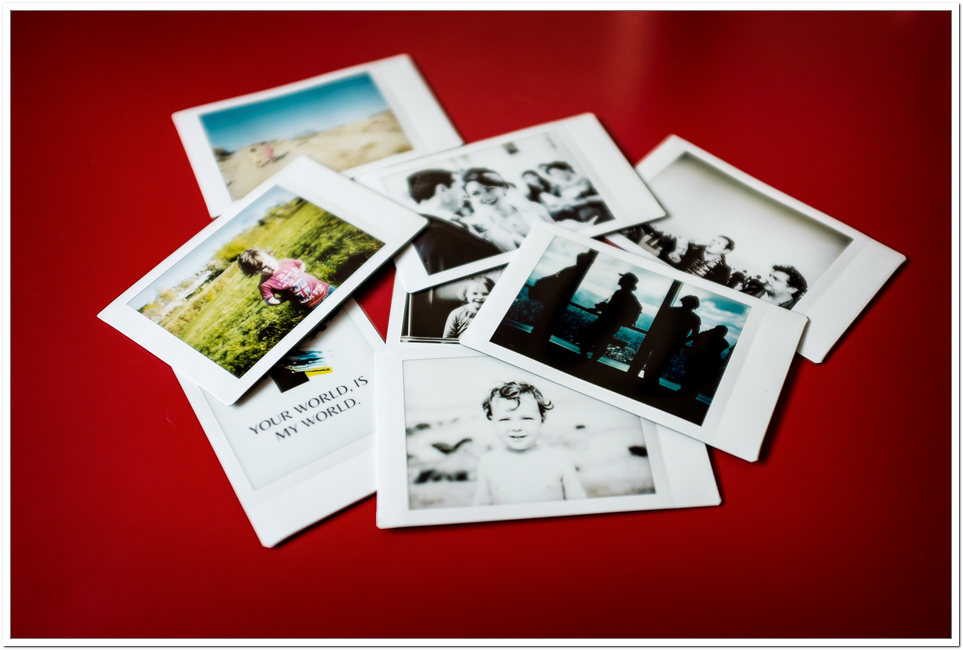
Photographers love to insist the camera doesn’t matter – our creative vision is what truly makes a picture, as the old bromide goes – but inside the family, we know a camera can make a huge difference.

When I decided to make a serious go at a photo project documenting my daily life on Washington, D.C.’s Metro underground system, I did not begin with a clear sense for what the images should be. Sometimes you can imagine a photo beforehand and getting it is just a matter of execution. Sometimes you sense there’s a picture out there … you almost smell it … but you don’t know exactly what it is or how to capture it. This was one of those.

madness
1/30 – f/2 – ISO1600

So starting last year, I began taking a camera with me every day on trips to work and around town. There were — and are — many more failures than successes. Plus my DSLR, along with the fast prime lenses I needed for dimly lit subterranean stations, was killing my back and shoulders. The files from my compact point-and-shoot didn’t have the detail or depth I wanted. Fortunately, there was a huge wave of anticipation about the then-new X100S, and I got on board. It has turned out to be an investment that has paid many unexpected dividends by enabling me to create pictures I didn’t know were there until the moment they presented themselves.

unamused
1/30 – f/2 – ISO1600

The unobtrusive little camera is light enough to carry all day, so you’ll actually take it with you, but it doesn’t force you to sacrifice sharp optics or a good sensor. It’s effectively silent, preserving your discretion in quiet train cars where an SLR shutter sounds like a gunshot. True, the X100S has a few quirks and faults and it isn’t the only tool I use to capture images. But the X100S is the one I carry 90 percent of the time, and it more than any other has helped translate the “sense” of a picture into an actual image.

crowded
1/30 – f/2.8 – ISO1250

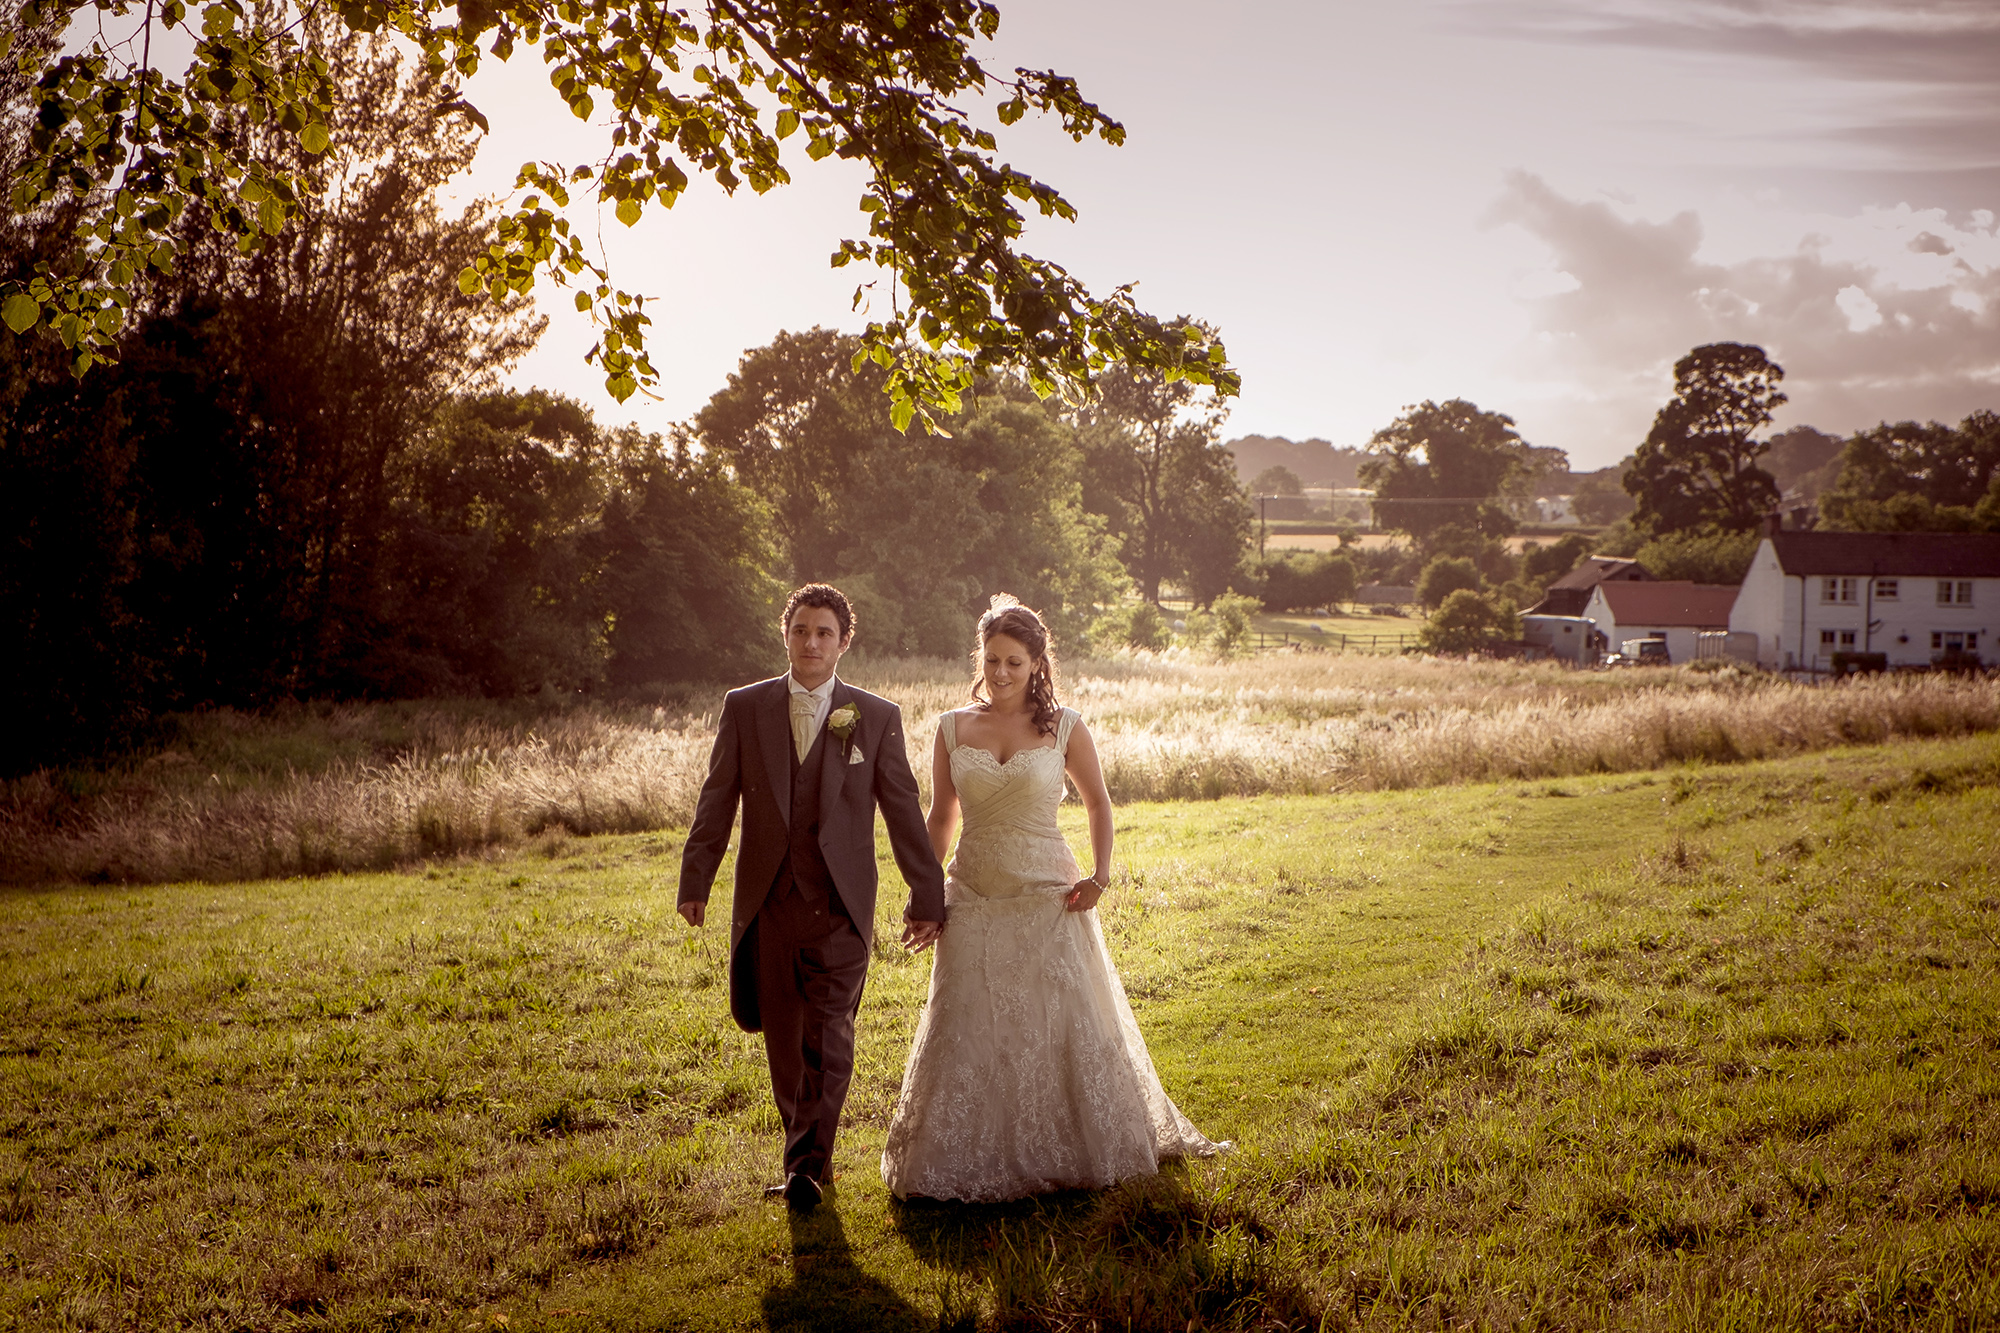
As it turned out, the other keys to the Metro project were the two most basic things in photography: People and light. If any of the pictures have been successful, it has been because good light hit an interesting person at just the right time. The trick was figuring out those places and moments and just being there to try to catch them.

passenger
1/1000 – f/5.6 – ISO400

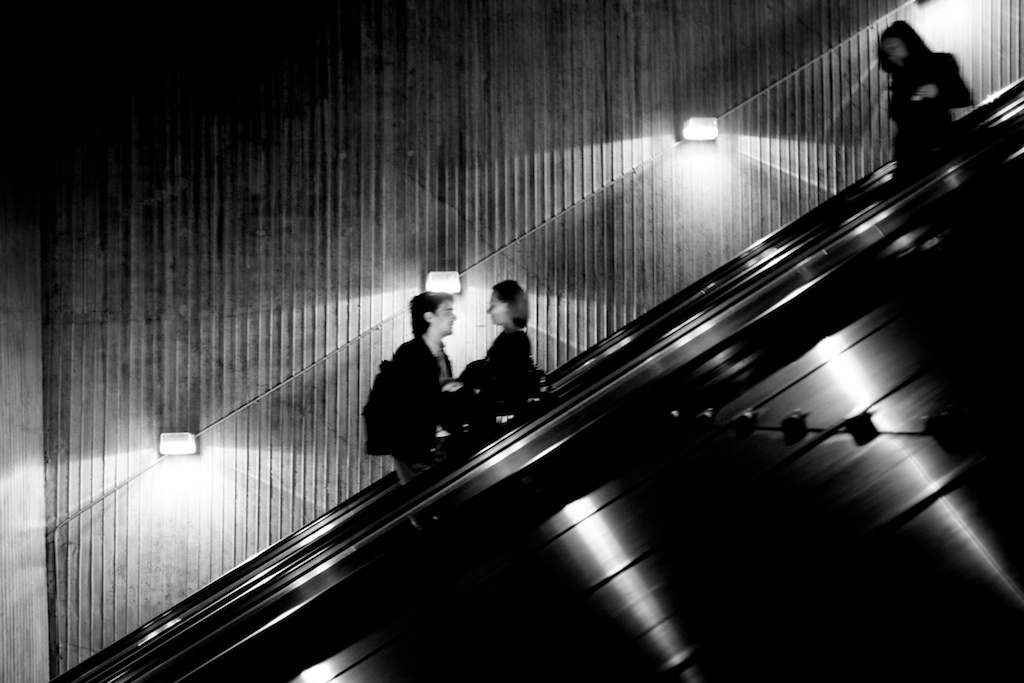
When a woman in a big woolen scarf emerged from a field of silhouettes as she stepped into a sunlit escalator — click. When a sunbeam inside a train car made a circuit over the passengers as we went around a bend, I set the camera to underexpose the scene and make a certain rider pop against the shadows. Dialing up 1/60th, f/2.8 and ISO 1250 with the Velvia film simulation mode can make the harsh-lit interior of a train car into a miniature stage for our human comedy.

escalator
1/1000 – f/4 – ISO400

There’s another aspect of using the X100S that has taken me by surprise: Its effect on others. Strangers stop you to ask about it — “It’s been years since I’ve seen somebody out using an old film camera!” they say. Once, I was photographing outside a Metro station and a D.C. police officer walked over. My heart began to race as I silently rehearsed a speech about my rights to take pictures in a public place. But there was no summons that day. “Hey,” he asked — “what kind of camera is that?”

museum
1/1000 – f5.6 – ISO400

See more of Philip’s photography here.

Testing out the TCL-X100 Tele-Conversion Lens for Fujifilm X100/X100S

When I first read about the forthcoming Tele-Conversion Lens for X100/X100S, being a very keen user and huge fan of the Fujifilm X100S, I was really looking forward to getting my hands on it and seeing what it can do.

I’ve used the WCL-X100 quite a bit and really love the results. Personally I can’t see any difference in the image quality and I’ve found those extra few millimetres can make all the difference when taking a few steps backwards is not an option.

Assuming the same could be said for the TCL-X100, I knew we’d have a product that will be highly regarded by the X100 community – you know who you are!

Image comparison

Here’s two comparison images of my kids. My eldest is like a statue with my “do not move your feet!” instructions. The other not taking this highly technical and scientific experiment as seriously as I’d like.

The River Ouse looking rather attractive – showing some more of the edge detail.

Another two showing edge detail.

Bokeh effect of the TCL-X100 compared to the XF35mmF1.4

James Limpua, a Facebook user, requested a comparison between the XF35mm and the X100S with TCL-X100. So here goes. X100S + TCL-X100 (+ in-built ND filter) are on the left, X-T1 with XF35mmF1.4 are on the right. Both shot at f/2.0.

Is digitally cropping pretty much the same as using this conversion lens?

A user has asked the question in the Comments section about whether Digital Cropping could have the same effect as using the TCL. I took a couple of example shots last night to demonstrate why the TCL is not just about bringing things closer, but actually narrowing your field of view.

Here’s two shots of my Millican bag. In both cases I lined the edge of the bag up with the 1/3rd gridlines on my camera. Obviously this means I was standing further away when I shot with the TCL.

As you can see, when I shot with the TCL on, the narrower field of view effectively makes the background appear much closer. One practical benefit of this is it allows you to cut out unwanted background distractions. Also, the longer focal length give a slight compression to the subject which is often more flattering. IF you notice in the samples, the bag looks slimmer in the TCL shot.

My verdict

IQ
Just like the WCL, as far as image quality is concerned, I personally can’t notice any loss of IQ when using the TCL-X100.

Autofocus
I have read people saying that the AF tends to miss more often with the TCL on but I have not experienced this. Although I’ve not used it in low light yet and I’ve only tested it on the X100S, not the X100.

Size and weight


My X100S is my absolute “go to” camera because it fits in my coat pocket, or in a small bag along with other things. The TCL does change that dynamic slightly, although it’s nothing I can’t overcome by storing it in my other pocket. If I’m really travelling light, unless I know I have a specific reason to have 50mm equiv, I’m probably going to leave this at home.

Overall
I think that after a fairly high investment (for a hobby) in an X100/S body, to be able to have the flexibility to change between 3 different focal length, leaf shutter, prime quality lenses (when factoring the WCL) for only a few hundred pounds extra per converter lens is a great move by Fujifilm.

You could live without it, and half the fun of the X100S is using your legs to zoom in or out and always thinking about what would fit into your 23mm (35mm FF equiv) frame, but this is certainly something that I will buy to turn my already awesome X100S into a better portrait camera.

As usual, please leave a comment below or send me a Tweet if you have any questions at all.

Learn more

For more information, including full specifications and where to buy, visit the TCL-X100 product page on the Fujifilm UK website.

Disclaimer

I may work for Fujifilm UK but I’m also a keen enthusiast photographer, and getting keener by the day. This blog is my opinion on the TCL-X100 and should not be considered the “official word of Fujifilm”.

Switching Systems – Interview with Michelle Williams

Interview with Michelle Williams – professional photographer that recently made the switch to the world of Fujifilm X

Michelle is a professional photographer from North Wales. She has been photographing weddings, newborns and animals as her full time job on a Canon camera for the last ten years. She recently discovered the Fujifilm X series of cameras so we got in touch to ask her a bit about her rite of discovery.

So what made you decide to try a Fujifilm camera?

I’m a Canon user and have been for ten years. I never thought I would want to change to another make of camera, ever. Recently however, I’ve seen a lot of feedback online about the Fuji cameras so last week I sold some bits and bought a used X-E1 and a 35mm lens.

I wasn’t expecting much as these things are usually prone to hype. I’d tried the Olympus pen for a walk around camera and it was good but more of a fun camera than one I would seriously use. From the very first image I took with the X-E1 I was nothing short of gobsmacked. I was so excited to see what it was capable of.

ISO 100 1500 F1.4

How has the X-E1 changed how you shoot?

I’ve not been out of the house without it since I bought it. This weekend I had a wedding and packed my usual kit of a 5D2 and a 7D with all my lenses. I also took along the little Fuji to play with if I got a chance.

To my surprise, I shot the majority of the day with the Fuji alone! The images are brilliant straight from camera which on a wedding means saving tons of time for me so again I’m taken aback by its capabilities…especially in low light!

I truly am blown away with the colour, clarity and functionality of this camera.

Once again, thank you to you all for making photography fun and exciting for me again. Keep up the great work!

See more of Michelle’s work by following her on Facebook https://www.facebook.com/michellewilliamsphotographyuk

Sun, sights & sunburn with the X-E2

I know what you’re thinking, sun on a bank holiday?…. Never.

It sure took me by surprise, so much so, that I didn’t want to waste one drop of it. It was time for my X-E2 to come on a sun-filled adventure to a local Cavalcade. 

I had the chance to borrow the XF56mm lens over the bank holiday weekend and I really wanted to give it a good go. I decided the best way to do that was to only take the XF56mm thus eliminating any other lens choices. I like doing this from time to time as it forces me to think harder about my composition and gets me moving in and out of the action far more regularly.

After battling through the traditional English queuing system for the car park and entrance, I saw a small tent with various furry animals with a few scary ones thrown in for good measure. I snapped this cute little Hedgehog relaxing in a lady’s hat. I can also confirm that he was actually surprisingly soft!

DSCF0133

I also caught this seemingly unimpressed Owl, but I loved the colours in the background that I had to share it with you.

DSCF0128DSCF0143

After moving from the animal kingdom, I took to an area filled with small miniature ‘lands’ and fairgrounds, most of which were handmade by the stall owners. Some were really quite impressive. I knew I could get some serious bokeh effects here using the f/1.2 aperture. Here are some of the results I got.

DSCF0175DSCF0172DSCF0166DSCF0173

After having a go on some remote controlled boats, having a race with my fiancée, and ‘letting’ her win, we stepped outside the modelers tent and saw this clown doing his thing. I love this next shot because of the people in the background watching him go by. 

DSCF0215

One thing you’ve just got to love about days out like this, there are simply SO many subjects to take pictures of. As we strolled across the fiery grass I came across lots of random but interesting scenes. Here are a few of my favourites.

DSCF0211
Find the best expression & give it attention in the composition
DSCF0220
Look to fill the frame for maximum colour impact
DSCF0232
Shoot candid shots whenever you get a chance

A little later in the afternoon after grabbing an ice-cream and putting on some much needed (yet too late) suncream. We could hear the in-house speakers beckoning us to a central location where cars of all shapes and sizes were going to present. This was probably the trickiest part of the day (photography-wise) as the sun was very high, beating down and creating a very bright, high-contrast scene. I wanted to slow the shutter speed down to capture some movement here but had to stray away from the idea due to this brightness. What I needed to have brought with me was an ND (Neutral density) filter. This is best described as ‘sunglasses’ for the lens. Here are some of the shots that came out pretty well.

DSCF0199 DSCF0203 DSCF0190

All in all, this was the perfect day for photography, great light, great subjects and a cracking good lens! The XF56mm never failed to focus once and is sharp as a button. I hope that you all have as good an experience as I did. We would love to see your bank holiday images popping up on our Facebook page and Twitter accounts!


Fujifilm Instax Share SP-1 Smartphoto Printer – Review by Kevin Mullins

A little while back someone showed me the Fujifilm Instax Share SP-1 Smartphoto Printer.  At first, I though…meh!  I could see it’s uses, but I couldn’t see it’s uses for me.

Instax-Share-SP-1-1Instax-Share-SP-1-2

Instax Share SP-1 next to an X100S for size comparison

This changed once I received it last week.

Let me tell you a little anecdote;  My daughter has one of the Instax Mini 8 cameras.  It’s pink (she’s five years old).  She adores it and she snaps away at anybody who will allow her.  She has a little album and it’s been a wonderful way for her to enter into the world of photography.

So, when I received the Fujifilm Instax Share SP-1 Smartphoto Printer I was intrigued, more than anything, to see how I could utilise it in my day to day work.

The Fujifilm Instax Share SP-1 Smartphoto Printer is nicely designed, and rounded.  The buttons are tactile and well positioned.  There is a neat battery indicator and also an exposures remaining LED.

It looks good and is really quite discrete too.  I have a white one, and I’m not sure if other colours will be offered.

Instax-Share-SP-1-3
Battery indicator and exposures remaining LED are very useful
Instax-Share-SP-1-4
A very handy reprint button will duplicate your last exposure. Good thinking Fuji!
Instax-Share-SP-1-5
The device simply looks good and the branding is discrete.

As you probably know, by day, I’m a professional documentary wedding photographer, and my other passion is Street Photography.

Street Photographers I think will simply love this device.  If you shoot portraits on the street, as I do occasionally, I usually end up offering the subject a business card and asking them to email me (I always send them a small print in the post if they do email).  This is a laborious task right? and an even more pain if you are shooting abroad.

I can see me taking the Fujifilm Instax Share SP-1 Smartphoto Printer with me when ever I shoot street now.  It’s small enough (101.6mm x 42mm x 122.5mm / 253g ) to slip into a bag and the two CR2 batteries will last for around a hundred exposures.  Plenty for a few shooting trips for me.

So; engage with subject, shoot, print…..away you go.  Very cool.

I was a bit reticent about using it at a wedding.  My style is totally candid.  I don’t really do bridal portraits etc.  However, I gladly took the SP-1 with me to a wedding I shot in the South of France last weekend.

This is what I did – and this is where I think it will be amazingly powerful for wedding photographers:

  • Shot the wedding all day using my X-T1 and X100S
  • During the down time I WiFi’ed (is that a real word?) over an image from the X-T1 to my iPad.  If you don’t have a wifi enabled camera you can of course simply ingest the card to the device.
  • I used Snapseed to edit the image sightly.  A bit of contrast and conversion to black and white.
  • I printed on the Instax Share SP-1
  • I gave it to the bride and groom as I left
  • They cried….said it was wonderful….and showed it to everyone else.
  • Boom!  Added value for wedding photographers right there.

Instax-Share-SP-1-7Instax-Share-SP-1-8Instax-Share-SP-1-10Instax-Share-SP-1-6Instax-Share-SP-1-11Instax-Share-SP-1-12Instax-Share-SP-1-13

 Connecting the printer, editing and printing the image took around one minute in total.
Connecting the printer, editing and printing the image took around one minute in total.

I can see wedding shooters who offer a more formal type of photography benefiting from this as well.  Being able to take a portrait of Aunty Mabel and print it there and then is going to make you the good guy (or girl).

Fujifilm Instax Share SP-1 Smartphoto Printer Print Quality

The print quality is fine.  You are not going to lose print sales post event by handing these out.  They are very much aimed at resembling the Poloroids of past and that, they do very well.  According to Fuji the print resolution is 10 dots/mm (254 dpi) with 256 levels per color (RGB).  It’s not hi-res printing but the images that do come out are snappy and certainly of a high enough quality to make people go “Ooooo” and even, perhaps “Aaaaah”.

The physical size of the images are 62mm x 46mm, so not huge….but perfect for street shooters and wedding photographers a like I think.

Cool things I like about the Fujifilm Instax Share SP-1 Smartphoto Printer:

  • Very quick to connect.
  • The App Software is very easy to use.
  • The printer itself tells you via the green LED lights how many exposures are left on the roll.
  • The App Software tells you which images you’ve already printed, or if an image is not usable.
  • Print time is around 9 seconds in total.
  • Didn’t have a miss communication once.
  • It’s a pretty small device.
  • Comes with batteries and two cassettes of film in the box.

A couple of things I’d like to see with the Fujifilm Instax Share SP-1 Smartphoto Printer in the future:

  • The ability to print direct from a WiFi enabled camera (X-T1 for example) would be awesome.
  • A better set of templates and editing options in the App
  • It would be cool to have a strap too.  I know, I know, you aren’t going to walk around all day with this around your neck but if you are doing a run of portraits, at a wedding perhaps, it would be useful.

Using the Fujifilm Instax Share SP-1 Smartphoto Printer:

  • You need the Instax Share App.  I believe this is available for iOS (iPhone and iPad) and Android devices.  I just used the iPad version.
  • Simply hold the power button the printer down for about a second and it comes to life.
  • At the same time, it creates and ad hoc wi-fi network (you can change the name, password etc if you are security conscience).
  • Go into your device settings and connect to that network.
  • Launch the Insax Share App.
  • Select the image.
  • Edit, add text, rotate the image etc as you see fit.
  • Press PRINT.
  • Then wait around 9-15 seconds for the emulation to be exposed in front of your eyes.
  • Stand back and admire your work.

The application comes with some themes and basic editing functionality (though I suspect any serious photographer will edit the images first in another image editing app on their device).  There are some neat uses of the themes where I can see it being useful to put your name or your website address on the image via the software.  All very cool stuff.   You can make the image Sepia or black and white too but, as mentioned, something like Snapseed is far better positioned for this type of editing.

In summary – I think this is a great device.  I know there are similar things on the market but for me this is a well rounded all in one solution for printing your phone photos or from a wi-fi enabled camera.

I really, really, really, really want to be able to print directly from the X-T1 and other wifi enabled cameras though.  I think that would make this device go from seriously useful, to absolutely necessary for travel photographers, street photographers and wedding photographers who want to give their clients that little extra.

Enjoy it.  I did.

Written by Kevin Mullins

“Why the X series?” with Martin Castein

Why choose the X-Series? Read our guest blog by Martin Castein to find out.

About Martin
Martin has achieved 18 gold awards at SWPP (Society of Wedding and Portrait Photographers) which is one of the largest international photography organizations in the world. Is the 2013 SWPP architectural photographer of the year and has also been nominated by the judges as the SWPP overall photographer of the year for 2013.

The Fuji X-series journey for me began with the excellent X-E1 and now the X-Pro1. The weight-saving advantage of the X series is obvious. But let’s look a little deeper than that.

EVF and Sensor
For the type of photography I do, I like to bring out a lot of detail, colour and contrast in my images.
So for me it is vital that I get my exposures absolutely perfect and that the sensor of the camera is truly capable when it comes to delivering detail, dynamic range and the tone the sensor produces, particularly skin tones.
Let me give you an example. This image was processed in Lightroom. The sensor can handle the complex lighting easily, in fact better than some current top end DSLRs I have owned.

XF-18-55mm - ISO200 - f/2.8
XF-18-55mm – ISO200 – f/2.8

Colour
I work mostly in colour. I love colour.
We live in the digital age where colour can be so expressive and powerful.
The Fuji X-series sensor can match and in most instances beat other manufacturers when it comes to these issues.

When the X-trans sensor is combined with the live exposure of the Fuji X-series EVF, we have the recipe for a very high hit-rate of usable images.
This next image was taken with a wall blocking half the image, the flare on the left is from a window, not post production. I could see this in viewfinder before I took the image, this aids creativity. Post production in Lightroom again, very simple with the brilliant colour of the X-trans sensor.

XF18-55mm - ISO640 - f/4
XF18-55mm – ISO640 – f/4

Manual focus
I really love the ability to use manual focus and then have the back button do autofocus should I require it. I use this all the time. It is like manual focus with auto focus override. With other systems we have auto focus with manual override.
This works because it is so easy to see what is in focus in the EVF.
I can see the focus peeking, working all the time. This way I can fire off shots freely, capturing moments and know immediately when it is time to change my focus. That’s the benefit of not needing to take the camera away from your eye. What you see is what you get.

LCD screen
Additionally, it is an advantage to have a rear LCD screen that can focus the same way as the viewfinder can. This allows me to get unusual angles and shoot from angles that wouldn’t be easy to manage with a DSLR. In the past I went through a lot of trial and error with a DSLR to get the same angles.

Advantages
So for me the biggest advantage of the X-series is the combination of the incredible performance of the X-trans sensor with Fuji’s brilliant implementation of the electronic viewfinder and manual focusing. Of course coupled with the savings in size and weight.

Lets remember
We are artists. As photographers we rely on our equipment to allow us to fulfil our artistic vision. The urge that drives us to create, that is what we are all about as photographers. The tool we do that with, our camera, ultimately either enhances this ambition or it stifles it.
The fact is our choice of camera affects how we feel about photography.
Fuji made that t-shirt we all like to wear, they made the camera that speaks to the photographer in a way that is hard to verbalise other than it feels right.

XF35mm - ISO200 - f/5.6
XF35mm – ISO200 – f/5.6

To see more of Martin’s work, please visit his website here or follow him on Facebook