After my last blog encouraged you to make a tripod using a piece of string, I’m going to go a little more surreal this time by explaining how an old frying pan can be used to get dramatic low angle images. The standard route to getting a low viewpoint is either to lie on the floor, use a camera with a tilting screen or mount the camera on a tripod that can be dropped to ground level. The first two options can involve you getting wet and don’t work if you want to use a longer exposure as you’re hand-holding. The latter can be a real fiddle. My frying pan groundpod, however, overcomes all of those issues.
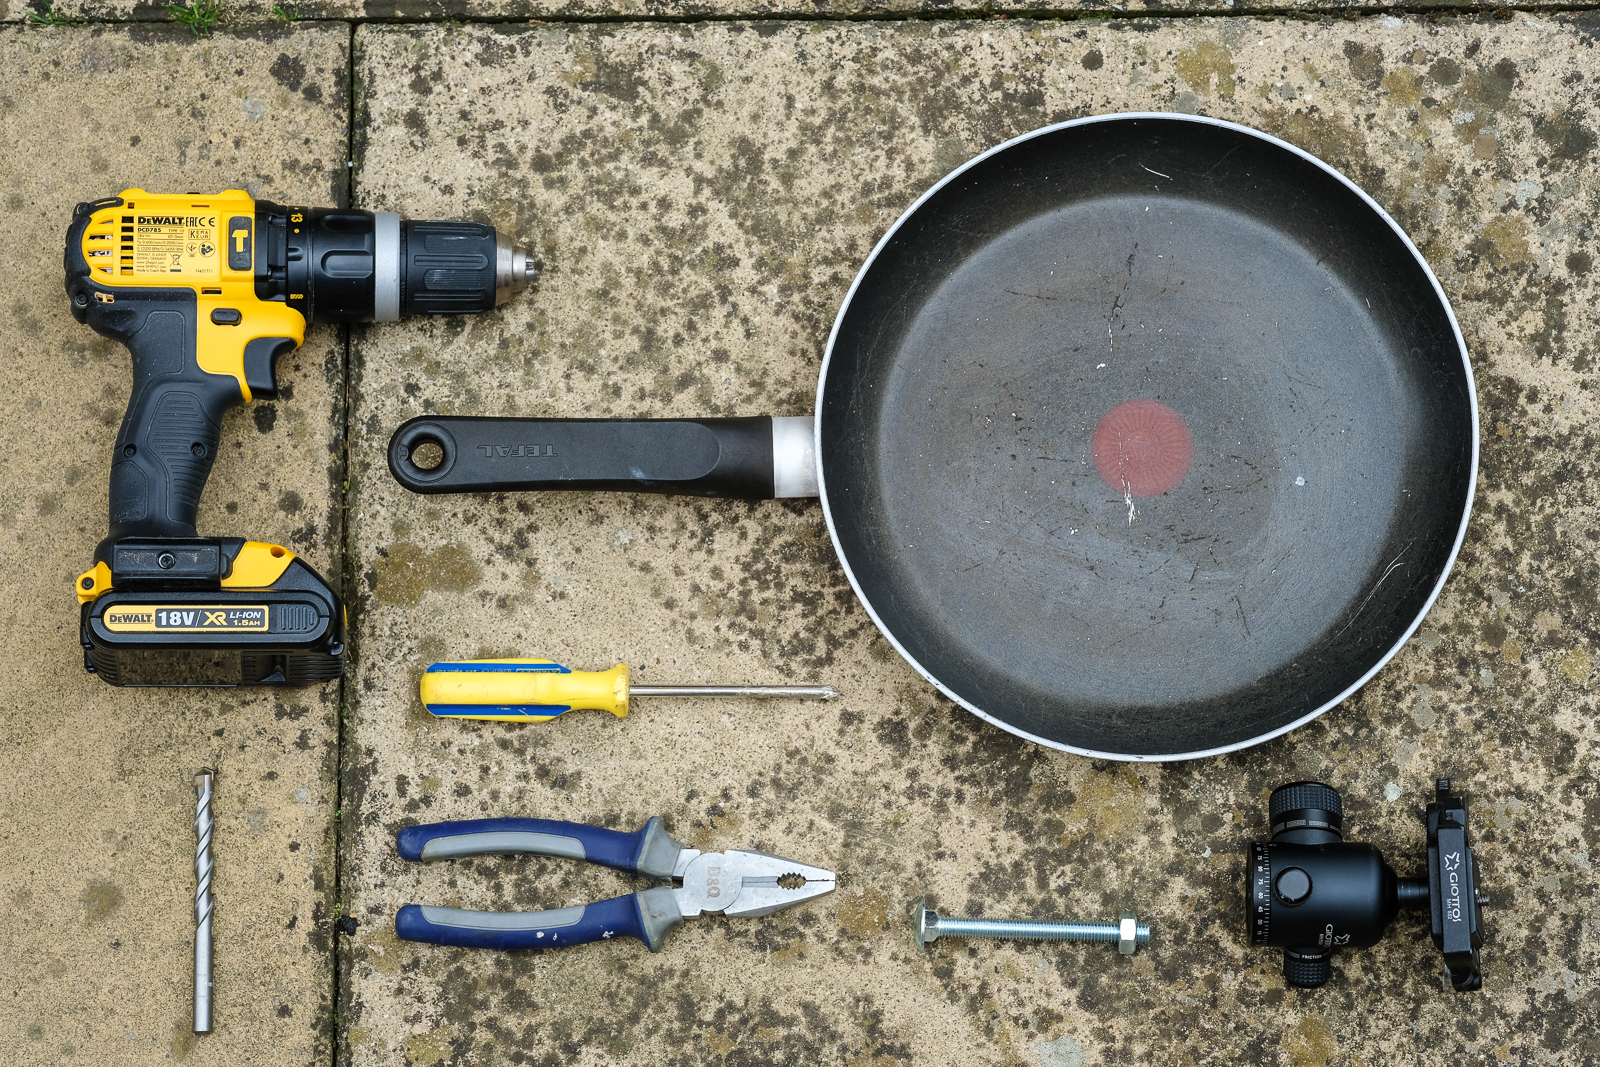
So here’s what you need. An old frying pan, a tripod ball & socket head, a nut & bolt and tools including a drill with a 10mm bit that is suitable for going through metal.

First up, you need to check what size screw thread the ball & socket head has. The standard size is ⅜” but you can also get little inserts – as I have here – that converts the thread to a ¼”. In either case, these imperial sizes are not readily available in DIY stores as the world has gone metric, but they can be found online. You’ll need both nut and bolt.

Raise the frying pan off the ground and drill a hole in the centre. It doesn’t have to be absolutely central. Take care if you’re drilling through a Teflon-coated non-stick frying pan like me and, as you’ll discover, this can take some time as frying pans are pretty tough. Once you’re through, tap any sharp edges of metal down with a hammer.

Now take your tripod head, pass the bolt through the hole and screw it into the base of the head. If you have a long bolt like me, cut the excess length off with a hacksaw and then secure it all with the bolt. Your frying pan pod is now ready for action. Obviously, with a bolt in the base, this can’t be used on a solid surface, but it’s perfect for grass, soil, pebbles, mud and sand. I headed to the beach to try mine out.

With an X-T10 attached to the tripod head and its LCD screen flipped out it was easy to frame up my shots exactly as I wanted them at the water’s edge. The sides of the frying pan kept both sand and sea away from the camera so I was able to try a variety of images.

Here’s one of my favourites, I think the sail on the horizon makes it.

Finally, just a couple of notes. While the groundpod can help you get some great low angle images, I can’t be held responsible for any funny looks you might get while using it – it does look as though you’re frying your camera! Also, if you are taking pictures at the sea be aware that cameras and saltwater are uneasy bedfellows.

For more information on the Fujifilm X-T10 click here.


 For me personally, long exposure (LE) photography allows me to explore a sense of calm, a visual relaxation that matches the way I feel when I look at the landscape. But for some, the technical side of this style of photography makes it incredibly frustrating and stressful.