One of the most well known and widely used composition techniques is the ‘Rule of Thirds‘. Originally it was used as a guide to help landscape artists in the mid-19th century, but it was quickly discovered as a handy tool for photographers as well.
Why use the ‘Rule of Thirds’?
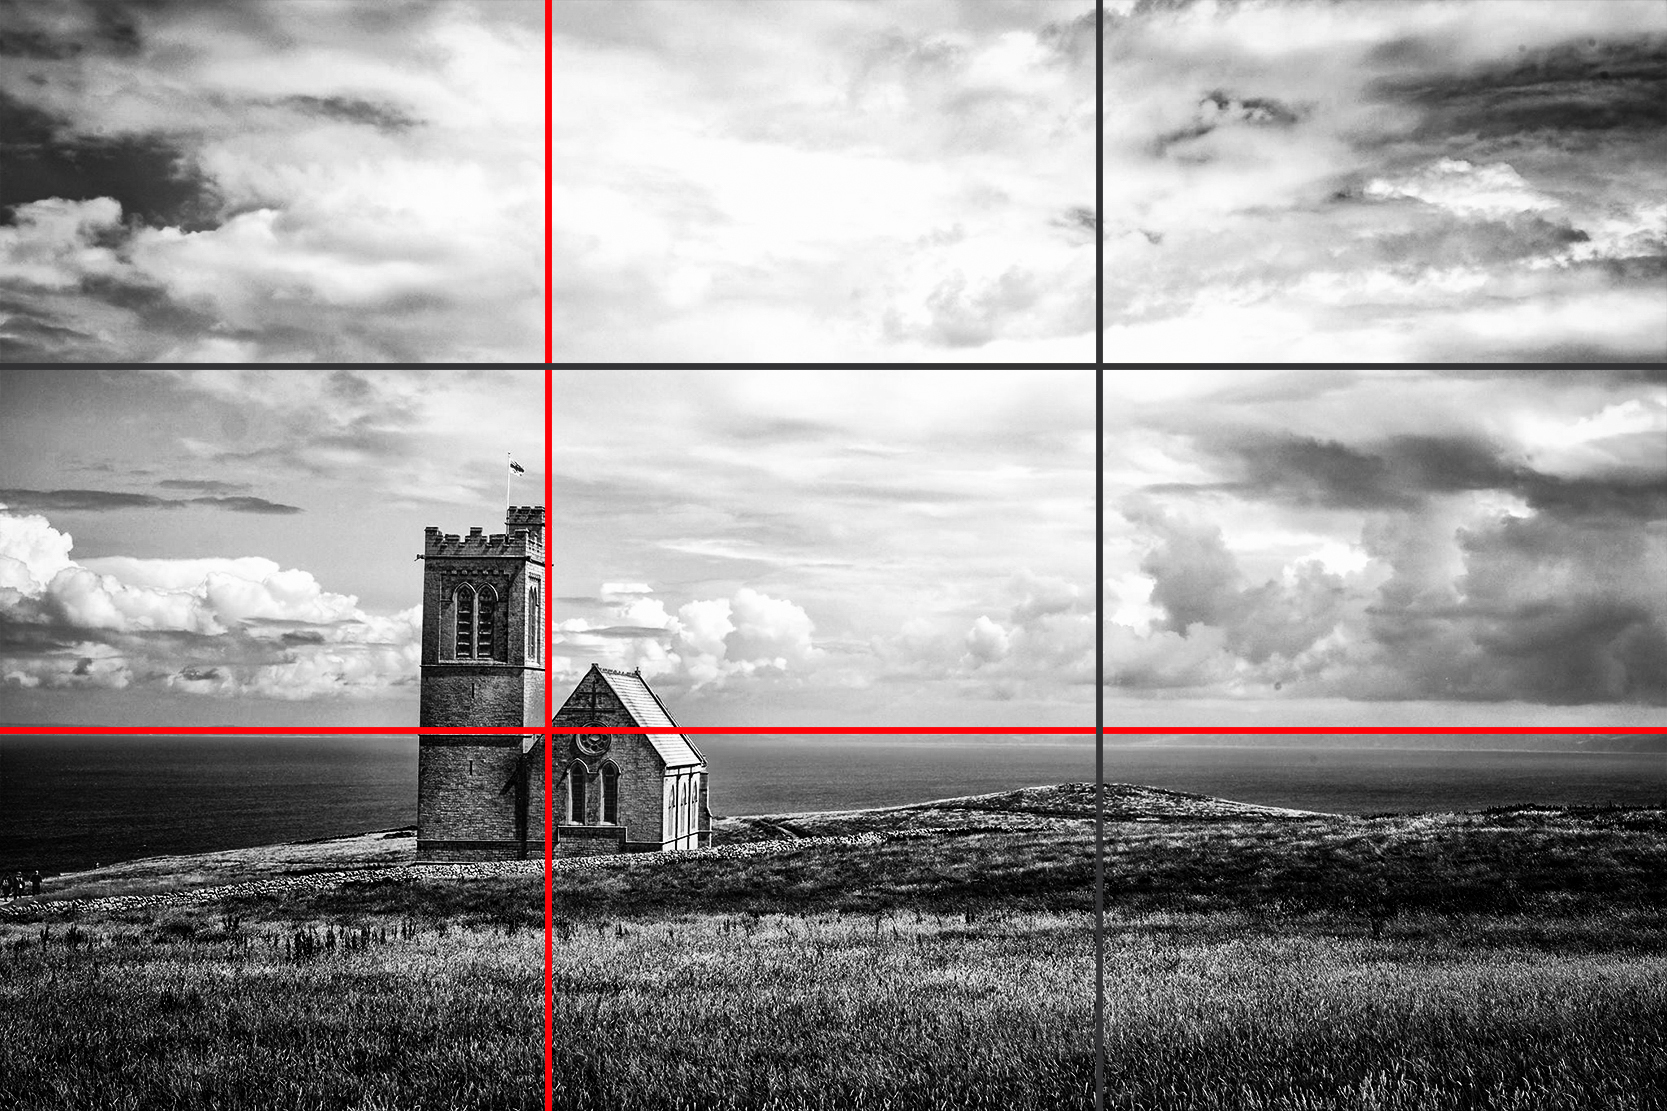
The idea behind the Rule of Thirds is to stop the photographer putting the subject in the centre of the frame. By doing this it allows the viewer more opportunity to explore the image as a whole rather than be fixed on the central point. For this rule to apply, you simply need to imagine that your frame is divided into nine equal sections with lines crossing the horizontal and vertical areas of the image. Or to make things easier still, go to the FRAMING GUIDELINE option found on your Fujifilm camera and turn the GRID 9 option on.

It is where these lines meet that is important, you should roughly aim to place your subject matter on or near these lines. In this particular example the tree has been placed directly on one of the third lines.

Which side?
You may also question where to place the subject in the frame. The left third or the right third of the image?
The right third of the frame is generally considered a better, safer placement of the subject matter (although this is subjective) due to the way a viewer ‘reads’ an image. Just like with books where we read left to right, we approach viewing an image in a similar manner. This means that when a viewer spots the subject of interest, they may stop exploring the rest of the image. Here is the same image simply flipped horizontally to give an idea of this effect.
Knowing the way a viewer ‘reads’ an image it can help you make creative decisions; by placing the subject on the left hand side you can create deliberate tension within your image.

Vertical AND horizontal
 You may also notice that not only the subject matter is placed on a third line but also the horizon line as well. The Rule of Thirds can be very handy at producing consistently good compositions, especially in landscape photography. Our recommendation is to place the horizon on one of the third lines – which one is up to you, but here’s a tip: If the sky is more interesting, let it fill two thirds of the frame and if the ground is more interesting, let that cover two thirds of the frame instead.

 So in this seascape image we have started to combine the elements discussed above; we have horizon placed on a third line, the seaweed sitting on the right third line and because the we wanted the foreground to be more interesting and prominent it takes up two thirds of the frame instead of the sky.
And it’s not all about landscapes either!
This rule can be applied to pretty much any type of photography, here are some examples of how it can be applied to portraiture and even action.
Keep it in mind
Keep these composition ideas in mind when looking at inspirational images – can you see them being applied?
Think consciously about your composition – it may feel unnatural the first time you try it out, but in no time at all you will be getting great results.
Before long, the Rule of Thirds will become part of your photographic toolkit – a solid starting point to let you explore for yourself and find your own style.
Until then, happy snapping! 🙂