BY BEN CHERRY
Witnessing a lightning storm can be frightening, but it can also be energising, certainly to photographers. The thrill of capturing lightning in a frame is like nectar to a photographer’s calling. Before we get consumed by this exciting subject it is important to remember that lightning storms can be extremely dangerous so please take suitable precautions when around a lightning storm; photographing lightning is great but it is not worth putting yourself in danger.
Lightning occurs all around the world, at different frequencies and strengths. I’ve been lucky enough experience a good few lightning storms, with my most memorable occurring in the tropics. But this isn’t to say that you can’t get great lightning shots wherever you are, all you need is some knowhow and then the lightning! Here is a brief 101 of lightning photography to get you started.
“It’s all about the light”
Like a flashgun, lightning is over in but a moment, and like flash if it is the predominant (or only) light source then it acts rather like its own shutter speed.
When using a flash at night for example, you might set the power output of the flash and then move to the camera settings. Generally speaking you turn the shutter speed to the maximum flash sync speed and then use ISO & aperture settings to compensate for the power of the flash. If it is too bright you increase the aperture and/or drop the ISO, if it is too dark then you do the opposite; much the same applies to lightning photography.
The intensity of the light from lightning is affected by two things:
The first is the power of the lightning: if it is a particularly large strike then if you’re set up for some previous strikes that weren’t as powerful, it’s more than likely the lightning will have blown out your highlights in the image.
The second thing to affect the light intensity is the distance between you and the lightning itself. Generally, lightning storms are large storm clouds which means that the lightning can be very close by one moment and then many miles away the next. These fluctuations in light can’t really be predicted but it is something to be aware of, and even to account for by increasing your aperture by a stop more than required to save your highlights.
Composition
Lightning is spectacular by itself but sometimes a scene can be made all the more special by being aware of your surroundings and looking for things that could add to the moment.
If you’re lucky enough to have something of interest in the foreground then see if you can add this to the electric scene. If there is still some ambient light around then you should be able to illuminate the foreground via your long exposure. If not, then illuminate using a torch or flash. This simple addition to the frame can help to better portray the scene. However bear in mind that you want to photograph as much of the lightning as possible so a sky-dominant frame will help to ensure this.
Intervalometer
Built into many of the X-Series cameras, an intervalometer allows you take a set number of photos with pre-determined intervals between each shot, this is set by the photographer and can be between 1 second to 24 hours. This is very helpful for lightning photography as you can set the camera to take a series of 30 second exposures (or less if this is overexposed) and sooner or later you’ll capture a lightning strike within one of those frames.
Be patient
The curse of photographing lightning is you can never guarantee where or when it will strike so you should always be prepared to wait a while for a good shot! At the same time though, be aware of where the storm is moving to and adjust your composition if it is moving out of frame.
Shoot RAW
This really can make all the difference! Because the exposure changes so frequently due to the intensity of the lightning, you cannot always achieve the perfect exposure 100% of the time. A RAW file records so much information compared to a JPEG that you can recover many more files which have the highlights blown out according to the histogram.
Daytime
If you come across a lightning storm during the daytime my method is to set up the aperture and ISO to the most light-demanding settings possible (e.g. F22 ISO 200) and then simply use the intervalometer to repeat the suitable shutter speed. It can produce some interesting results.
Let us know if you’ve caught any lightning photos using the hashtag #fujilightning
A little about Ben – Ben is an environmental photojournalist, zoologist and Fujifilm X-Photographer. His passion is showing the beauty and fragility of the natural world. Find more of his work at:
Following on from the last blog that covered what gear to use for wildlife photography, I’m going to explain how I set up my X-Series cameras for capturing action. Though some cameras are better than others for this type of photography, there are little ways to help yourself help improve your chances of capturing action.
High burst rate
Though using a high burst rate will eat through your memory cards space, shooting at a high frame rate will hopefully get a good selection of action shots.
Auto focus
First of all make your focus point as large as possible: do this by pressing the AF button and zooming out as far as you can. With a moving subject it will be very difficult to keep the subject in a small selection zone, so give yourself the best chance possible. Continuous focus (This applies to the X-T1 and X-E2 as they have vastly improved continuous AF functionality) is really helpful with certain subjects, especially if they are coming towards you. For those of you with models that are best in single focus mode, fear not! Generally the Fujifilm lenses are quick to auto focus so if you’re following a subject you can focus, take a shot and then focus again or alternatively prefocus if you know where the subject it going to go. Some photographers use cameras in MF mode and use the AFL/AEL button to focus. This is helpful because you can then use the manual focus ring on the lens and see what is in focus via focus peaking. Experiment and see what method works best for you.
This sequences was taken using the X-T1’s tilting screen and the XF56mm at F2.8.
ISO
My standard ISO setting is 800. To some this might seem high but the output from this is so clean that it isn’t a concern for me. If it’s a bit cloudy and I’m wanting to freeze the action I’ll push my ‘ready’ ISO to 1600. My philosophy is that it is better to have a sharp image that might be slightly noisy as you get up to than an image that might have some motion but has less or no noise.
A blue shark close up taken at ISO 1600
100% close up – In my eyes the noise (or lack of it) is not a problem at ISO 1600
Aperture
For action photography you have to decide if you want to freeze a moment, capture the motion or something in the grey area. If you want to freeze the action you’ll generally want to use a wider aperture to get a sufficiently high shutter speed. The shutter speed required to freeze depends on the pace of the action, and your chosen aperture is determined by the light conditions and your ISO choice. The thing to remember is that shutter speed, aperture and ISO are all intertwined. If you want to read more on apertures then read this previous blog (it contains puppies!). If you want to focus on one, say a faster shutter speed, then this has an adverse affect on the other two factors. If you’re wanting to freeze the action with a fast shutter speed AND also have a large depth of field then you have to increase the ISO. It is also about prioritising the most important factor for you and then compromise with the others. When aiming to freeze the action I am generally in aperture priority mode, where I have set the ISO according to the conditions (usually over 800), and I then choose an aperture to obtain the shutter speed I want.
Taken at 1/3800 sec, F5.6, ISO 800
If you want to capture motion blur, say through panning with your subject, then your shutter speed is having less of a constraint on your ISO and aperture so you can change these accordingly to reduce your shutter speed. One way to control this is through shutter speed priority, where you set shutter speed to what you want and then have the aperture in auto mode so it will change to keep the same low shutter speed (with the ISO previously set).
Taken at 1/13 sec, F16 ISO 200
Finally, another set up option for action is to set the aperture and shutter speed to what you want and then have the ISO in automatic mode. You could go fully manual but I find this can quickly lead to problems when trying to capture action, especially if there is a lot going on around you. This method can result in you missing fleeting moments.
Now that you know some action set ups go out and shoot! Let us know what your action set up is with the X-Series and share with us your action shots via our Fujifilm’s Facebook and Twitter. As ever, if you have any questions then please leave a comment below or contact me via:
As winter starts to set in, photographers are looking for ways to capture this cold season. For me, winter is best covered in the morning. This is a personal preference but in the mornings you have frost, a reasonable hour for sunrise and (if you’re lucky) fog or mist.
There are three types of fog, so you need to decide what you are looking for and this will depend on your location:
Ground fog – In mountainous/hilly areas and cold patches you can get ground fog collecting in valleys. After a rainy night or over wet ground you can get shallow precipitation fog.
Sea fog – Also called advection fog, this is where warm air passes over cold sea water.
Sea/River smoke – Where the air is colder than the water, creating a generally shallow level of fog, this is generally restricted to water areas, hence river smoke.
When trying to photograph fog you need to use the weather forecast to understand what the evening will be like in your desired location. I was fortunate enough to visit Curbar Edge in the Peak District the afternoon before my first morning I was there to scout the location. It was just before sunset and the fog was forming in the valley below and at that point I decided to try it out the following morning to see how it would look.
The weather for my first morning at Curbar was drizzling and there was a thick layer of cloud, which meant it was pretty unlikely I’d witness much golden light, I thought I’d set out and give it a go. I am so happy I did! This was my first real experience of photographing mist and it is incredible how quickly the spectacle evolves in front of your eyes. I one point I was photographing down one end of the valley, taking some long exposures, only to look over my shoulder and see that it had dramatically changed down the other end of the valley!
I used the X-T1 and the XF18-135mm lens for my main set up. As it was a wet morning the weather-sealed kit meant that I could stop worrying about the system and focus on the spectacle. As well as offering weather sealing, the XF18-135mm meant that I had great versatility, meaning that I didn’t have to worry about changing lenses the entire time. However, I also ended up using a neutral density filter to reduce the amount of light reaching the sensor to further extend the shutter speed. This was great but because I was using a filter set instead of screw in filters it meant that the front element was exposed to the conditions. Long exposures and rain drops do not mix! Thankfully a little umbrella tucked away in my bag helped to shelter the filter.
Generally I was not bothered about using a fast/moderate shutter speed so I set up the system on a tripod and used ISO 200 (the lowest RAW compatible ISO) and generally around F8. The addition of the ND filter, which was a 10-stop filter, meant that the shutter speed required was dramatically decreased. This results in the mist smoothing out, giving quite an interesting effect. See the comparisons below (note that despite the fact the ND filter is meant to be neutral it has put a distinct colour cast on the images).
0.6 sec
125 seconds
1/13 sec
58 seconds
1/10 sec
58 seconds
The ND filter extended the shutter speed so much that I had to use the bulb setting, as the required shutter speed was longer than 30 seconds. For this I used the remote trigger that allowed me to hold down the trigger (lockable) to keep the shutter open for as long as required. The X-T1 shows the length of the shutter speed on the back screen, this is very helpful. There is something to consider thought when using long exposures: the processing time. As soon as you go beyond 30 seconds, the processing time dramatically increases from seconds into minutes, this isn’t a problem but is something to be aware of when trying to photograph a scene that is evolving constantly.
To make sure I didn’t miss any moments while the X-T1 was processing and to get some different shots, I used the X100s with ISO 1600 to produce a fast enough shutter speed to allow me to use the camera one handed. Picture the scene: a wonderful valley filled with fog unfolding in front of me, one camera on a tripod; my left hand sheltering it with an umbrella; photographing the scene with the X100s in my right hand at the same time! Who says photographers can’t look cool…
The three above photos were taken with the X100s using the monochrome + red filter jpeg preset.
The reason I chose Curbar Edge is because it provides a high vantage point. This is really important to optimise your chances for good mist photography. It generally means that you should be hit by the early morning light and so should warm up faster! This is a valid point to consider on crisp winter mornings, not that it happened this time around. A high vantage point allows you to see for a greater distance, hopefully providing you with a greater number of layers to your picture. At the top of a valley, Curbar Edge allowed me to see for miles along the valley, which offered both valley fog and river smoke. The ability to then use a telephoto lens to zoom in on particular areas can result in some quite striking shots.
But also having the ability to instantly zoom wide was a great asset to try and obtain a variety of photographs.
The colour photos were all taken with the X-T1 and I used the Classic Chrome camera calibration in Lightroom which produced wonderful colours in my opinion. I have only just started using this camera calibration and I love it.
Though on this occasion the sun didn’t break through the thick cloud cover, the spectacle was nevertheless remarkable and I can only imagine what it would have looked like if sun rays had broken through.
The second morning
Despite being very happy with the previous morning I decided to give it another go as the forecast suggested there was a better chance of a proper sunrise. This time round I decided to not focus too much on lengthy shutter speeds, but instead the details in the fog. What I didn’t expect was the amount of fog!
The range of the 18-135mm meant that I could capture the grand scale of the fog at 18mm, with the car in the first of these pictures giving a sense of scale. Then using the longer end of the lens I pulled out particular parts of the landscape, such as the little cottage that looks like it should be in Harry Potter and the hilltops surrounded by a sea of fog, turning them into islands. As well as the incredible amount of fog, the sun did make a bit of an appearance too. Despite this it was a very cold morning, producing a wonderful frost. I was very happy to have packed a hat and pair of gloves.
I positioned myself so part of the hilltop was between me and the rising sun, creating a backlighting effect on Curbar Edge, which brings the fog alive.
Because of the brighter sky this time round I needed to use a ND gradual filter, where unlike the filter I used during the first morning, this one changes from one end to the other, as the name suggests. At one end it is darker (you can buy filters at different stops, depending on how dark you want to make part of the image), while at the other it has no effect on the light. I use these when I am photographing something with a sky that is much brighter than the ground below. With the above image I used a filter which didn’t stop down the light enough to correctly expose the sky but I like it nevertheless because of the frost (it get particularly difficult to expose correctly when the sun is in the image). While the picture below is a slightly better example of a ND gradual filter in use.
I hope this has proved helpful and now it is your turn to get out there and photograph the wintery conditions. Let us know how you get on.


 A little about Ben – Ben is an environmental photojournalist, zoologist and Fujifilm X-Photographer. His passion is showing the beauty and fragility of the natural world. Find more of his work at:
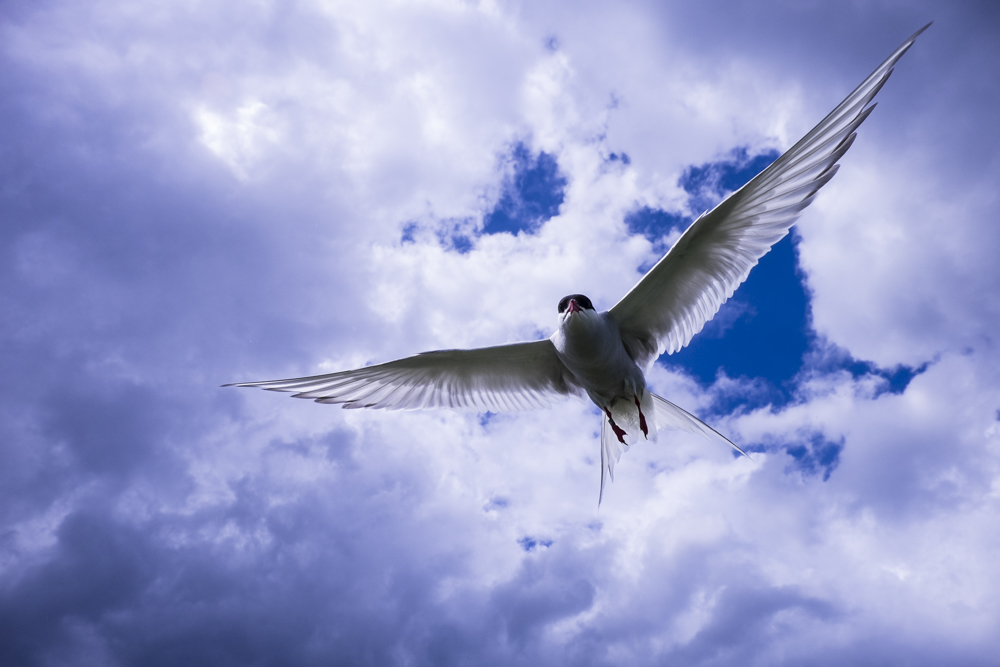


 100% close up – In my eyes the noise (or lack of it) is not a problem at ISO 1600


