
I’ve been using an X-T1 for the best part of a year now after finally admitting to myself that my X100S didn’t quite stand up to the variety of different photography subjects I had started to shoot. Don’t get me wrong, the X100S has a permanent slot in my camera bag, and will always be my travel-light camera, but apparently there’s more focal lengths out there than 35mm equiv!
The X-T1 has served me extremely well and as an amateur photographer with no real need for a second body, I wasn’t massively excited about the X-T10 for my personal use.
Then I actually used one…
Firstly: What I love about the X-T1
Image quality
I love the image quality of the X-T1. Pretty simple really. The RAW files are great for what you can do in Lightroom. So much data is captured that can be brought in. And the JPEGs are just beautiful, with plenty of in-built features and film simulation modes to give your images that final touch.

Live view
I shoot everything as close to what I want my final image to look like and I like to be able to see it before I shoot. For example, I’ll shoot street in black and white (JPG+RAW) and under exposed by 1/3 or 2/3 stop. For landscape photography (my biggest vice) I can see where my Grad filters are on the screen as I move them around. Same goes for the Polarising filter. (In case you’re interested, I use the Seven5 system from LEE. Great quality. Very small. Very Fuji!)

1/250 f/8 ISO200
Amazing quality EVF
I do not use my screen for anything other than composition (see below). For exposure checking and for quick previews of shots I just took, it’s all about the EVF. So clear. So high resolution. I cannot stress enough how useful this thing is for me.
Tilting screen
I’ve already mentioned that I love landscape photography. For this I will almost always use a tripod and when the camera is on the tripod, I’ll use the screen for 99% of the time. I’m a big lad – 6 foot 4 / 193cm to be precise, and I tend to prefer to shoot with my camera far below my eye level. The tilting screen saves me a lot of backache. Even in the sunshine, I just crank it right up to +5 brightness and it works fine (just remember to turn it back down when you turn your camera on next in a dark environment!)
Q menu + custom settings
I set my camera up to have 3 different custom settings. I have a “ready to edit” colour profile, a “ready to go” colour profile and a black and white profile. If you’re interested, this is what I currently have:
C1. Ready to edit colour: Pro Neg Std, -2 NR, -1 sharp, -2 highlight, -2 shadow, -1 color.
C2. Ready to go colour: Classic Chrome, -2 NR,-1 sharp, 0 highlight, 0 shadow, 0 color.
C3. Black and white: Mono+G, -2 NR, +1 sharp, +1 highlight, +1 shadow.
I still change on the fly, and I use the Q menu to make tweaks with the above settings as my starting point. C2 and C3 JPEGs will frequently be used straight out of camera. C1 JPEGs will have a bit of contrast added back and then used.
Looks amazing, feels amazing*, is a pleasure to shoot with
Not sure I need to expand on this. I love the manual exposure settings – aperture, shutter speed, ISO all at your finger tips. I love the simplicity of using the camera and how few buttons you can really get away with using. I also love the look of the camera.

1/1000 f/7.1 ISO200
Wifi
I use this a lot in my work as “social media guy for Fujifilm UK” and also in my personal life as “proud dad, must update Facebook with pictures of kids / cats”. It’s one of those features that some people can live with out, but I’m not one of those people.
And finally…
My lenses
I have an XF14, XF18-55, XF35 and XF56. All four of them get used regularly and all four of them are simply amazing.

So what about the X-T10?
Well look at the list above. The X-T10 has all of these.
What the X-T10 doesn’t have, when compared to the X-T1 is weather resistance. This doesn’t bother me personally. I’m so scared of catching a drop of water of the front lens element and ruining a shot that I’ll do my utmost to keep it dry at all times. It’s still an incredibly robust camera and I’m sure it’ll take a quick downpour and be fine (disclaimer: probably best to not try this at home).
Also, it doesn’t support UHS-II. This is only a problem if you are shooting continuous, which I rarely ever do. It can only shoot 8fps for a maximum of 8 frames. The X-T1 can shoot 8fps for 47 frames on a UHS-II card. This is obviously a massive difference and if you intend to shoot High-Speed Continuous, the X-T10 is severely lacking compared to its big brother.
The reason for the * next to “feels amazing” in my list above is that it comes with a caveat. It does feel great, but it doesn’t quite fit my hand “out of the box” and therefore is not as comfortable as the X-T1. It’s fine to shoot with while you support the lens with your left hand, but it doesn’t feel as comfortable in my hand in between shots. To me there’s not quite enough grip there. HOWEVER, there is an optional Hand Grip MHG-XT10 which resolves this. It doesn’t make the camera much heavier or bigger, but it adds a good bit of bulk to the hand grip which resolves this issue.

1/1000 f/8 ISO200
Now for the advantages of the X-T10 over the X-T1
The most important advantage is the size and weight. It’s a really tiny camera and (with the optional grip) is still comfortable to shoot with. It looks “even less pro” than the X-T1 to the uneducated, so if you’re shooting in places where security guards etc are not happy with professionals shooting, you are going to blend in as any other tourist. However the build quality is still top notch, check out this video below for a quick “factory tour”:
https://www.youtube.com/watch?v=9imKQZoQ1_U
Another advantage is that it doesn’t have an ISO dial like the X-T1 has. I know what you’re thinking: “How can this be an advantage?” I’ll tell you why. After using the camera for a bit and spending some time talking to Damien Lovegrove who has been using one professional for a week now, I realised the benefit.

X-T10 with XF35mm. 1/1000th, f/1.4, ISO800
On the X-T1, the ISO dial has a lock button that is a little clunky to use. On the X-T10, the front wheel is one of the function buttons which can be set to ISO. Once you do this, you can change the ISO value by pressing the wheel in, moving it left to right to change the setting, and then pressing it once more to save the value. You currently can’t do this on the X-T1 because ISO is controlled by a physical dial. Something I’ll ask Fujifilm Toyko to look at as it would be nice to be able to set the dial to A and then have a manual over-ride.
The last advantage is that it’s easier for a novice to use. I have very few images of me and the reason for this is my wife and kids don’t really use my cameras. The Auto switch on the top will definitely come in handy when I hand it over to one of them to use on family trips.
So what would I buy?
I work for Fujifilm and therefore inevitably get access to gear that would normally be way out of my budget in terms of how much I want to spend on my hobby.
I love my X-T1 and never thought I’d be looking at an alternative camera already. But the truth is, if I didn’t already have an X-T1, and if I was putting my own hand in my pocket to pay for the camera, I would definitely buy an X-T10.
I hope this post has helped to explain the reasons why and might come in handy if you are making a similar decision. If there’s anything else you’d like to know, please leave a comment below.
Summary
Need weatherproof? Go X-T1
Need High Speed Continuous Shooting? Go X-T1
Want a bit more bulk in your hand? Go X-T1
Need an additional battery grip? Go X-T1
Not too concerned about any of those points above? Go X-T10!


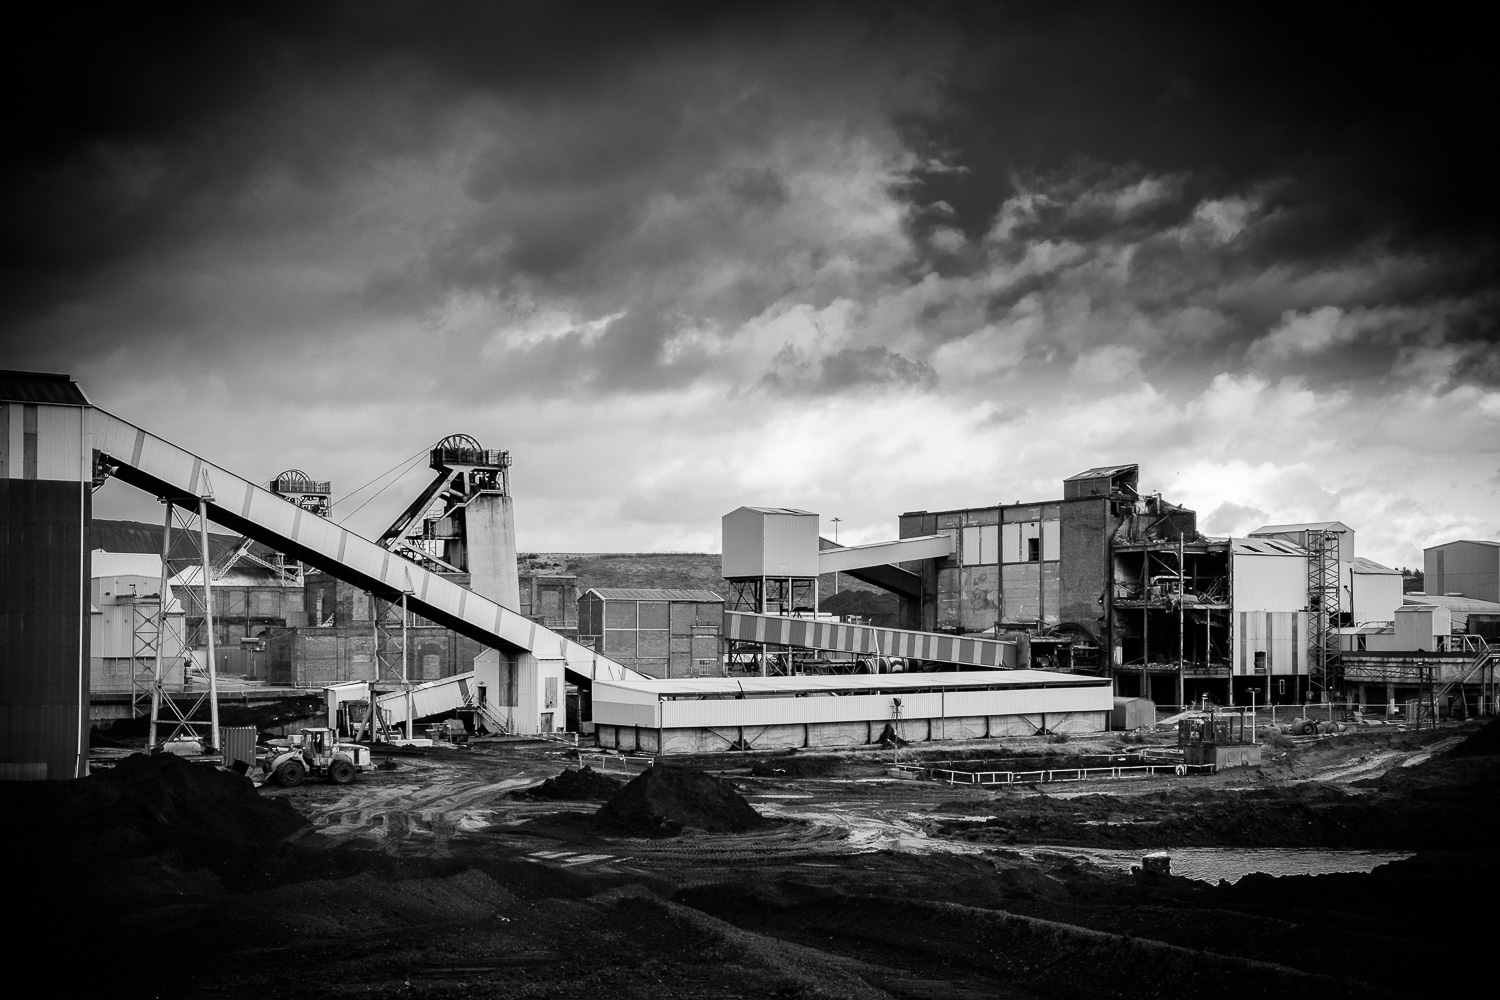
 The 10th July 2015 was a landmark date in the history of Nottinghamshire. When the last shift at Thoresby Colliery finished on that day not only did it mark the end of 90 years of mining in the village of Edwinstowe but it signals the end of mining in Nottinghamshire.


