Wildlife

HOW TO: Set up for Action Photography

Following on from the last blog that covered what gear to use for wildlife photography, I’m going to explain how I set up my X-Series cameras for capturing action. Though some cameras are better than others for this type of photography, there are little ways to help yourself help improve your chances of capturing action.

High burst rate

Though using a high burst rate will eat through your memory cards space, shooting at a high frame rate will hopefully get a good selection of action shots.

Auto focus

First of all make your focus point as large as possible: do this by pressing the AF button and zooming out as far as you can. With a moving subject it will be very difficult to keep the subject in a small selection zone, so give yourself the best chance possible. Continuous focus (This applies to the X-T1 and X-E2 as they have vastly improved continuous AF functionality) is really helpful with certain subjects, especially if they are coming towards you. For those of you with models that are best in single focus mode, fear not! Generally the Fujifilm lenses are quick to auto focus so if you’re following a subject you can focus, take a shot and then focus again or alternatively prefocus if you know where the subject it going to go. Some photographers use cameras in MF mode and use the AFL/AEL button to focus. This is helpful because you can then use the manual focus ring on the lens and see what is in focus via focus peaking. Experiment and see what method works best for you.

This sequences was taken using the X-T1’s tilting screen and the XF56mm at F2.8.

ISO

My standard ISO setting is 800. To some this might seem high but the output from this is so clean that it isn’t a concern for me. If it’s a bit cloudy and I’m wanting to freeze the action I’ll push my ‘ready’ ISO to 1600. My philosophy is that it is better to have a sharp image that might be slightly noisy as you get up to than an image that might have some motion but has less or no noise.

Shark
A blue shark close up taken at ISO 1600

Shark close up100% close up – In my eyes the noise (or lack of it) is not a problem at ISO 1600

Aperture

For action photography you have to decide if you want to freeze a moment, capture the motion or something in the grey area. If you want to freeze the action you’ll generally want to use a wider aperture to get a sufficiently high shutter speed. The shutter speed required to freeze depends on the pace of the action, and your chosen aperture is determined by the light conditions and your ISO choice. The thing to remember is that shutter speed, aperture and ISO are all intertwined. If you want to read more on apertures then read this previous blog (it contains puppies!). If you want to focus on one, say a faster shutter speed, then this has an adverse affect on the other two factors. If you’re wanting to freeze the action with a fast shutter speed AND also have a large depth of field then you have to increase the ISO. It is also about prioritising the most important factor for you and then compromise with the others. When aiming to freeze the action I am generally in aperture priority mode, where I have set the ISO according to the conditions (usually over 800), and I then choose an aperture to obtain the shutter speed I want.

Frozen Kittiwake

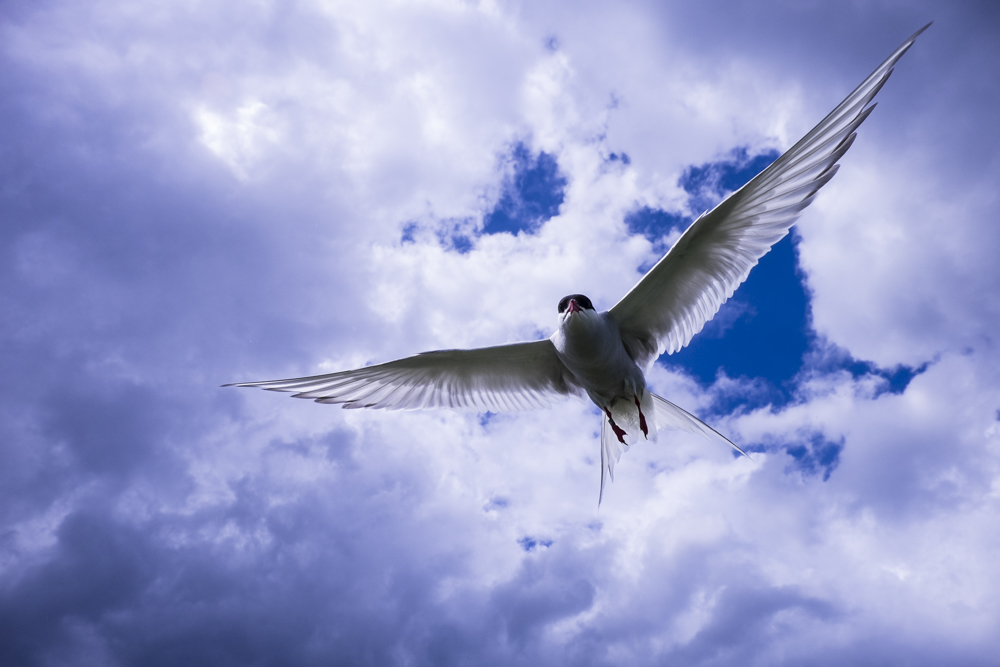
Taken at 1/3800 sec, F5.6, ISO 800

If you want to capture motion blur, say through panning with your subject, then your shutter speed is having less of a constraint on your ISO and aperture so you can change these accordingly to reduce your shutter speed. One way to control this is through shutter speed priority, where you set shutter speed to what you want and then have the aperture in auto mode so it will change to keep the same low shutter speed (with the ISO previously set).

Panning moped

Taken at 1/13 sec, F16 ISO 200

Finally, another set up option for action is to set the aperture and shutter speed to what you want and then have the ISO in automatic mode. You could go fully manual but I find this can quickly lead to problems when trying to capture action, especially if there is a lot going on around you. This method can result in you missing fleeting moments.

Now that you know some action set ups go out and shoot! Let us know what your action set up is with the X-Series and share with us your action shots via our Fujifilm’s Facebook and Twitter. As ever, if you have any questions then please leave a comment below or contact me via:

Twitter – @benji_cherry

Facebook – https://www.facebook.com/BenCherryPhotography

The right gear for the job – Wildlife

I thought this could be a helpful blog series for individuals looking to invest in equipment with particular interests in mind. This blog series will hopefully cover gear and techniques to help those getting into photography, who want to develop their skill set and knowledge. Because one of my main subject matters is wildlife I thought I’d start off with this genre.

Wildlife photography is a genre that can massively benefit from having suitable equipment, in my eyes more so than many other photography genres (but I’m biased!). To that end it’s good to be prepared with the most suitable gear for the task.

Best Camera – X-T1

The X-T1 has a number of features that make it the most suitable camera for wildlife:

Dolphins
Knowing that my X-T1 and 18-135mm lens set up was weather sealed meant that I could stop worrying about splashes and focus on capturing the dolphins.

First of all it is a weather sealed camera, so when used with a weather sealed lens you have a completely sealed system which is important when outdoors if you’re having to counter water in wet conditions or dust in dry conditions.

Then there is the fast auto focus, which the X-T1 is definitely the best at in the X-Series at this moment in time. The auto focus is very quick in single focus mode with basically every lens available and the continuous focusing mode is also very reliable and quick once focus has locked.

Terns
Fast continuous focus and 8 frames per second meant that I could get the composition just right as these terns flew at me on the Farne Islands.

Being able to shoot at 8 frames per second and take advantage of the latest UHS-II SD cards for fast writing speeds means that this camera can cope with quickly evolving situations where you need fast bursts to capture the action and to be quickly ready to repeat the process.

As well as the camera being great, the accessories can be really helpful, namely the battery grip. Often with wildlife photography you are out and about for many hours and the last thing you want to happen is to be stuck changing batteries just as something exciting is happening (this has happened to me far too many times!). The battery grip holds an extra battery so doubles the time before you need to change your batteries.

Finally, the big thing about to come to the X-T1 (black version) is the electronic shutter. Being able to shoot at up to 1/32000 second is great but is generally not necessary for the lenses used with wildlife photography; but what will be very beneficial is the silent shutter. If you’re close to wildlife or in ear shot then even the slightest sound can set off a timid animal. The X-T1 shutter is by no means loud but certain animals have such finely tuned hearing that the mechanical shutter sound can be enough to scare off your subject.

Back up camera – X-E2

Having two cameras is a good idea for wildlife photography. It is often helpful to have two different lenses on the cameras so you can quickly capture images at different focal lengths, going from the close up headshot to the animal in environment shot. If an X-T1 is out of the question, let alone two of them, then the X-E2 is a brilliant compromise. It offers a more affordable option and though it may not have weather sealing and all the bells and whistles I mentioned above it is still a very capable camera. With 7 frames per second and a hybrid AF system that includes contrast and phase detection, this camera is able to capture fast paced action almost as well as the X-T1.

Lenses

Puffin
The 55-200mm in action.

The 55-200mm is currently the longest lens available for the X-Series until the 140-400mm comes out very soon. Covering a good range with a very useable widest aperture (F3.5-4.8), this lens is a super lightweight option for wildlife photography. The auto focus is fast and accurate plus the lens has OIS (optical image stabilisation) which is great to help you capture sharp shots if you’re handholding.

Moving into the weather sealed lenses, the 18-135mm lens is a brilliant all-in-one wildlife/nature lens to carry around if you’re wanting a one-lens solution. When used on the X-T1 this is a sealed system that has snappy auto focus and OIS to help make sure your shot comes out sharp. If you’re looking to have a more specialist lens(es) then the new 50-140mm is a good place to start, though not as long as the 55-200mm lens it offers a widest constant aperture of F2.8. This is brilliant for photography in darker conditions, such as golden hour at sunrise and sunset. This has been combined with OIS and the world’s first triple linear motor auto focus system to ensure you focus in on your subject quickly and get sharp results. This lens has internal focusing and zoom, helping ensure that no moisture or dust can get into this weather sealed lens.

Wildlife doesn’t always require the longest focal length possible. Often framing your subject within the environment can have a much more powerful effect than the classic headshot close up. The soon to be released 16-55mm lens will be the perfect partner for the 50-140mm lens, providing another weather sealed option with a fast widest aperture of F2.8.

Highland cattle
Highland cattle of the Isle of Skye at 18mm. Not the best ‘wild’life photograph but it helps emphasise the point of framing an animal in its environment.

If you’re interested in macro photography then you have two options, the Fujifilm XF60mm F2.4 or the Zeiss 50mm F2.8. I have used the Fujifilm version and love it, though if you want 1:1 scale then the Zeiss is the way to go. These lenses are also great general purpose lenses, the orang utan photo at the top was taken with the XF60mm.

Ants
Ants crawl over a vivid red plant in the heart of the rainforest in Borneo.
Beetle
An emerald green beetle’s shell glistens from my off camera flash. The XF60mm is a great lens to cover a wide variety of shots.


I hope this has proved helpful to those of you that are looking to invest in the Fujifilm X-Series for wildlife photography. If you have any questions then please leave a comment below or contact me via:

Twitter – @benji_cherry

Facebook – https://www.facebook.com/BenCherryPhotography

Taking the X-T1 into the deep blue

Just to make it clear, I am not an underwater photographer. I have dabbled in it from time to time in locations of incredible marine life, such as snorkelling around coral reefs. The North Sea has a high abundance of marine life and the coast of Penzance is one of two places that you can consistently see blue sharks (the other is Cape Town). So when Danny Copeland, a fellow University of Sheffield Zoology graduate, spoke about his plan to go and see them with Charles Hood, a local charter skipper (http://charleshood.com), I jumped at the chance to join him.

Previously I have used DSLRs for underwater photography in a Ewa-Marine underwater housing. This time though I wanted to continue to push the X-T1 in difficult conditions so I put it in the same housing with the 10-24mm. Despite being dwarfed by the bag, the set up worked really well.

Thanks to Danny Copeland for this photo of me and the camera. Follow Danny on twitter to get the latest on underwater photography and marine conservation.

Ben Cherry XT1 underwater

Once we reached 10 miles out to sea we started chumming using mackerel heads (yum) to attract the sharks. Once they were in the area the four of us that went on the trip were able to slip into the water. Once I had checked the housing was sealed I swam around to find some subjects and came across this large jellyfish surrounded by lots of little fish. This example highlights the benefit of using a zoom lens underwater as I was able to get two very different perspectives using different focal lengths.

24mm

Blue Shark trip-6

10mmBlue Shark trip

Conditions were generally slightly overcast which actually meant there was a lovely soft light, which helped control the highlights that would have been a problem if it was a clear, sunny day. However this did mean that it was slightly dark in the water, even at the surface, so I shot at ISO 1600 to start and pushed this as the sediment levels rose throughout the day. Other settings I made sure I had set up on the boat were: continuous focus with focus priority, continuous high speed shooting (8fps), matrix metering and LCD only display. Generally I was using aperture f5.6 to strike a balance between a fast shutter speed and a good depth of field.

Because I was wearing a mask and the camera was in a housing I couldn’t utilise the wonderful EVF but instead found the LCD screen to be a great alternative. It allowed me to have a clear view of the shark(s) by not having my face to the camera and provided easy viewing of composition through the back of the camera. The advantage of the X-T1 is that I have not noticed any difference in focusing speeds between the EVF and LCD, which isn’t always the case. All of these factors meant that I could really take in this remarkable experience as one shark in particular became more and more inquisitive…

Rising out of the depth

Blue Shark trip-4

Coming in for a closer look

Blue Shark trip-8

Closer…

Blue Shark

Moments before bumping the lens!

Blue Shark trip-5

The camera only helped to make the experience more memorable, with the shark showing interest in it. With an animal like this it was so interesting to witness its intelligence and curiosity, the term ‘spaniels of the sea’ I feel is very apt. At one stage the shark photo-bombed a picture of Danny!

Shark photo-bomb

Blue Shark trip-7

Despite coming very close, it whole situation was very calm and meant that the interaction was an absolute joy. The shark even seemed to show a happy expression.

Playful shark

Blue Shark trip-2

Overall, the X-T1 and 10-24mm set up exceeded my expectations. I knew it would follow subjects well but I thought that shooting through water would probably lower the hit rate. However, the only factor that affected this was human error. With a specifically designed underwater housing, this camera and lens set up would be a brilliant choice for any underwater photographer, with its small size, clear controls and superb image quality.

Ben Cherry – Who am I?

Hi there, my name is Ben Cherry and I am a guest blogger for Fujifilm. My primary interests are wildlife and travel photography but I’ve previously covered events from motorsport and snowboarding films to fashion shoots and weddings.

I have been a Fujifilm X-Series user for a year now, ever since I used an X-Pro1 for a trip Malaysian Borneo.

Ben Cherry X-Pro1
This is me…

What I look for in a photograph is a moment, from a smile to unusual animal behaviour, I try to capture a photograph that encompasses a situation and can tell a story. To me, photography is a form of story telling, like writing and painting it is how the content is perceived by the viewer that is important. If someone experiences an image, feeling and/or viewing the subject the way the photographer did at the moment of clicking the shutter, then to me that is the ultimate prize in expressing your experience of a moment.

Why Fujifilm?

I use Fujifilm cameras because for me this is the best system for my work, offering superb image quality, a small compact size for travelling and a wonderful enjoyment factor through the manual controls. From the X100s to the X-T1, all of the products I use offer something different to my photography, whether it’s the low light capabilities of the 23mm f1.4, 35mm f1.4 and 56mm f1.2 or the pocket-ability, go nowhere without it, design of the X100s.

The clear purpose and design of each product gives me the clarity needed to choose the right gear for the job at hand. In future posts I will be discussing what the Fujifilm X-Series offers me and also explain some helpful hints and tips for those who are new to photography and to those who are new to the X-Series.

In the meantime you can check out some of my previous blogs here and check out my website and social media:

www.bencherryphotos.com
Facebook page
Twitter
Instagram

What to shoot now – spring into life

It won’t be long before the natural world starts showing signs of life, which will give photographers across the globe plenty of subjects to train their cameras on.

To start, look low to the ground where bulbs will soon start to break the surface of the soil. Getting down low is the key to success and those X-series cameras with an articulated rear LCD will come in handy to help you frame up shots without having to lie on the floor.

Don’t be afraid to crop in close on snowdrops and daffodils, selecting the macro mode to ensure you focus as close as possible. If you’re shooting on a sunny day, placing your camera flat on the ground and pointing the lens upwards will deliver a ‘worm’s eye view’ of the flowers, which works particularly well with yellow crocus, tulips and daffodils set against a deep blue sky. Consider using the Velvia Film Simulation mode to boost colours, or fit a polarising filter to really saturate primary hues.

Feeding time

If you don’t fancy scrabbling in the dirt, birds and wildlife get a little bolder in the springtime as they start searching for mates and building nests. Use a telephoto lens like the XF55-200mm or XC50-230mm to keep a safe distance and make sure you shoot against a clear, uncluttered background such as foliage or even the sky to be sure nothing distracts from the subject. With any wildlife subject you’ll need to be patient; the best shots will come to those who wait… or those who set up feeding stations in their gardens!

Window light portraits

The low sun at this time of year is perfect for people shots indoors. Carefully choose a window – you want sunlight to bathe your subject in, not to blind them. Position your subject nice and close, then switch your camera to aperture-priority mode, using a wide aperture to throw the background out of focus.

Window Light Portraits

A day in your life

If a 365 project is too daunting, perhaps you can manage 24 hours. Pick a typical day and document your life. It’s easy to do with the portable X cameras. Start with your breakfast and only put the camera down when you go to bed. Apply the usual rules though: think about your shots and compose carefully, don’t simply machine-gun it.

A day in your life

Striking silhouettes

Set aside the usual approach to exposing your subject and expose for the background to get a dark, striking silhouette of a person, tree or church – easily recognisable subjects work best. Switch to spot metering and take a reading from the bright background to ensure your subject is rendered as an outline.

Striking Silhouettes

Film fanatics

Emulate the look of yesteryear’s photos with one of the X-series Film Simulation modes. All the X-series cameras offer these magic modes; the X-Pro1 boasts a stunning selection of 10, including names you may remember from film boxes, such as Provia and Velvia. Find them in your camera’s Shooting menu or via the Q menu.

Film Fanatics

Carnival spirit

In countries around the world, Shrove Tuesday (4 March) is a day for celebration; in many, such as Germany and Italy, this means carnival, while in the UK, it’s the chance to flip pancakes. Whichever is happening near you, photograph it. For a carnival parade, try the Pop Color Advanced Filter (on the XQ1, X100S, X-M1, X20 and X10).

Carnival Spirit