Fujifilm EMEA

This blog account is managed by the Corporate Communication team for Fujifilm in EMEA.

Baby It’s Cold Outside..

10-xmas-fuji

X-Photographer strip BLACK

By Elli Cassidy

At Christmas it’s almost compulsory to take photographs and when you add a newborn baby into the equation it’s the perfect opportunity to create something extra special.

Whether you’re a fan of full-on Christmas decor, or prefer just a subtle nod to the season I hope this fills you with hints, tips and a sprinkle of festive inspiration.


If you are new to photographing babies you can keep it simple and natural, have baby lying on the back and photograph them awake and relaxed. Newborn babies can’t focus their eyes well, so I wait for them to stare into the distance and then move my camera into their line of sight, it can take a bit of patience but is usually worth it.

For this shot, I dressed the baby in a soft white romper and a berry headband which sets the season without needing a santa hat.

1-xmas-fuji
1/100s, f/2.8, iso 100, X-T2, XF16-55

Another simple image to capture is baby toes, they can be awake or asleep for this, though for wrigglers I’m grateful for the fast focusing of the X-T2.  In the first shot you can see the out of focus fairy lights which add an interest to the composition, and for the second shot I used a berry coloured wrap to create a warm festive feel.  In the second shot I was actually gently holding the baby’s toes in place underneath the fabric to keep them at the angle I wanted.  The tilt screen on the X-T2 was handy here as I could both hold her feet and shoot one handed comfortably.

2-xmas-fuji
1/100s, f/2.8, iso 100, X-T2, XF16-55
3-xmas-fuji
1/100s, f/2.8, iso 200, X-T2, XF16-55

Overhead shots are also easy shots to get whilst keeping baby safely lying down on fabric. The wreath I used is mainly fabric so is quite soft and not prickly, and I padded the middle out with a furry cushion cover so that she was well supported at all times.

If a baby isn’t the most settled then I will swaddle them with a wrap so they feel secure, and more often than not they fall asleep when wrapped.  For all these shots I stand over the baby, using a camera strap, and then use live view on the tilt screen of my X-T2 to compose the image.

4-xmas-fuji
1/160s, f/2.8, iso 200, X-T2, XF16-55
5-xmas-fuji
1/125s, f/2.8, iso 200, X-T2, XF16-55
6-xmas-fuji
1/125s, f/2.8, iso 200, X-T2, XF16-55

This shot is a more typical newborn baby pose, but using a seasonal coloured wrap keeps the image simple whilst adding a slight festive touch.

7-xmas-fuji
1/100s, f/2.8, iso 100, X-T2, XF16-55

Christmas is a great excuse to pull out some of my favourite props too, so here are a few where I’ve tried to recreate some of the magic of the holiday.  All of these images were taken with a spotter, which means I had someone on hand (usually a parent) to stay very close to the baby with the sole purpose of holding them if they start to move or roll.  Spotters are either just outside the frame but still within reach of the baby, or I edit them out in Photoshop.

To make it a bit more interesting I wanted to include some lights within these set-ups too, one having a candle lit effect lantern and the other incorporating some fairly lights.  Each of these meant I had to work out the best way to capture the lights whilst not overpowering them with flash.  I needed to shoot fairly wide open to be able to record as much of the ambient light as possible, yet I still needed to light the subject too with my flash. I had the ISO at 100 (or Low) and my aperture at 2.8 on the 16-55mm, if I shot at 1/250s I overpowered the fairly lights and you couldn’t really see any light from them at all, when I slowed down to 1/125s they were visible but quite small and hard. I couldn’t shoot any wider unless I swapped lenses, so the next option was to reduce the shutter speed further. As my baby model was asleep, as long as I held the camera steady, I was able to shoot at 1/15s which enabled the flash to still perfectly light my model without overpowering the ambient so I captured the nice effect of the lights too. Again using the tilt screen was invaluable as I could sit down and hold the camera steady without having to lie on the floor to see.

8-xmas-fuji
1/15s, f/2.8, iso 100, X-T2, XF16-55

With the lantern shot the candlelight wasn’t giving any spread at all as it was just so low powered, so I photoshopped the glow in afterwards. I thought including both images will show you the different ways of achieving the same kind of end result.  Where possible I do prefer to get it right in camera, but I’m not opposed to editing small things if it helps create the right feel either.

1/125s, f/2.2, iso 100, XT2, XF56,

And finally a slight twist on a more advanced newborn pose known as The Potato Sack, I wanted to give a bit of a snowman feel so added a hat and then in photoshop I added some snow, just for the fun of it.  This pose is usually done with baby being supported and then the hand edited out afterwards.

10-xmas-fuji
1/125, f/2.8, iso 200, XT2, XF16-55

All images were shot with the X-T2 and lit with a single Elinchrom d-lite1 and a 1m² softbox. I almost always position the light so that it flows down the baby’s face to give either a butterfly shadow under their nose or a loop shadow at the side of their nose.


And finally I few tips for you to help get your newborn model to sleep:

1. Heat – A toasty warm room and a fan heater near baby, I find it’s the warm breeze that helps settle them
2. Milk – A ‘milky drunk’ baby, I always ensure they have a full feed before we start so they are nice and full
3. White noise – Background noise helps send most babies to sleep and masks any noise you might make whilst working
4. Blankets – I use a blanket from home to hold them in whilst getting them to sleep as it smells familiar to them
5. Dummy – I always ask if they have one at all, you can pose the baby with their dummy and then just remove it for the individual shots
6. Patience – sometimes it takes a while for them to drop off to sleep but having all the above in place can make it much easier.

I hope you all have a great Christmas and I’d love to hear how you get on with your festive baby photographs!

Elli Cassidy
www.minimemories.co.uk

Shooting stills on a movie set with the X-Pro2

guest-blogger-strip-black

By Keith Bernstein

Earlier this year Castel Film Studio in Bucharest, Romania, underwent a dramatic makeover. The studio’s backlot streets, previously the location of a Gothic horror movie, were re-modelled into 1900 Milwaukee, the setting of a new movie set in the American Midwest at the turn of the century. A cast of American and British actors filmed over 3 months, helped on a daily basis by up to 500 Romanian extras and backgrounds actors.

Background actor on set

As the stills photographer on the film, I took the opportunity to use the X-Pro2 on set for the first time. Stills cameras on movie sets – usually SLR’s – have to be silent to prevent any shutter sound being picked up by microphones or disturbing the actors during a take. To silence the shutter the camera and lens is housed inside a blimp – a soundproof housing that lets you shoot during the filming of a scene. Heavy and slightly awkward to use, the blimps have only limited camera controls on the outside; changing camera settings necessitates opening the housing. The silent shutter mode of the X-Pro2 was immediately attractive; and shooting without a blimp meant saving 1.4 kg of weight around my neck.

I used the X-Pro2 extensively to photograph the extras and a lot of the set decoration, often switching the format on the X-Pro2 to a 1:1 ratio. This allowed the pictures to be quickly uploaded in square format on to social media to market and publicise the movie. Light levels on set, especially the interiors, were often very low, and the X-Pro2 at ISO 4000 with the XF35mm f1.4 lens worked amazingly well, even when shooting at maximum aperture.

There are a number of great features on the X-Pro2; the format change option, live view when changing colour temperature selection, and the silent electronic shutter are among many outstanding choices. One irritation I have with the camera is the battery life – it’s not the best so I always carry spares.

I am currently working on a film in Germany, and am now using two X-Pro2’s with 23, 35 and 56mm lenses. So have I given up on the heavy blimp and SLR combination and switched over entirely to X-Pro2’s? No not yet; there are still some on-set circumstances where the SLR & blimp combination works better for me; but the size, weight, electronic viewfinder and options such as format change of the X-Pro2’s is pushing me ever closer to the edge of change.

Set dressing on interior set
Castel studios backlot and re-created Milwaukee street

Biography

Based in London, working on film sets throughout the world; recent productions include the last 6 Clint Eastwood films, (Sully, Sniper, Jersey Boys, J. Edgar, Trouble With The Curve, Invictus) ; Long Walk To Freedom with Idris Elba; Argo with Ben Affleck and Gunman with Sean Penn
Website: www.keithbernstein.co.uk
Instagram: keithbernsteinphotographer
Facebook: www.facebook.com/KeithBernsteinPhotographer

Shooting live events with Fujifilm X Series cameras

_dsf0134-edit

By Matt Hart

Shooting live music events is one of the trickiest disciplines in photography. Subjects move a lot, often lighting changes constantly and in general it can be a lot of hard work. With that said, live music events have passion by the bucket load and if you can capture that in a single frame it makes for some exceptional images. It could be a front man working the crowd, the guitarist tearing up a solo or people attending having the time of their lives, whatever it is, the subject matter can never be accused of being dull.

In this blog, I’m going to get a bit technical running you through the kit I use to shoot events and the reasons behind it. Also, we’ll cover what to look for when photographing live music. Enjoy!

matt0083-edit


The kit

Right, let’s jump straight into it by running you through my usual kit for shooting live music and festivals.

Camera:

I usually take two camera bodies with me. The reason I do this is so I can use two different lenses and change quickly between them. My preference is the Fujifilm X-Pro2 and the Fujifilm X-T2 with the battery grip. Overall, the cameras are similar in terms of feature set but the build and handling of each make them serve a different purpose. The battery-gripped X-T2 has several advantages – Firstly, it allows me to shoot all day without needing to change batteries over. Secondly, I can switch to portrait and landscape orientation easily and lastly, the joystick for positioning the AF point is incredibly useful for accurate and quick focusing on specific subjects.

While the X-Pro2 is more than capable of shooting a live music event or festival, I like to keep the X-Pro2 free to shoot images of interesting people. These days I shoot with the X-Pro2 almost exclusively for my street photography, so bringing it to a festival makes a lot of sense for me. I’m taking my ever-faithful street photography setup and just applying it to a slightly different environment. For me, the main benefit is the rangefinder style. Unlike the X-T2, the viewfinder is off-centre and when you point it towards a subject, it doesn’t look like you’re aiming directly at them. This means people are far less likely to close up and act differently. Pointing a huge camera directly at a person usually means they’ll pose for their picture, but my aim is to capture the more candid, natural moments instead.

_dsf0150-edit


Lenses:

With a lot of events, you will be firmly planted in what is lovingly referred to as ‘the pit’. This is the area at the front of the stage where you can see the performers and have the opportunity to take shots of them. For this, I will opt for the XF50-140mm lens. Its focal length suits subjects that are quite far away and it also allows me to zoom in enough to get a tight shot should I want to capture that. It’s also very useful for capturing people in the crowd on each others shoulder too.

_mkh3857-edit

With the exception of the Fujinon 50-140mm XF lens, I mostly shoot with prime lenses. My kit bag usually comprises of the Fujinon 16mm f/1.4, Fujinon 23mm f/2 and sometimes the Fujinon 90mm f/2 lens too. I like to have the have fast, wide prime lenses, especially in low-light situations. I will alternate between the 16mm and the 23mm often and occasionally draw upon the 90mm when I want to capture close-up portraiture or to shoot a subject I want to isolate from the background.

_mkh5233-edit


Alternatives

In general, I use primes as I just love all the characteristics they give. However, there are a couple of zoom lenses which are incredibly sharp and suit shooting events perfectly. Firstly, the Fujinon 10-24mm f/4 is a fantastic lens. It’s wide enough for big stage shots, capturing crowds and potential to get very creative too. Another great lens is the XF16-55mm f/2.8 this serves the purpose of all of the primes and it’s a bit more convenient not having to switch out lenses.

matt0163-edit


What shots to look for

Many moons ago I shot club nights and festivals week-in week-out but these days I’m not shooting for a promoter or club, instead I’m shooting for myself. My brief is set by myself so I’m trying to look images that excite me. It’s all about capturing the mood and telling a story of the event.

Here are a few of the key shots to look for when shooting an event.

1. Performer shots

Capturing musicians in action is quite tricky. If they’re moving fast in low-light in can be incredibly difficult. The important thing to remember though is what the viewer is going to want to see – that’s the musician and possibly some environmental context if it adds to the composition. If the subject is the main focus I prefer to shoot wide open and isolate the subject. If there’s something interesting like a DJ with their decks or a rack of guitars I might stop down the aperture or shoot the scene with a wide angle lens to give a sense of the environment.

_dsf0170-edit

matt0010


2. Crowd shots

If you’re shooting from the stage or in the pit, it’s always worth spinning around and checking out what the crowd are doing. A well timed pyrotechnic or a person on another person’s shoulder makes for an amazing picture. Sometimes I walk along the front row and pick out a group of interesting people.

_dsf0113-edit

_mkh5315-edit


3. People shots

Interesting people and music events go hand in hand. The crowd shots are always good, but I love to get into the crowd and capture the people having fun. Essentially, I take a street photography approach to this. I want people to be relaxed and natural around me, so before I start taking any pictures I walk around in the crowd, blending in and just enjoy myself. Once you’re in there amongst everyone you can begin to capture what you see in front of you which will be a unique perspective.

matt0235-edit

_mkh3291-edit

_mkh6021-edit


4. Capturing the atmosphere

You simply can’t stage atmosphere – It’s either there or it’s not. The shots that I find myself looking at time and time again are the ones that tell the story of what the festival was like. It’s all about capturing the moment and the soul of the event. Now, there’s no hard and fast way to capture this kind of scene but if it sounds good, the crowd are noisy or the hairs are standing up on your arms, shoot what makes you smile!

_mkh5601-edit


Capturing Captains with the Fujifilm X-T1

X-Photographer strip BLACK

tony-woolliscroft-jul-2014
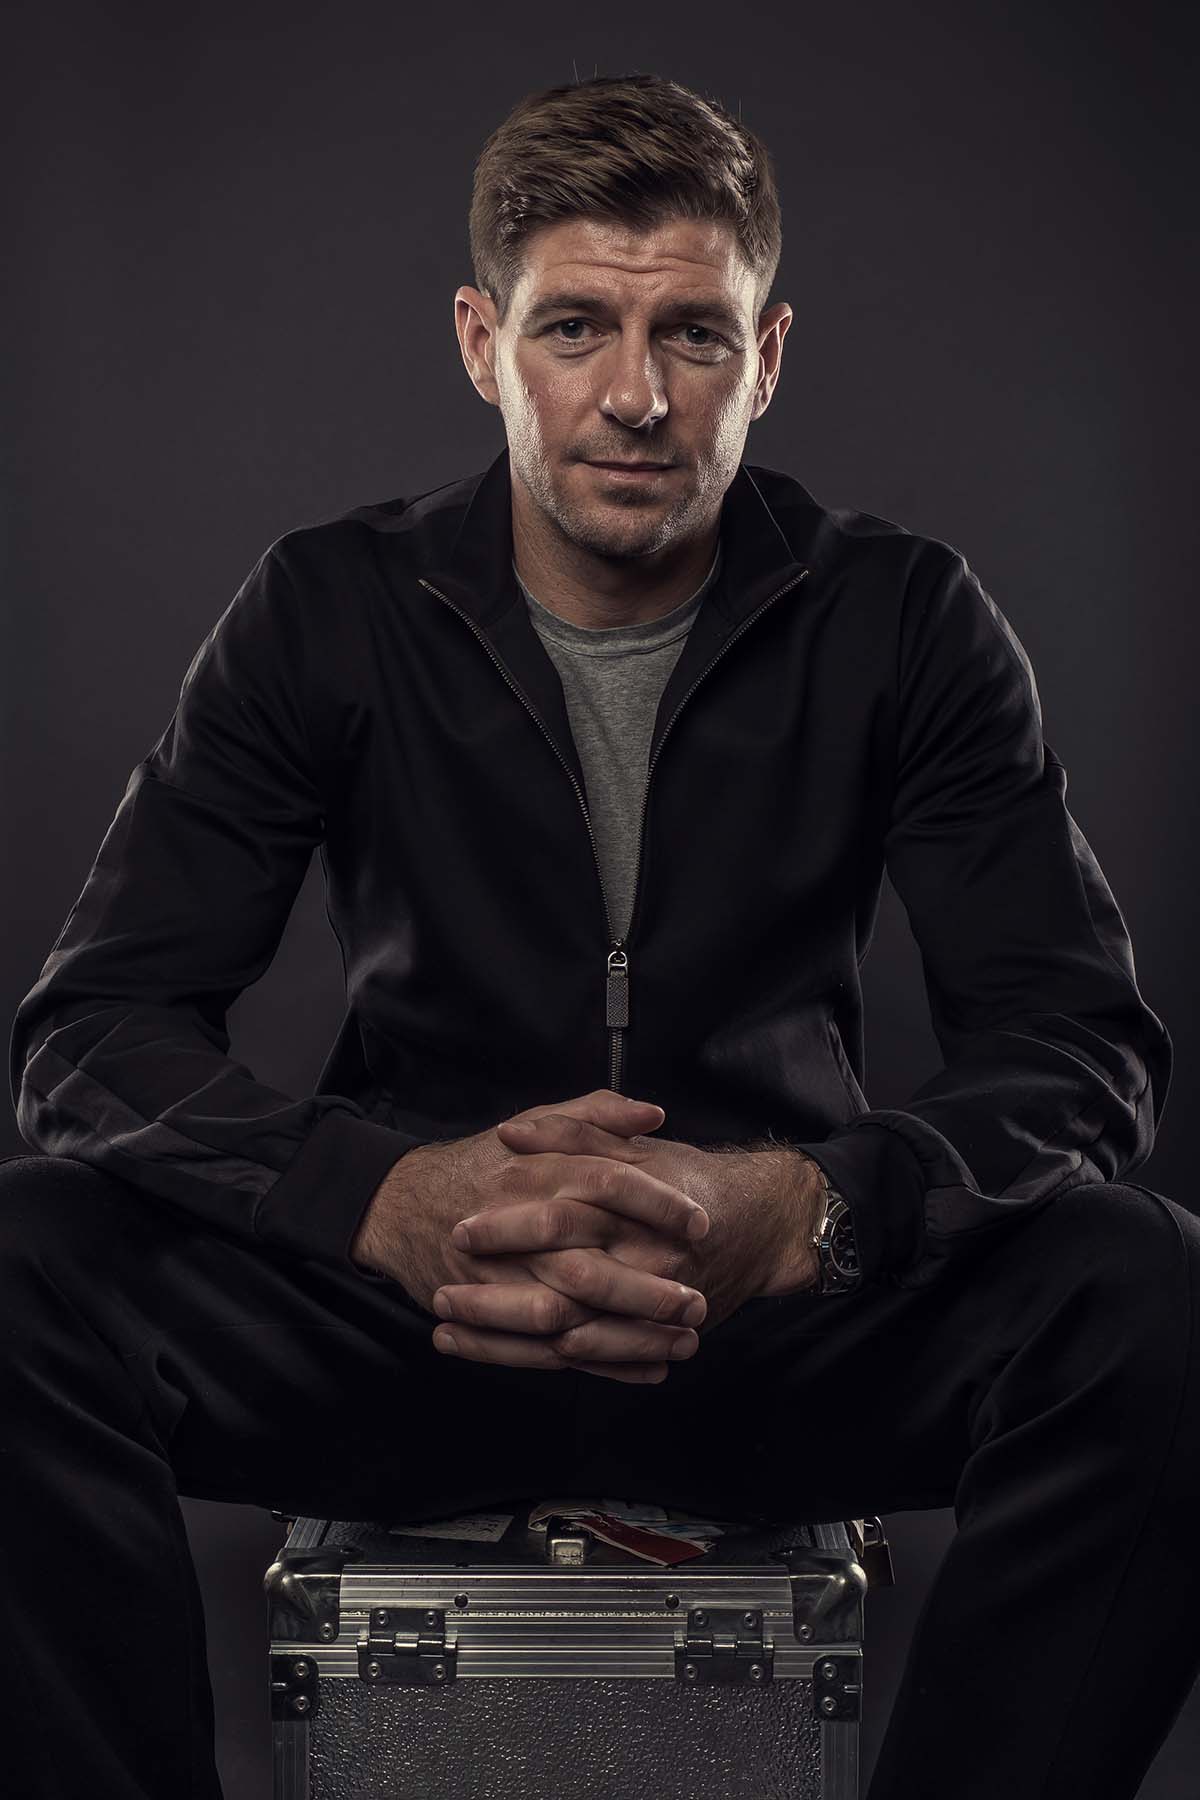
Think about it, it’s your dream job. You’re a Liverpool season ticket holder and supporter and as a professional photographer you are asked if you’re interested in photographing the portraits of a number of former and famous Liverpool FC captains for an upcoming book.

Of course I jumped at the chance!

My brief was pretty simple, make all the captains look good, but the harder part of the brief was to make all the pictures look like they had been shot in the same session at the same time ……. Of course this would mean shooting on location in ten different locations!


The first captain on our list was perhaps the hardest logistically to set up as when we arrived at Ron Yates’ home there was simply nowhere to set up my studio and Ron’s wife was not too pleased at the thought of moving everything around in her living room!

But we soon persuaded her that it was ok to shoot with a simple one-light set up and so photographed Ron on his sofa right there in the front room.

“One of the great advantages of shooting with my Fujifilm X-T1 camera system is that the camera is not overwhelming in size and this makes it easier to communicate with your client.”

Ron Yates
Ron Yates

I was not given a lot of time to take Ron’s portrait as he sadly suffers with Alzheimer’s so I needed to work quite quickly. This meant going for my trusty XF16-55mm f2.8 lens. This lens is amazing at times like these – it’s versatile in focal length from wide angle to zoom, sharp and very fast to focus.

From here I worked quickly, taking as many different portraits as I could in as short amount of time possible.


Over the next few captains that I photographed I was given more time and space to get what I had in mind for the book.

Robbie Fowler
Robbie Fowler

One location I was given was to shoot in was Jamie Redknapp’s garage at his home! It was a big space to set all my studio backdrop and lights in, plus I received refreshments from Jamie’s lovely wife Louise!

Jamie Redknapp
Jamie Redknapp

Also having the luxury of more time and a bigger working space is that I got to use my different Fujifilm prime lenses. And let’s not forget that with each different portrait sitting you have to come up with a variety of posed shots, I tend to shoot a full length sitting down shot, a ¾ length standing up shot and then a selection of close-up headshots. The lenses I use in my shoots are the XF16-55mm f2.8, XF23mm f1.4 and my XF56mm f1.2.

“I really love the 56mm as it’s pin sharp, fast to focus and gets a great headshot in a limited space.”


And the locations where quite varied too – from conference suites in Southampton Airport (amazing what access you can get in these places dropping Graeme Souness’ name) to removing furniture from Ronnie Whelan’s dining room so I could set my studio in there (Massive table and chairs out!).

Graeme Souness

There was also the time aspect to all this as each Captain was giving their time for free, so I was very conscious that my photoshoots didn’t drag on.


In my experience with these types of shoot I’ve come to know and trust the equipment that I use. From my portable studio set up to my Fujifilm camera and lenses, I know I’ll get great results each time.

Paul Ince
Paul Ince

One of the most common questions I get asked is which Captain was the most difficult to shoot.

It’s an easy answer really – Steven Gerrard.

On the day of the shoot Steven was very pushed for time as he had a big appointment in Milton Keynes for Adidas. To compound matters further the interview for the book ran over as well…… So in the end I was given just 60 seconds to get as many portraits out of the shoot as possible.

Lucky I had just enough time to set my studio up and was ready as he walked in. I used my Fujifilm X-T1 camera alongside my XF16-55mm lens to create the shot.

As I said before, in times like these you need equipment you can trust and that will simply get you a great result.

That’s why I shoot Fuji!

Steven Gerrard
Steven Gerrard


El Camino with the Fujifilm X100S

fuji-blog-camino-de-santiago-11-of-32

guest-blogger-strip-black

The Camino de Santiago (also commonly known as ’The Way of St James’, or ‘El Camino’ in Spanish) is the name given to the pilgrimage routes that start all over Europe, but all lead to the same destination: the Cathedral of Santiago de Compostela in Galicia (Northwest Spain).


By Danny Fernandez

Since moving to Spain in 2011, I had heard many people talking about doing ‘El Camino’, and each of them saying how incredible the experience is (life changing for many). For the past few years, it has been on my ‘to do’ list, and this August, I decided to combine three of my passions (travel, cycling and photography) and see what all the fuss is about!

fuji-blog-camino-de-santiago-8-of-32

The first choice I had to make (although it wasn’t really much of a difficult one) was whether I should walk, or cycle. As a keen cyclist, the choice was simple; I would do a cycle tour. By cycling, it also meant that I could see much more of the coast in a shorter time, and also easily take detours if I wanted to explore the area.

fuji-blog-camino-de-santiago-3-of-32

The second choice that I had to make was which camino to do. It was a toss up between the most popular, but easier and better facilitated route; the Camino Frances, or the more difficult and less crowded Camino del Norte. I decided to do the ‘Camino del Norte’. This is the route which follows the northern coast on Spain. I chose to do this route as I had heard it is the most beautiful but also one of the most difficult routes due to all of the mountains! I decided to start in the beautiful coastal town of Castro Urdiales (50km west of Bilbao), and had approx 17 days to cycle the 780km to Santiago de Compostela.

fuji-blog-camino-de-santiago-1-of-32

fuji-blog-camino-de-santiago-13-of-32

The third choice that I had to make was where I would stay. Typically walkers (commonly known as Pilgrims during the camino) stay in Albergues (which is like a simple hostel, solely for pilgrims). However, cyclists get the last priority of beds in Albergues (walkers first / those on horses – yes, horses – second / cyclists third). As I had no guarantee of a bed, I decided to bring a tent and camp where possible.

fuji-blog-camino-de-santiago-15-of-32

fuji-blog-camino-de-santiago-17-of-32


My Way

There seem to be as many reasons for doing the camino, as there are pilgrims. I met people from all walks of life, including entire families, married couples, adventurers, grandparents and even one guy who had walked out of his front door – in the Netherlands – 11 months ago, and is still walking now!

At the start of my camino, I overheard people saying things like “The Way gives you what you need”. I rolled my eyes and blew this off as some hippy thing, but after 17 days of cycling, I agreed with this.

fuji-blog-camino-de-santiago-12-of-32

I think that the nature of any repetitive action (in this case ‘wake up/eat/cycle/sleep/repeat’), gives you a lot of – almost meditative – headspace, and can teach you all sorts of things about yourself. I had a lot of time to ponder on things (I was, after all, cycling by myself for on average 5 – 8 hours a day).

I also feel that the challenges taught me a lot about myself, and man, there were challenges! It was way more difficult than I could imagine. Some days I would battle a constant uphill mountain for more than 2 hours without escape. On average, I was ascending and descending between 800 – 1000 metres of altitude a day. And when it’s 32 degrees, and your loaded bike weights 30kgs, you feel every meter.

fuji-blog-camino-de-santiago-23-of-32

Before starting, I expected to have many highs, and many lows (such is the beauty and the curse of solo travel), and the camino gave me both of these. I had extreme highs after making it through hours of rainy mountains to be rewarded with parted clouds over the most breathtaking views. And I had extreme lows when I questioned my reasons for this ‘stupid idea’ and was 90% sure that I was going to quit and just hang out on a beach for the remainder of my trip.

Each persons experience of the Camino is unique and I feel that if you listen, you can learn a lot about yourself during this journey.

fuji-blog-camino-de-santiago-22-of-32


Why I chose the X100s

I’m not sure if other photographers are like me, but I spend so much time in a constant debate over which camera equipment to bring before any trip.

Since selling my Canon gear 3 years ago and slowly building a collection of Fuji (X100s / X-T1 / X-T10 / XF16mm / XF35mm / XF56mm) I was fortunate enough to have the choice of what to bring for this trip.

x100sI had narrowed it down to the X100s, or the X-T10 + XF16 and XF35 lenses. After changing my mind on a near daily basis, I eventually decided to simplify EVERYTHING on this trip, therefore I would only bring my X100s. I had previously spent 3 months backpacking around India with this camera and think it’s an incredible travel camera.

My reasons for bringing just the X100s was that I wanted simplicity. This was very much my philosophy behind the entire trip – to get away from every day life of choices and go back to basics (this was also the basis for my terrible decision of bringing only 2 pairs of socks for a 17 day cycle trip). I was clear that this was not a photography trip; it was all about the experience of the camino, and the X100s was always at hand to document it.

And if I had to choose only one reason why this is still my favourite travel camera, it’s because it doesn’t interrupt your experiences; but instead is there to complement them. Photography has taught me how to see, and when a camera fits in so seamlessly with your life, it can help deepen your appreciation of that moment.

fuji-blog-camino-de-santiago-21-of-32

fuji-blog-camino-de-santiago-9-of-32

fuji-blog-camino-de-santiago-25-of-32

fuji-blog-camino-de-santiago-26-of-32


fuji-blog-camino-de-santiago-19-of-32

fuji-blog-camino-de-santiago-10-of-32