Year: 2017

Through a Photographer’s Eye: Josselin Cornou

Through a photographer’s eye is the first in a series of interviews featuring Australian photographers. In each interview, we learn about the person behind the camera and how they use Fujifilm X Series cameras to photograph the world around them. Our fifth interview is with Sydney based photographer, Josselin Cornou.

Josselin, your photography is extraordinary, can you tell us about yourself, what you do and why you enjoy taking photos?

Photography is simply more than just a hobby, it’s sometimes a way of life. Working in a highly competitive and technical environment, I see photography as a way to express my feelings and develop my artistic mindset. I also see a real opportunity to use photography to gain impact by campaigning, in order to help great causes, like the reduction of CO2 in the world.

Funny enough, I was lucky to follow the training “Search Inside Yourself”, the #1 most popular training program at Google, and I was stunned to see that photography is actually really similar to the process of meditating and journaling. Slowing down and appreciating without judging, in order to capture the moment at its fullest!


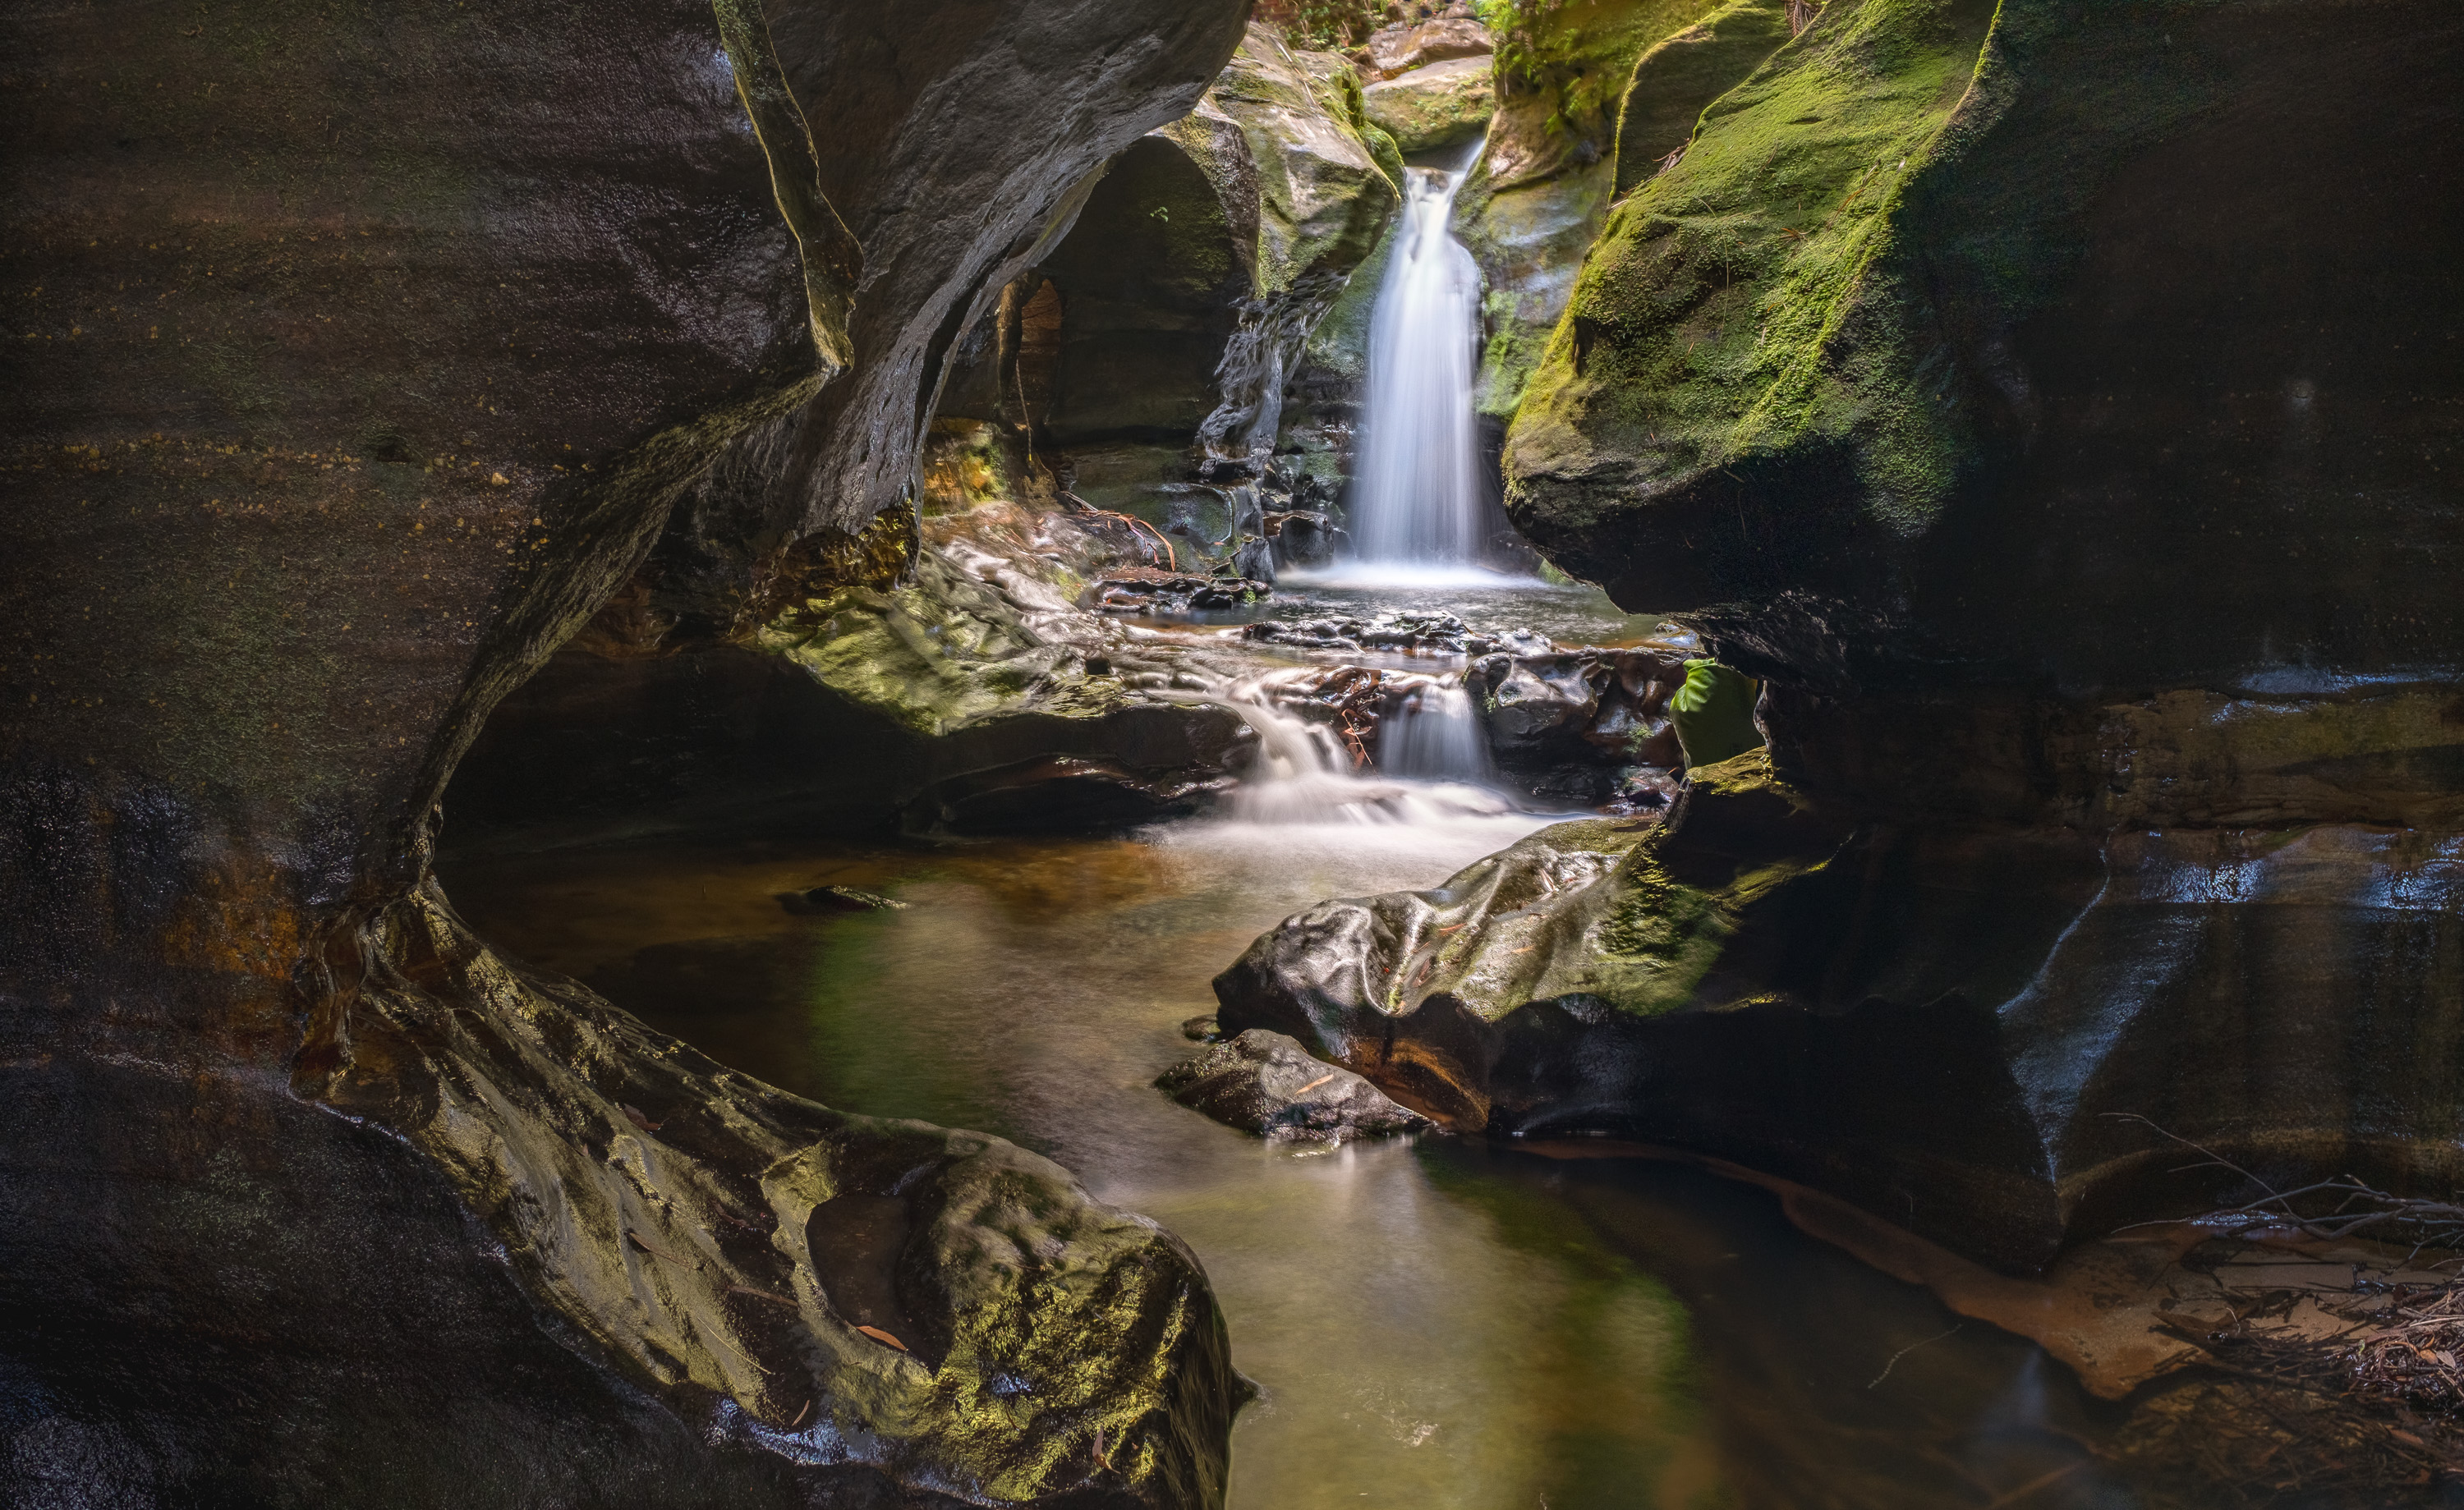
You recently ventured to the Rocky Creek Canyon in New South Wales to test out the new Fujifilm X100F. Tell us, how did you find the experience and did the X100F perform well?


The Fujifilm performed well, it felt like the previous X100S, just better. The top ISO dial was really useful in order to change settings on the fly. This is actually really useful, as you can’t always carry a tripod while venturing through canyons.

It is interesting to know that, while shooting in a long ‘technical’ Canyon, you need to be aware that time can be against you:

  1. You spend typically at least a good 80-90% of your time swimming/abseiling/jumping around/throwing bags in the water. You need a camera that you can take quickly, and being able to change setting in a click of a button is a real advantage.
  2. You will spend less than 20% of the time with a tripod. Time counts, and trust me – you don’t want to get stuck in the water (it’s freezing)

To add to the complexity of canyoning photography, you need to manage really wide dynamic range, and bracketing is sometimes the only option to capture the moment.

I think the X100F is a nice camera to venture into incredible landscapes. While I am a big adept of ultra wide angle, it is good sometimes to keep yourself at a 35mm focal length (full frame equivalent). If I needed a wider field of view, I would simply create a stitched pano. The fact that the X100 series has a small lens is actually a big plus for panorama photography. You will unlikely see any parallax issues while composing your panorama.


Again, I have to say I do love the new top dial to change the ISO on the fly. Also, I like the compact size of the body.


The canyon was quite treacherous in some parts, can you let the readers know how you kept the Fujifilm X100F dry? Also, did the battery life perform for the day-long expedition?


My solution: Use a dry bag in a dry bag 🙂 Macpac do sell those small 5L dry bags for a couple of dollars, and that should cover you for most situations when venturing through the water. Using an underwater housing would be best, but those dry bags do the job just fine.

I only needed to use one battery. That was actually more than enough for a day shooting in a canyon (about 400 shots). I personally never wondered why battery life on mirrorless was an issue. Those batteries are much lighter than DSLR cameras.


How do you like to push the photographic boundaries from a technical imaging aspect and can you show us an example of your imaging process and explain how you formed the final shot?


Below are two examples on how I process my photos from start to finish.


Example One: My personal three-way incremental techniques. A technique to render photos within 5-10 minutes:


  1. First, you have to think about the colour pattern that is going to be used for the photos (e.g. colour wheel). Start with the original image and edit it using Lightroom. I quickly work on the highlights, shadows, white and blacks in the photo. I also correct the hue/saturation of the different colour channels in order to follow my preferred colour wheel scheme. I finally correct distortion and the general aspect ratio in order to bring back the photo as close as I saw it with my own eyes.


2. I continue to the second step by opening the photo with Nik Software Color Efex Pro 4. I usually apply a custom version of the recipe named “Soft Landscape” and remove any vignetting but add some sharpness back to the photos. Also, I apply some of the filters to the selected part of the photo.

3. Then, I reiterate on step one and two until I am happy with the photo.

 Before

After


Example Two: HDR (High Dynamic Range)


One of my best photography techniques is to bracket multiple exposures of the same shot. Why would you do this you might say?


Sometimes you need more dynamic range, and you don’t have time to manually change your settings. This is particularly useful if you go on a non-photography tour. This technique should give you way more flexibility to edit your photo.


Originals:


  1. Here I am happy with the general colours of the photos so I will stick with the Analogous colour scheme (groups of three colours that are next to each other on the colour wheel) to portray the natural colour of the rock.
  2. Following this, I will then create my HDR using Lightroom. This technique should work 99% percent of the time. If not, I would recommend using Photoshop to merge your HDR.


  1. At this stage, I generally disable auto tone, because it sometimes gives an unrealistic (and ugly) result:


  1. Instead of enabling this feature, I reset the auto tone, and play with HDR photos produced by Lightroom. My rule of thumb here is to only edit incrementally, slowly so that I don’t go over the top with any settings:


Settings:
In this image you can see the settings I used in Lightroom to achieve the overall look.


  1. As seen in the photo, during our expedition, the sunlight was hitting the green fern and trees, adding a green ambient light. However, the rock colours remained with a warmer tonality. (It is also interesting to note that Bayer sensors are twice more sensitive to green). I decided to bring back the original colours of the rocks by using an elliptic tool. The end result gave me a nice gradient between the two colour tones. It was important to note that I had to make sure to keep the colours within the predefined Analogous colour scheme.


  1. I then process two copies of the photo using a Lightroom Plugin called Color Efex Pro and Analog Efex Pro with two different tonalities:

left image – Analog Efex Pro, right image –  Color Efex Pro.


  1. Here you can see the final result of both photos. The Analog Efex Pro layer will be used for vignetting, while the Color Efex Pro layer(a warmer version of the original photo) will be used for the centre area to obtain the following rendition. Again changes are extremely subtle:


  1. Finally, we can reprocess the image with Lightroom. The goal here is to slightly increase the exposure of the centre of this frame and slightly accentuate the contrast of the underexposed areas. This should create an all round better depth in the image.


This should give me a more natural, more realistic photo – depicting a better vision of what was seen during that moment.

Before


After


Something worth noting is that you can use the following programs to continually reprocess your image to recreate the scene. By making small incremental changes in Lightroom followed by Nik software and then Photoshop, you will be able to recreate the scene as you saw it with your own eyes. I personally used this processing workflow for some of my most popular shots, such as these: ‘Lonely Solitude‘, ‘Sunrise with the old Gods‘ and ‘Sakura, from the leaves to the sky‘.


If you have some advice for someone starting out in photography what would it be?


Buy a camera with a fixed manual lens. In a day of automation, it is easy to go into the classic auto mode. It works really well in most cases, but this also means that the user will hardly learn any photographic concept. Having a limited focal length will help the user reframe the shot, avoiding any bad practices like constantly zooming. My first camera was a Panasonic GH2 + Voigtlander 25mmF0.95. That setup really helped me step up my game.


If you want to do landscape, then get an ultra wide angled lens. These lenses are expensive, but they will help you frame those ultra wide shots – making it totally worth it.


You mentioned in a conversation you had a previous X Series model, what made you decide on Fujifilm X Series equipment in the first place and how do you see it’s future unfolding with the introduction of mirrorless medium format?


I love the compactness of the system. One camera that really interested me was the X70. I liked it because it provides a 28mm with an adapter to go to 21mm. I travel a lot for work and leisure, and I want to keep my gear light.


I think Fujifilm is going toward a good direction with the medium format:

  1. The camera market is shrinking, it’s very evident with CIPA shipment hitting a new low this year. In the way I see things going, I wouldn’t be surprised to see the interchangeable camera market becoming a niche. To prevent this, camera manufacturers needs to innovate on a hardware and software point of view.
  2. Full frame cameras are now proposing higher megapixel cameras. The problem is that effective resolution on full frame camera tops around ~50-70MP. Two solutions to increase those: scale up the size of the sensor, or change the design of the sensor (3 layers stacked one, etc.).


Now you have had some time with the X100F, were there any features you enjoyed using and what would you like to see improved in future X Series models?


Enjoyed using:

  1. ISO dial, it was great!
  2. Quick menu settings.
  3. The small joystick that can be used to navigate and change focus points.
  4. Backwards compatibility with X100 series lens and accessories.


Things to improve:

–   ISO dial is great, I love it. It is sometimes hard to change it on the go.

–   Please provide an app store where we could install apps for time-lapse, overlay with apps (e.g. predicting the position of the sun, etc), social media apps (snap, etc.). Transferring photo to a laptop is old. Sometimes we just want to share on the go.


Looking at your photos we noticed you love to travel. Are there any essential pieces of equipment you like to take with you before travelling and what’s the best way to conduct research on the places you are planning to visit?


I usually like to bring with me:

  1. Drone (DJI Mavic Pro).
  2. Camera with wide angle lens (15-30mm ~), 50mm lens and 70-200mm. And the kit lens of course (for my underwater housing). Oh and I always have a second old body, just in case one breaks.
  3. Underwater housing, if I plan on bringing the camera underwater. I have a cheap one that does an excellent job (Meikon).
  4. Solar panel to charge on the go + 10,000 mAh battery so that I can quickly charge my camera and equipment.
  5. A phone camera, that is always good to have.
  6. A small tripod, and sometimes a bigger one.


The best way to conduct research on places I am planning to visit: That’s a tough question – I usually look at travel guides, I also look at the weather, and the likelihood to see wildlife and scenery (that will dictate which lens I am taking). Also use an app like Photopills to know what I am going to shoot (night photography, etc.). In most cases, I wait only a few days before booking my hotel. The weather might change, and this may dictate your choice of location.


I don’t like to look at too many photos from other photographers of the place I’m going to, because it sometimes might spoil the feeling of that place, and it will also give me too much temptation to imitate them. It also gives the opportunity to look at a place differently.

To see more photos from Josselin follow him on Instagram or visit his website here.

Other interviews in this series

Through A Photographer’s Eye: Drew Hopper

Through A Photographer’s Eye: Alamby Leung

Through a Photographer’s Eye: Ian Tan

Through a Photographer’s Eye: Dale Rogers


Experiencing Rajasthan with the X100S

By Simon Bray

I wanted to explore somewhere different, somewhere that would stretch me, show me part of the world that I’d never experienced before, and may not have the freedom or lack of responsibilities to explore in the same way again; so we chose India, specifically, two weeks in Rajasthan.


I think to say that it stretched me would be an understatement of vast proportions. Every time I thought I was getting somewhere close to understanding the place I was in, something new would throw me off. My senses were constantly stimulated, whether it was relentless traffic and horns sounding, incense or burning rubbish, the colours and constant movement, being stared at or asked for money, flavours that were totally new, the combination was overwhelming.

However, there was never a shortage of things to photograph. It was almost as if every corner demanded to be documented. Everything was new, interesting, exciting, it was like returning to when I’d just started to pick up a camera and the possibilities of making images was totally new again.

Being a tourist gave me permission to photograph, I didn’t feel any boundaries. Every time someone asked me and my wife (mainly my wife) for a portrait, I asked for one in return. My confidence to take images soon built, even if my the rest of my instincts remained unsure about everything happening around me.

I don’t think I went with any direct expectations of what I wanted to capture. I don’t think I had any direct expectations of what I was about to throw myself into at all actually! The one thing I did know was that I wanted to travel light. I took just one backpack, so taking a raft of lenses and equipment really wasn’t an option, which is why I opted for the FUJIFILM X100S, it was an obvious choice really.

It’s a camera that I’d grown to love shooting with over the past year or so. The simplicity of using it is what really drew me in, but the image quality continues to impress me, I’d go as far as saying I like working with the files over my full frame DSLR option. It’s my go-to camera for travel, to the extent that I’ve just ordered the FUJIFILM X100F, which I know will be by my side pretty much everywhere I go!

I have compiled the images I took during my time in Rajasthan into an 86 page book, co-published by Let’s Explore Publishing and myself. It’s an exploration to experience a culture that is different to my own. Different values, commodities, traditions, history, religions, customs, food, politics, economics and yet so much to be shared together along the way.

If you would like to pre-order a copy of the book, please visit: http://www.simonbray.co.uk/prints-publications/the-limited-findings-of-a-westerners-short-stay-in-rajasthan


About Simon

Simon Bray is a Manchester based documentary & landscape photographer. He began taking photographs when he moved from Hampshire to Manchester as a means of assimilating into his new surroundings and adjusting to city life. His work has been exhibited at The Whitworth, Manchester and Brighton Photo Biennial and displayed at The Southbank Centre and Open Eye Gallery, Liverpool. His work has been published in The Guardian, BBC In Pictures and Outdoor Photography.

Website: www.simonbray.co.uk
Instagram: www.instagram.com/simonbray
Twitter: www.twitter.com/simonbray

X-Thusiast Featured Photographer Tafa Ali

The latest featured photographer in our X-Thusiast program is Tafa Ali. Tafa was born in Indonesia, and lives in Sydney. Keen on fashion photography, Tafa shoots at runways and enjoys attending photo exhibits at art galleries.


Can you tell us a bit about yourself and where you are from?


My name is Tafa Ali. I was born in Indonesia and I am currently living in Sydney, Australia. I’m a freelance photographer and I work at Spectrum Camera House.

tafa

Tafa Ali

I was focused on music and drawing when suddenly photography had a massive impact on me after I picked up a film camera in high school. It has now been six years that I have been shooting and have exhibited my work overseas and in Australia.


blue-and-gold-xpro2-56mm-apd

“Blue and Gold” X-Pro2 + XF56mmF1.2 R APD


How did you develop an interest in photography using Fujifilm equipment?


I was a Canon shooter before, but with the new mirrorless technology and the amount of gigs I was going to be doing, Fujifilm was a better choice for me. When first picking up a X100S from a mate, I loved how sharp my photos were and how easy it was to change the settings in manual mode using the dials. It reminded me of when I was shooting film. This simplicity made me want to purchase only Fujifilm cameras going forward.


How would you describe your photography style and strategy?


My photography style is focused on fashion, portrait and event photography. Mostly I shoot with natural light or a direct flash for my portrait and fashion shots. Keep it simple and clean, unless the client wants a different setup.

oscar-de-la-renta-backstage-x100t

“Oscar de la Renta Backstage” X100T


What inspires your photography?

People – everyone has their own unique characters. I love capturing their personality.


Where are your favourite places to take photos and do you prefer a certain type of light to photograph in?


I don’t have any favourite places to shoot because I mostly shoot indoor. When I shoot outdoor, I like to shoot on random streets in the city or Newtown and mainly beaches, too. I like shooting in the shade because the light is very soft and diffused, which really helps to bring out nice skin tones.

botanic-garden-x-pro2-56mm-apd

“Botanic Garden” X-Pro2 +XF56mmF1.2 R APD


What is your favourite memory from a photography session?


When I was shooting one of my favourite musicians, Steve Vai!


Can you tell us what is your favourite Fujifilm camera and why?


I used to have X-T1, but mostly I use the X100T because of the hybrid viewfinder. Now I prefer to use the X-Pro2 as my favourite camera to use. It has a much better autofocus – especially after the firmware update. And it’s super amazing in low light! I was photographing fireworks on New Year’s Eve at ISO 8000 and I barely saw any noise. Also, I can use all my vintage lenses from my film cameras on X-Pro2 with my adapters.


Which Fujinon lens or lenses do you prefer to use with your Fujifilm camera and why?


I shoot 99% portrait and fashion, so the Fujinon XF56mmF1.2 R APD is my favourite. It’s a super sharp lens at F1.2 and I just love the colours and the really nice soft bokeh!

sunday-morning-in-bronte-x100t

“Sunday Morning in Bronte” X100T


What sort of workflow do you use in your photography? Do you shoot in RAW or Jpeg?


Mostly I edit my photos using Lightroom and Photoshop. I shoot RAW and Jpeg on each individual SD card. For mobile editing, I can transfer and edit straight on my phone, for this I use snapseed and VSCO.


Do you have any technical tips you’d like to share? Perhaps suggestions on the best lighting, shutter speed, white balance, aperture, ISO, etc.? Other preferences?


Before I start shooting, I need to have a concept first. Planning ahead saves so much time on location later. I always set my ISO first, and then aperture; the last thing is shutter speed. If I need to change the exposure I just change the shutter speed dial. I always use auto white balance except when I shoot fashion runways. This is when you have to adjust your own white balance (saves a lot of editing time) because the lighting keeps changing every second.

newtown-chill-x100t

“Newtown Chill” X100T


Do you have advice for new photographers or the next potential X-Thusiast?


Watch a lot of tutorials online but don’t spend too much time in front of your computer. Go outside and shoot, hang out and make friends with people who love photography too.


Attend photographic exhibitions, go to art galleries and join photo walks. I might see you there at the next People with Cameras by Fujifilm. Looking forward to the next one. 🙂


Are you interested in becoming our next featured X-Thusiast photographer? Check out our full X-Thusiast Gallery and submission details.


Through a Photographer’s Eye: Dale Rogers

through-a-photographers-eye

Through a photographer’s eye is the first in a series of interviews featuring Australian photographers. In each interview, we learn about the person behind the camera and how they use Fujifilm X Series cameras to photograph the world around them. Our fourth interview is with Phillip Island based photographer, Dale Rogers.

29153893622_ef9feaba94_k

Dale, having viewed your images via your website and Facebook page can you tell us more about yourself and why you started an adventure based photography business with your partner?


Cecilia, my wife, and I been using cameras since the old film days. I began when I was around 10 years old using my Dad’s Canon AE-1 Program camera. I have shot full frame digital until a couple of years ago when I bought my first Fujifilm as a ‘mirrorless experiment’. Since that time, I have sold all my full frame Canon gear and use the X-T1, X-T10 and X-T2 cameras and a wide selection of lenses.

We both work other jobs alongside Photo Rangers until the business model is more self-sustainable. Cecilia is an academic and teaches literature at Deacon University to students studying education and I manage a government human services program.

 31288750922_c498b6a241_k

Fujifilm X-T1 – XF18mmF2 R – ISO 200 – F2.8 – 1/4000 second

We are passionate about photography, educating others and the environment. We decided our passion could be combined in a unique mix. With our adventure based workshop business Photo Rangers we thought we could teach photography skills in the natural environment and not only teach camera skills, composition and photography techniques but we could also teach about the unique ecosystem on Phillip Island/Wilson’s Prom – the geology, flora, fauna and the delicate balance of sustainability required.

We believe that a person takes a better photo when they clearly identify the subject and understand the ‘story’ around that subject. This serves two purposes for us – workshop participants learn to use their gear and take better photos and they have a better understanding of the environment and eco-system. We call our mix of adventure based workshops and environmental education eco-photography.

Finally, we do what we do because we love to have fun. On all of our workshops, we ensure a supportive and fun approach allowing participants to easily remember the lessons from the adventure.


What sort of feeling do you get when you find yourself outdoors photographing with Fujifilm X Series equipment?


Easy. The equipment is not a burden to carry the 9 or 10 kilometres we sometimes travel on a trail. So I feel less burdened, more free with my Fujifilm gear. I’m able to enjoy the hike, the sight, sounds, smells and the experience of being outdoors. It allows me to enjoy the hike and focus on seeing the light and compositions that appear as I walk.

32836845545_04656bb877_k

Fujifilm X-T10 – XF10-24mmF4 R OIS – ISO 200 – F7.1 – 1/30 second

The Fujifilm viewfinder looks amazing and when I peer through the camera, I can quickly change my shutter speed or aperture to find just the right exposure instantly. That means I miss very few shots and I am not frequently chimping down on the back screen of the camera to see if I got it. I get more keepers with less effort with my Fujifilm cameras.

And finally, I know that the Fujifilm camera will take as good a shot as can be taken. I never worry about having a better camera because I am confident I have everything I need to get the perfect photo.

30672943216_2fee4d5aff_k

Fujifilm X-T10 – XF18mmF2 R – ISO 200 – F9 – 1/30 second

Can you elaborate on how you use Fujifilm equipment out in the field to connect with the rest of world?


Since moving to Fujifilm, I have slowly moved away from the epic, ND filtered landscapes. Epic landscapes put you out of the picture as if you are viewing from a window or viewing a painting. They are epic in scale and the viewer feels small in comparison to the scene portrayed. Epic landscape photos are taken in breathtaking beautiful places. Places where cars pull over, people stop and marvel at the view and are destinations to visit.

An intimate landscape is rarely noticed by a passerby. They are not marked on a map, hiked to, driven past, camped at or explored. They just exist. They exist right under our feet or right in front of our eyes. They are there for the finding if one slows down and really looks.

 30408568284_46a364a7ab_k

Fujifilm X-T2 – XC50-230mmF4.5-6.7 OIS – ISO 800 – F6.7 – 1/30 second

An intimate landscape encompasses the viewer and pulls them into a special secret moment of time, place and space. The viewer is not outside of, but rather, included within the intimate landscape. Using my Fujifilm equipment, I can slow down enough and find these intimate landscapes.

I push my gear pretty hard and frequently drop lenses, have tripods blow over, bang cameras along rocks or cliffsides and get the camera and myself very wet. My gear gets caked in salt grime, sand and mud regularly. I have not had any misfortune with the X Series so far!

31891419872_a7e972d6a2_k

Fujifilm X-T2 – XF10-24mmF4 R OIS – ISO 200 – F9 – 1/1000 second


When you are out by yourself photographing the landscapes of Phillip Island and surrounds what do you tend to take with you in terms of camera equipment? For someone starting out in this field, what Fujifilm gear would you recommend?


I always carry two cameras at hand. I clip the Fujifilm X-T10 with a XF10-24mmF4 lens to my backpack strap with a Peak Capture Plate. I carry the Fujifilm X-T2 with a XF50-140mmF2.8 lens. This gives me the ability to get the intimate landscape and wildlife shots with the X-T2 and the wide beautiful landscapes with the X-T10 without having to change lenses or dig around in my pack.


For astro photography, I use the X-T2 with the XF18mmF2 lens and set up the X-T10 with a XF14mmF2.8 lens some distance away. I use the X-T10’s built in intervalometer to take consecutive shots to build star trails or a time-lapse sequence.

30018927330_b036684f5e_k

Fujifilm X-T2 – XF14mmF2.8 R – ISO 320 – F2.8 – 25 seconds

For the beginning photographer, I recommend buying to your budget. If the budget fits the X-T2 and XF16-55mmF2.8 then I recommend that as the initial setup. However, often I see photographers just starting on their discovery of the craft and not able to invest in the top end gear. I recommend the X-T10/X-T20 with XF18-55mmF2.8-4 combo as a starting kit.


If you have some advice for someone starting out in photography what would it be?


If you are just starting out in photography, I recommend you follow and watch other photographers on social media especially those who are shooting similar things to yourself. By watching others, you see perspectives or ideas for shooting that you would not have thought of or you start analysing the images trying to determine how the shot was achieved.

32227865915_7b4cfcc326_k

Fujifilm X-T1 – XF10-24mmF4 R OIS – ISO 400 – F7.1 – 1/250 second

Have a look at some of the old masters (or current masters) of photography and see their images. My inspiration for intimate landscapes came from Eliot Porter, one of the first professionals to use colour film, and Jai Maisel who currently shoots street photography in New York City. Have a look at their work and see if you can see the connection I made between them.

I also encourage photographers to try one of the 52-week challenges that exist. On our Photo Rangers Community Facebook page, we host a 52-week challenge. This is a personal challenge and not a contest or competitive event. The purpose is to get photographers creating photos and shooting subjects they would not have done otherwise. If you want to join along in this supportive community, come on over to http://facebook.com/groups/photorangerscommunity


Do you have a favourite setting or film simulation you use when photographing in outdoor locations, and what about editing, does this form a part of your workflow?


I sometimes enjoy shooting with the Acros film simulation. By looking through the viewfinder at a black and white image, light is seen differently and my composition and exposure will be slightly different than if I were not using Acros.

I customise and change up my camera’s Q Menu to shoot in several different film simulations and styles on a regular basis.

32022176583_a53d874e0e_k

Fujifilm X-T10 – XF10-24mmF4 R OIS – ISO 200 – F9 – 1/1000 second

I import both the JPG and RAW files into Lightroom CC. There are times where the JPG files look great and no real editing is required. But, if there are big differences in the dynamic range of light, I’ll do a thorough edit of the RAW file. The only time I will use Photoshop is to create star trails for multiple images.

I export completed images in a 2048px longest edge JPG with a water mark and a full resolution JPG without. The 2048px file is used for social media and the full resolution to be used for print.


What sort of wildlife do you photograph and is there a particular time of year when someone should visit Phillip Island?


There are seasonal changes to the wildlife on Phillip Island and I adjust my shooting based on what’s available as well as the position of the sun and Milky Way relevant to my favourite shooting locations.

Summer is my favourite time of year because, on the narrow Cape Woolamai Peninsula, wallabies move from the forested East side to the rugged cliffs of the West near sunset each day. I can always count on finding a few wallabies grazing on a cliff side with the ocean and setting sun as backgrounds creating a perfect shot.

 31367441481_c2adca1f21_k

Fujifilm X-T2 – XC50-230mmF4.5-6.7 OIS – ISO 200 – F4.5 – 1/125 second

Summer is also when Cape Woolamai is home to almost two million Short Tailed Shearwater birds. They venture out before sunrise each morning to feed on ocean krill and return just after sunset each night in a massive flock to their burrows. The return of the Shearwaters each evening is a magical experience and I’m out there on a regular basis with our adventure based workshops to see and photograph them.

The Shearwaters leave the island in the fall but we experience the migration of Humpback and Southern Right whales to warmer waters in the winter.

The Milky Way is also very prominent in the night sky during winter and conditions for astrophotography are perfect.

32576750916_430b216faa_k

Fujifilm X-T2 – XF18mmF2 R – ISO 1600 – F2 – 20 seconds


Based on your experience, what advice can you give to someone thinking about upgrading their current digital SLR to a Fujifilm mirrorless system?


What are you waiting for? Having shot both full frame DSLR and Fujifilm mirrorless simultaneously, I saw no reason to maintain the heavy DSLRs and inferior lenses. Seriously, I recommend people to go hold the Fujifilm or try one out. That’s usually all it takes. Once a photographer spends a few minutes with the Fujifilm, they are hooked. Just the ability to shoot off the histogram makes getting the right shot much easier than you can ever do with the exposure meter on a DSLR.

29186050246_f8bc617baf_k

Fujifilm X-T1 – XC50-230mmF4.5-6.7 OIS – ISO 200 – F7.1 – 1/2000 second

I do recommend that photographers seriously look at the X-T2, XF10-24mmF4, XF16-55mmF2.8 and XF50-140mmF2.8 as the basic starter kit covering most focal lengths. From there they can pick up a few primes to suit their shooting style or preference.

To see more photos from Dale follow him on Facebook, Instagram, Twitter or visit the Photo Rangers website.

Other interviews in this series

Through A Photographer’s Eye: Drew Hopper

Through A Photographer’s Eye: Alamby Leung

Through a Photographer’s Eye: Ian Tan

Orcas. An Arctic fairytale of whales (which are actually big dolphins)

By Tommy Simonsen – Northern Norway, January 2017.

The air is crisp and cold, and the light is about to break as we speed through the strait, heading north. We freeze a little in our yellow safety suits; we are after all in an open boat hurtling through the winter darkness at 69”N. The 12 meter long black R.I.B. (rigid inflatable boat) is perfect for these arctic waters, and the feeling of cold doesn’t bother us too much on our way to a great annual adventure: the Arctic Orca Safari!

The dark season is about to come to an end at these latitudes. The region has been engulfed in darkness and passing winter storms since the end of November, when the sun broke above the horizon for the last time. The further north you get, the longer the darkness lasts. Today we got a vague sort of daylight between 11.00 and 13:30.

I have been tracking the weather forecast, and noted that the clouds are supposed to clear around this time. As the sun is about to make a return, that is an extra reward, whether or not we find any orcas. At this time of the year, sky at the top of the world turns a special shade of pastel pink.

Orcas and other whales arrive in the northern coast of Troms county from the end of October to February. They follow the large shoals of herring that come from the open waters into the fjords. Herring is food, so where there is herring, there are whales.


After an hour the R.I.B. suddenly slows down. It lies quietly in the water, with snow covered mountains rising in the distance. The light has turned an intense yellow in the southern sky, and in the north, deep blue has given way to pastel pink.

P-Tchhh!  I look around; it’s close.


P-TCHHH!!!


It’s really close!


An orca pops up right next to our R.I.B., exhaling explosively, filling the air with the smell of digested fish.

There’s nothing like the smell of herring in the morning!

As the light gets stronger, we realize that it is a large family group we have found. A shoal of herring is present, and the family is in hunt mode, ignoring us completely. They work like a wolf pack, confusing the fish by blowing bubbles, working to keep the panicked herring close to the surface and then barrel through them, filling their great mouths with stunned prey. It is clamour and carnage on the surface, with seagulls and sea eagles swooping in to join the feeding frenzy. Pods of orcas zigzag, coming right towards the R.I.B., dorsal fins slicing the water.

P-Tchhh!
Orcas are everywhere. They dive under us, emerging on the other side of the boat. Close by us. Far away from us. Everywhere. It’s intense. I remind myself to breathe, to not forget why I am here.

To get extraordinary pictures.


How I create my orca pictures from a boat

Type of boat

I prefer to work from a small boat, so I can shoot from lower angles. But remember: salt water is certain death to your expensive electronic camera. It is extremely important to pack your gear in a waterproof Ortlieb, Lowepro or similar bag of another brand. And I mean really waterproof! If you’re not used to shooting from a small boat, keep the bag properly closed during transport. Learn to read the waves and how the boat responds to them. The waves might not splash you from the front, but come at you from the sides, or elsewhere unexpected.

When you use your camera, keep the bag closed. And NEVER leave the bag unattended on the boat deck. When I need to, I cover the camera under my arm or in a plastic bag when I wait for something to happen. Don’t put the camera against your body under the jacket. Remember it’s cold outside, and you are warm. When you take your camera out again, the lens and viewfinder will fog up.

Keep your gear cold. Only spare batteries should be kept warm in your inner pockets. On a trip like this, you should bring several batteries.


Position in the boat

Where you sit on an R.I.B. during a tour is important. If you occupy a front seat in the bow, you get a wide, panoramic view with no obstructions. But the bow gets the worst beating from the chop, and is also the one position where you are almost guaranteed to get wet if the sea is anything but calm.

On an R.I.B. during a whale safari, I prefer a seat at the rear, as close to the pilot / guide as possible. It makes communication easier, and is also the place where the boat’s rail is at its lowest, so I can lean over the side in calmer conditions, to get the lowest angle possible. Capturing whales high above the horizon line adds to the drama of my images.


Cameras and settings

I have two FUJIFILM X-T2 camera bodies with two 32 or 64GB SD cards in each. One with the XF50-140mmF2.8 WR on it, and the other with the XF16-55mmF2.8 WR.

Both bodies and lenses are weather sealed, which is necessary because you get a little wet working around waves and whales, and this equipment can take some some sea water without damage. And I always have the ever important, absorbent microfiber lens cloth. I have a couple of them in different pockets, so I can switch when one of them gets too wet.

The X-T2’s tilt screen is one of the reasons it is my preferred field camera. It’s perfect for shots at lower angles, especially with the vertical tilt for portrait oriented images.

Shutter speed and reaction time are vital to shooting whales. I prefer 1/2000 sec. If the sea is rough, shutter speed has to come up. All of these shots were made under lower lighting conditions, so my shutter speed varied from 1/500 to 1/1000 sec at ISO 1600 to 2500 in all of them. Imagine how the colors would have turned out at ISO 200? Fast lenses are certainly critical in these conditions.

Responsive auto focus is also important. I often use “single point” or “Zone” AF mode, normally on Single or Continuous tracking focus. Typically, I use “CL” or “CH” burst modes for whales. The AF point joystick is most important to me for quick composing and shooting.


Don’t forget to have fun

Remember to put your camera down once in a while. These Arctic orca safaris have a special place in my heart. I work very hard on these trips, but remind myself to put my cameras away sometimes, to fully enjoy the spectacle of these magnificent creatures in action.

Thanks for coming along on this Arctic journey with me.

Tommy


Arctic Orca facts

  • The Orca is the largest of whales in the dolphin family, and like most other dolphin species, they live in social groups.
  • There are about 3000 orcas in the Norwegian and Barents Seas.
  • Females can be up to 7.7 meters, and weigh 3.8 tons, with an average life expectancy of 50 years, and a maximum of 80-90 years. After being pregnant for 15-18 months, a female gives birth in the late autumn to a 2.3 meter long calf that weights about 200Kg.
  • Males can be up to 9 meters, and weigh 5.5 tons, with an average life expectancy of 30 years, and a maximum of 50-60 years. The dorsal fin is much larger on males.
  • They live in family groups of females and calves, with only one or few adult males.
  • Each group seems to have their own dialect for communicating.
  • Orcas often collaborate to capture prey, which can be small fish like herring, or the large species like other whales. They have been observed herding fish into tight corrals, while other members of the group swim into its midst, stunning the fish with their tails to make feeding more efficient.

Facts source: Norwegian Polar Institute.