Year: 2016

Shooting live events with Fujifilm X Series cameras

_dsf0134-edit

By Matt Hart

Shooting live music events is one of the trickiest disciplines in photography. Subjects move a lot, often lighting changes constantly and in general it can be a lot of hard work. With that said, live music events have passion by the bucket load and if you can capture that in a single frame it makes for some exceptional images. It could be a front man working the crowd, the guitarist tearing up a solo or people attending having the time of their lives, whatever it is, the subject matter can never be accused of being dull.

In this blog, I’m going to get a bit technical running you through the kit I use to shoot events and the reasons behind it. Also, we’ll cover what to look for when photographing live music. Enjoy!

matt0083-edit


The kit

Right, let’s jump straight into it by running you through my usual kit for shooting live music and festivals.

Camera:

I usually take two camera bodies with me. The reason I do this is so I can use two different lenses and change quickly between them. My preference is the Fujifilm X-Pro2 and the Fujifilm X-T2 with the battery grip. Overall, the cameras are similar in terms of feature set but the build and handling of each make them serve a different purpose. The battery-gripped X-T2 has several advantages – Firstly, it allows me to shoot all day without needing to change batteries over. Secondly, I can switch to portrait and landscape orientation easily and lastly, the joystick for positioning the AF point is incredibly useful for accurate and quick focusing on specific subjects.

While the X-Pro2 is more than capable of shooting a live music event or festival, I like to keep the X-Pro2 free to shoot images of interesting people. These days I shoot with the X-Pro2 almost exclusively for my street photography, so bringing it to a festival makes a lot of sense for me. I’m taking my ever-faithful street photography setup and just applying it to a slightly different environment. For me, the main benefit is the rangefinder style. Unlike the X-T2, the viewfinder is off-centre and when you point it towards a subject, it doesn’t look like you’re aiming directly at them. This means people are far less likely to close up and act differently. Pointing a huge camera directly at a person usually means they’ll pose for their picture, but my aim is to capture the more candid, natural moments instead.

_dsf0150-edit


Lenses:

With a lot of events, you will be firmly planted in what is lovingly referred to as ‘the pit’. This is the area at the front of the stage where you can see the performers and have the opportunity to take shots of them. For this, I will opt for the XF50-140mm lens. Its focal length suits subjects that are quite far away and it also allows me to zoom in enough to get a tight shot should I want to capture that. It’s also very useful for capturing people in the crowd on each others shoulder too.

_mkh3857-edit

With the exception of the Fujinon 50-140mm XF lens, I mostly shoot with prime lenses. My kit bag usually comprises of the Fujinon 16mm f/1.4, Fujinon 23mm f/2 and sometimes the Fujinon 90mm f/2 lens too. I like to have the have fast, wide prime lenses, especially in low-light situations. I will alternate between the 16mm and the 23mm often and occasionally draw upon the 90mm when I want to capture close-up portraiture or to shoot a subject I want to isolate from the background.

_mkh5233-edit


Alternatives

In general, I use primes as I just love all the characteristics they give. However, there are a couple of zoom lenses which are incredibly sharp and suit shooting events perfectly. Firstly, the Fujinon 10-24mm f/4 is a fantastic lens. It’s wide enough for big stage shots, capturing crowds and potential to get very creative too. Another great lens is the XF16-55mm f/2.8 this serves the purpose of all of the primes and it’s a bit more convenient not having to switch out lenses.

matt0163-edit


What shots to look for

Many moons ago I shot club nights and festivals week-in week-out but these days I’m not shooting for a promoter or club, instead I’m shooting for myself. My brief is set by myself so I’m trying to look images that excite me. It’s all about capturing the mood and telling a story of the event.

Here are a few of the key shots to look for when shooting an event.

1. Performer shots

Capturing musicians in action is quite tricky. If they’re moving fast in low-light in can be incredibly difficult. The important thing to remember though is what the viewer is going to want to see – that’s the musician and possibly some environmental context if it adds to the composition. If the subject is the main focus I prefer to shoot wide open and isolate the subject. If there’s something interesting like a DJ with their decks or a rack of guitars I might stop down the aperture or shoot the scene with a wide angle lens to give a sense of the environment.

_dsf0170-edit

matt0010


2. Crowd shots

If you’re shooting from the stage or in the pit, it’s always worth spinning around and checking out what the crowd are doing. A well timed pyrotechnic or a person on another person’s shoulder makes for an amazing picture. Sometimes I walk along the front row and pick out a group of interesting people.

_dsf0113-edit

_mkh5315-edit


3. People shots

Interesting people and music events go hand in hand. The crowd shots are always good, but I love to get into the crowd and capture the people having fun. Essentially, I take a street photography approach to this. I want people to be relaxed and natural around me, so before I start taking any pictures I walk around in the crowd, blending in and just enjoy myself. Once you’re in there amongst everyone you can begin to capture what you see in front of you which will be a unique perspective.

matt0235-edit

_mkh3291-edit

_mkh6021-edit


4. Capturing the atmosphere

You simply can’t stage atmosphere – It’s either there or it’s not. The shots that I find myself looking at time and time again are the ones that tell the story of what the festival was like. It’s all about capturing the moment and the soul of the event. Now, there’s no hard and fast way to capture this kind of scene but if it sounds good, the crowd are noisy or the hairs are standing up on your arms, shoot what makes you smile!

_mkh5601-edit


Portrait Photography – Take Your Photography to the Next Level

Australia strip BLACK

Taking portraits?
Need some advice?

portrait-photography-006


One of the reasons why people choose to buy a camera is for portraiture, or more specifically, so one can take photos of friends and family. This may be the reason why you purchased an X Series camera or even why you might be considering one.

Let’s assume you have an X Series camera in your hand for the first time and wanted to capture a portrait. Looking down at the dials on top of the camera may leave you feeling quite lost about the settings you should use to capture the perfect portrait. It is a common ‘freak out’ moment among many first time users, so don’t worry.

In this article we will explain how to capture a portrait if you are just starting out using automatic mode and if you wish to grow in your photography level 2 explains a more professional approach to portraiture using aperture priority.

Level 1 – Beginner: Automatic Mode

Fujifilm X Series cameras are built from the ground up to enable anyone to capture a perfect photo no matter what their experience. The balance of intelligent design, research and development combined with incredible image quality boasts itself in all modes of the camera, including the automatic mode.

Sometimes just picking up a camera and turning it on to capture the moment is all you need to do. It can be a great starting place to invigorate your creative spark and really get you into photography.

To start operating your X Series in Automatic mode change the following settings pictured below to the red ‘A’.

portrait-photography-004

portrait-photography-005

Depending on the Fujinon lens, you may also find the ‘A’ setting on the aperture ring.

portrait-photography-008

The settings we will explore in this article (and pictured above) include shutter speed, aperture and ISO. These three corner store settings will form the base of your photography skill over the years and understanding them will take time so don’t worry if it doesn’t all sink in to begin with.

Basically, by setting the camera to auto you tell it to automatically calculate how much light should be let into the camera, how much of the subject should be in focus and how light sensitive you want the camera to be. These three settings are shutter speed, aperture and ISO respectively.

The second step when photographing in automatic mode is to ensure you select automatic focus or ‘S’ on your camera. Selecting this mode will ensure whenever you half-press the shutter button to take a photo of a stationary object (in this case a person) the camera will autofocus on the subject automatically.

portrait-photography-002

Tip: If you are photographing children, turning the focus mode to ‘C’ for Continuous as this is the best option for moving subjects.

portrait-photography-007

So you see, this mode isn’t all that hard to use. You will be surprised what success you can generate when photographing in automatic mode.

Tip: Did you know the Fujifilm X-T10 has an automatic switch that overrides all of the cameras settings? This feature makes the Fujifilm X-T10 a perfect choice for entry level photographers.

portrait-photography-001

If you want to take your photography to the next level it’s important to learn a few things about aperture priority and F-stops.

Level 2 – Professional: Changing your aperture (F-stop)

Changing the what?

F-stop is a term that refers to the amount or value of light coming in through the lens and it’s commonly referred to as aperture, something we briefly talked about when describing automatic mode.

Aperture, put simply is an adjustable sized hole in the lens you can change. The aperture is measured by numbers (F-stop), and selecting one of these numbers will determine how much of the subject is in focus. We will explain the numbers that appear on the lenses further through images for a clearer comparison, but first, do you remember when we talked about the corner stone settings that will form a basis of your photography?

portrait-photography-003

Aperture is one of those corner stone settings, so this means whenever you manually choose a priority setting, like shutter speed; aperture; or ISO, the camera will automatically take care of the remaining two modes. In this case, we would be changing the aperture by manually selecting the F-stop found on the lens, the shutter speed and ISO would then be set to automatic ‘A’. The jargon for this would be to say we are shooting in ‘Aperture Priority mode’.

Many portrait photographers photograph in Aperture Priority to ensure they utilise the best depth of field their lens can offer. The resulting picture is a subject in focus separated from the background by blur. If you are to take one thing away from this article, remember the following as it will make a huge difference to your portrait photography:


To obtain a shallow depth of field change the aperture to the smallest number (ie F2.8)
Think small F-stop = small amount in focus
Image result: The person will be in focus and the background will be very blurred.


To obtain a large depth of field change the aperture to the largest number (ie F22)
Think large F-stop = lots in focus.
Image result: The person will be in focus and the background will also be in focus.


Another important thing to keep in mind when manually photographing in Aperture Priority is to ensure you have a knowledge of the numbers on the front of your lens. Let’s use the popular kit lens, the Fujinon XF18-55mmF2.8-4 lens as an example.

portrait-photography-010

Breaking down the numbers the 18-55mm describes the focal length of the lens. 18mm describes the widest angle of the lens, whereas if you were to zoom in the maximum focal length it would be 55mm. This makes sense when written, but what about the accompanying numbers, the F-stop values?

portrait-photography-011

The listed F-stops of F2.8-4 describes the limits of the aperture (remember that hole in the lens). It is also true to say that the F-stop values on the front of the lens correspond to the focal length of the lens.

portrait-photography-012

For instance, if you zoom out to the widest point of the lens you will be able to select F2.8 as the maximum aperture ensuring you get the maximum depth of field the lens can offer.

However, if you zoom in to 55mm (to get closer) the maximum aperture decreases to F4, or in real world terms the hole in the lens gets smaller, therefore letting in less light.

Understanding these numbers will provide a greater insight into lens pricing and the amount of depth of field the lens offers. The easiest way to remember this is if the lens has a fixed aperture, for example the XF50-140mmF2.8 then no matter if you zoom in or out the size of the aperture is the same value – F2.8. In other words there will be no light loss. Whereas in our example of the XF18-55mmF2.8-4 there will be some light loss at the longer focal length.

So what does this mean? Can you still take great portraits at a focal length of 55mm at F4 using the standard kit lens found on most X Series cameras?

Yes, of course, you can! The only difference is the amount of subject matter that will be out of focus when compared to a photograph at F2.8. Remember when we said, “To obtain a shallow depth of field change the aperture to the smallest number (ie F2.8)”.

grace-089

Tip: To take the best photo using the XF18-55mm at 55mm we would encourage you to increase your distance away from your subject and zoom in while photographing in aperture priority at F4.

The other alternative, if depth of field is important to you, is to consider a specific portrait lens that has a small aperture. This may help explain why there are so many lenses available for X Series cameras. For instance, did you know there is an excellent portrait lens available in the form of the XF56mmF1.2 lens?

Can you guess what the photo will look like if you were to photograph in aperture priority at F1.2? We leave you to answer that in the comments below…

Hopefully, by reading this article and coming back to every now and again, these explanations may help you in the future. Remember, it’s not important to remember everything noted here when you start out, that’s not the point, rather what we want you to learn is just one thing at a time.

Learn ‘that’ one thing so it becomes second nature, and over time you can increase your learning. Other ways you can learn photography may include joining a photography club, attending a photography meetup, workshop or photowalk and lastly, when it comes time to purchasing a lens, we encourage you to visit an expert at a retail store – their knowledge on specific lenses could save you all the Googling!

Capturing Captains with the Fujifilm X-T1

X-Photographer strip BLACK

tony-woolliscroft-jul-2014
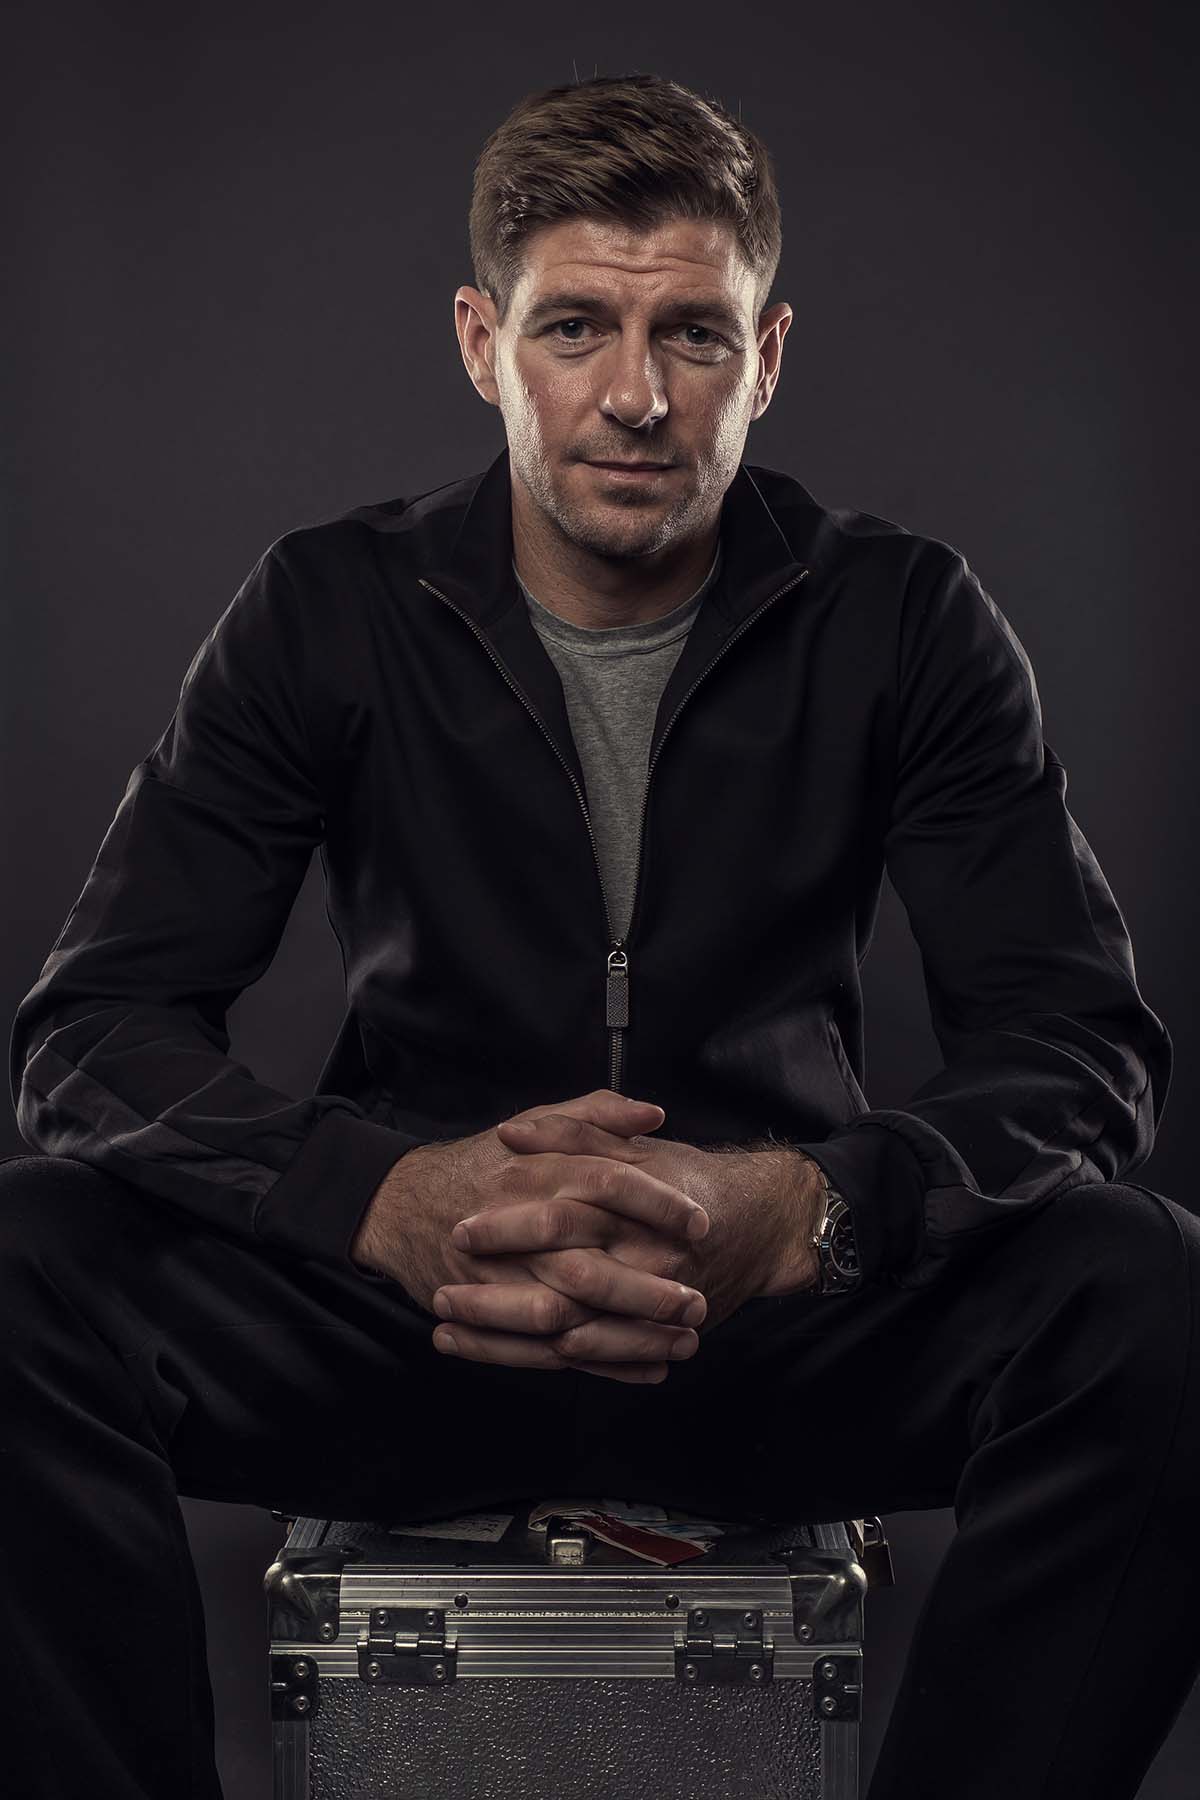
Think about it, it’s your dream job. You’re a Liverpool season ticket holder and supporter and as a professional photographer you are asked if you’re interested in photographing the portraits of a number of former and famous Liverpool FC captains for an upcoming book.

Of course I jumped at the chance!

My brief was pretty simple, make all the captains look good, but the harder part of the brief was to make all the pictures look like they had been shot in the same session at the same time ……. Of course this would mean shooting on location in ten different locations!


The first captain on our list was perhaps the hardest logistically to set up as when we arrived at Ron Yates’ home there was simply nowhere to set up my studio and Ron’s wife was not too pleased at the thought of moving everything around in her living room!

But we soon persuaded her that it was ok to shoot with a simple one-light set up and so photographed Ron on his sofa right there in the front room.

“One of the great advantages of shooting with my Fujifilm X-T1 camera system is that the camera is not overwhelming in size and this makes it easier to communicate with your client.”

Ron Yates
Ron Yates

I was not given a lot of time to take Ron’s portrait as he sadly suffers with Alzheimer’s so I needed to work quite quickly. This meant going for my trusty XF16-55mm f2.8 lens. This lens is amazing at times like these – it’s versatile in focal length from wide angle to zoom, sharp and very fast to focus.

From here I worked quickly, taking as many different portraits as I could in as short amount of time possible.


Over the next few captains that I photographed I was given more time and space to get what I had in mind for the book.

Robbie Fowler
Robbie Fowler

One location I was given was to shoot in was Jamie Redknapp’s garage at his home! It was a big space to set all my studio backdrop and lights in, plus I received refreshments from Jamie’s lovely wife Louise!

Jamie Redknapp
Jamie Redknapp

Also having the luxury of more time and a bigger working space is that I got to use my different Fujifilm prime lenses. And let’s not forget that with each different portrait sitting you have to come up with a variety of posed shots, I tend to shoot a full length sitting down shot, a ¾ length standing up shot and then a selection of close-up headshots. The lenses I use in my shoots are the XF16-55mm f2.8, XF23mm f1.4 and my XF56mm f1.2.

“I really love the 56mm as it’s pin sharp, fast to focus and gets a great headshot in a limited space.”


And the locations where quite varied too – from conference suites in Southampton Airport (amazing what access you can get in these places dropping Graeme Souness’ name) to removing furniture from Ronnie Whelan’s dining room so I could set my studio in there (Massive table and chairs out!).

Graeme Souness

There was also the time aspect to all this as each Captain was giving their time for free, so I was very conscious that my photoshoots didn’t drag on.


In my experience with these types of shoot I’ve come to know and trust the equipment that I use. From my portable studio set up to my Fujifilm camera and lenses, I know I’ll get great results each time.

Paul Ince
Paul Ince

One of the most common questions I get asked is which Captain was the most difficult to shoot.

It’s an easy answer really – Steven Gerrard.

On the day of the shoot Steven was very pushed for time as he had a big appointment in Milton Keynes for Adidas. To compound matters further the interview for the book ran over as well…… So in the end I was given just 60 seconds to get as many portraits out of the shoot as possible.

Lucky I had just enough time to set my studio up and was ready as he walked in. I used my Fujifilm X-T1 camera alongside my XF16-55mm lens to create the shot.

As I said before, in times like these you need equipment you can trust and that will simply get you a great result.

That’s why I shoot Fuji!

Steven Gerrard
Steven Gerrard


Discovering The Unknown: A Journey Through Mexico

X-Photographer strip BLACK

By Omar Z Robles

My work as a photographer has been characterized largely by my choice of subject matter and composition. Best known for photographing dancers against uncommon backdrops, I frequently get asked why and how I choose the backdrops that make it into the final frame. The truth is, when I travel (other than researching photography laws in each respective country), I don’t spend much time researching the “best places to photograph”.

Why not?dscf3772I prefer to be surprised by the places I visit and let them speak to me as I make my way into the unknown. Avoiding preconception of a physical location helps my process: I believe it helps me to create more honest images. Honest, because the final output reflects my own discoveries as opposed to try to emulate what I have seen others do – even subconsciously. This can be frustrating at times, but frustration is a part of the creative process which welcome with open arms. Much as necessity is the mother of invention, frustration can be the propeller of creativity.dscf3253I found myself traveling in Mexico City, where I was able to enlist and schedule several dancers before my trip. I had a full schedule of shoots before landing. Yet, I had no idea where was I going to photograph. While the thought frightened me, it also motivated me. Throughout the trip, I relied both on the advice of my dancers and local Fujifilm X-Photographer Jaime Ávila who, out of his own initiative, pre-scouted a few places for me (thanks a lot, brother!).DSCF9215.jpgHowever, seeing is believing. In spite of their local knowledge and willingness to help, it is not until I am at the actual locations that I face the real challenges: Will this location work for me? How can I make this place my own? How can I translate it into my visual language? My mission is to make the dancer the protagonist. It’s my responsibility to feature him or her in the location while creating a narrative evocative of the city. I can only achieve this through patience and observation.

No matter where I am, I need to observe what makes each place unique. And, more importantly, what is unique to me at that particular moment in time. That takes time and some trial and error – that’s where patience needs to kick in.

Here in Mexico City, more so than architectural elements, the one thing that has caught my attention is its density. LOTS of it. There are as many people in the streets as there are cars. While the density initially felt like a hardship, I took the time to discover how to use it to my advantage – and more importantly, how to use the density to tell the story of my experience here. Instead of running away from it, I decided to place the dancers between congested areas of people and between heavy traffic lanes.

To my advantage, working with FUJIFILM X Series gear has been a great blessing in these types of situations. Surfing waves of people, I was carrying equipment so light that I was able to move easily through the crowds. Having lightweight gear and fast autofocus, I jumped in and out of traffic swiftly (and safely).

Also, I have used the lightness of my X-T2 in combination with its burst mode to create slow exposures in areas where there are a lot of people moving. The result is an image of a magnificently elegant dancer standing strong with a blurred sea of moving people. I rarely carry a tripod; these images were easily created handheld.

I have been using the tilting screen quite often to shoot from extremely low angles. Shooting from low angles often helps in diminishing visual background noise.

My journey in Mexico City started with many revelations about my own process and creativity. I found myself slowly unraveling the unknown with the help of X Series and a true sense of adventure and exploration…

Throwing some shapes

Black card, tape and Velcro are all you need to add extra creativity to out-of-focus highlights.

If there’s one thing that Fujifilm XF lenses are well known for it’s bokeh. Some folks mistake this term as referring to purely out-of-focus highlights, but in reality it means the whole out-of-focus area of an image and how appealing it looks. But there’s fun to be had with highlight areas, particularly pinpoints of light the likes of which are created by fairy lights. Take a look at the two shots below, the one on the left is a defocused shot taken with an XF55-200mm at the 200mm setting and its widest aperture. The shot on the right was created by slipping a piece of card with a heart cut in it in front of the lens. Cute, eh?

And it’s easy enough to do.

First up, you’re going to need some materials. I used the following:

  • 1x sheet black card
  • 1x scalpel
  • 1x scissors
  • 1x roll of electrician’s tape
  • 1x pack of Velcro strips
  • 1x Fujifilm camera and lens

ks2_5751

The more eagle-eyed among you will also notice there’s an X Series box inner as well. More on that later…

ks2_5756

Start by taking the card and a pencil and drawing round the lens you want to creating the bokeh shape for.

ks2_5757

Once you’ve got a nice outline (not wonky like mine), cut it out using the scissors, then place it back on the lens to make sure it’s the right size.

ks2_5760

Measure the diameter of the card and then use the scalpel to cut out a second circle that’s approximately 1cm across.

ks2_5761

Once you’ve done that, cut a strip of black card and apply the electrician’s tape to one edge of it.

ks2_5762

Slowly wrap this around the circle you’ve already cut out, creating a shallow holder in the process.

ks2_5763

The holder should now slide neatly over the front of the lens.

ks2_5764

Take the Velcro and cut two short strips, sticking them on either side of the small hole.

ks2_5765

Finally, cut a final small piece of card and then either the scalpel to cut a shape you want to appear in the bokeh. A heart is easy enough to cut by hand, but if you want something more intricate shaped punches are available in craft stores and provide a smooth edge. Stick the other part of the Velcro on this card and attach. This way you can easily make other shapes and remove/attach as you wish.

ks2_5766

You’ll need to do some experimentation with different lenses and aperture settings. Naturally, the wider the aperture the better, plus you’ll find that manual focusing is better. After my initial tests with this shape to produce the shot at the top of this blog, I created a second slightly fatter heart shape for the shot below, which I prefer. To add a bit more interest, I also added a lily as it’s my wife’s favourite flower and I thought it fitted the heart theme.

And the X Series box inner? Well that was used for the shot on the right. See, Fujifilm even produce creative packaging as well as great cameras!

X-Thusiast Featured Photographer Josh Delany: Melbourne Views

Australia strip BLACK

3

 ‘Moody Icebergs’ Fujifilm X-T1 ISO 200, 31.5mm, f/22, 5.3 seconds

Fujifilm Australia are happy to announce Josh Delany as our X-Thusiast Featured Photographer for November 2016. In our Q&A, Josh relays his interest in photography and how his Fujifilm X Series kit enables him to capture the natural beauty of the world around him.


Tell us about yourself. Where is home? What inspires you from day to day?

Home at the moment is Maribyrnong, in the northwest of the greatest city in the world, Melbourne. Hobbies include kayaking, cycling and of course photography. I’ve found photography my main focus lately as I can get a bit of exercise done whilst out exploring for a great photo opportunity. Daily inspiration is trying to make each day better than the last. In terms of photography, my inspiration mainly comes from the beauty of nature. It continues to amaze me. There is so much beauty in this world, I like to try and capture it from its best angle.


How did you develop an interest in photography? How did you learn and develop your craft?

While I was studying to be a building designer, I remember going to an architecture exhibition and being amazed by the architectural photography on display.


I’ve always appreciated photography and honestly, it was through getting Instagram a few years ago that I started taking photos on my phone and playing around with editing. It wasn’t until about 18 months ago I decided to take it more seriously and purchase a camera. The research I did was thorough and I eventually decided on the Fujifilm X-T1.


dscf3827

“Porsche Exposure” – Fujifilm X-T10, ISO 100, 18mm, F9.0, 30 seconds


Do you have a particular photographic style? If so, what would you consider that to be? We noticed you like landscape photography; can you tell us what you look for in an ideal landscape shot?

I am still very much a novice, so I am still trying to develop a style and intend to spread my wings a little and try my hand at portrait and architectural photography. For the moment, I really enjoy landscape photography. There’s a great feeling of adventure going away for a weekend, exploring, not knowing what exactly you’ll see but knowing it will be beautiful along the way.


I love water and sunsets. Long-exposure photos of running water is a particular favourite, so waterfalls are very appealing. I also love when the sky turns pink during a sunset and the hues bounce off everything around. An amazing landscape shot would be a combination of a waterfall and a beautiful pink sun setting sky.


What’s your favourite location to shoot in Australia? What’s your favourite subject to shoot in general?

Living in Melbourne, I’m often out and about so I regularly shoot in St. Kilda and Williamstown. They are on opposite sides of Port Phillip Bay and have great views of the city. I plan to do a lot more exploring of Australia with my camera in the future, so would love to be asked that question again in a few years. I like shooting nature in general, sunsets, water of any kind—including bays, oceans, rivers and waterfalls. I also like to include some man-made subjects in my photos like buildings, cars, boats—you name it.


6

“Never Say Never” – Fujifilm X-T10, ISO 100, 18mm, F2.8, 2.3 seconds


What’s your favourite (or recommended) X Series camera? Why do you prefer that particular model?

The first serious camera I purchased was the Fujifilm X-T1, around 18 months ago. I loved the style, size and functionality of it. I picked up the basic skills quite easily on that body with the external dials and loved the feel. Unfortunately, on one of my adventures road tripping back to Melbourne from Sydney, I tried to get a sunrise photo of Horse Head Rock in Bermagui, NSW at high tide and was knocked over by a wave as I was climbing around the rocks into the water. The camera was damaged beyond repair with the salt water. I decided not to buy another X-T1 as I wanted to wait for the X-T2. So in the interim, I purchased the smaller Fujifilm X-T10. I find that it has all the features I require and has been just as good as the X-T1. When I do pull the trigger on purchasing the X-T2, I’ll keep the smaller, lighter X-T10 for the more adventurous shots where there is a risk of the camera being damaged.


Which Fujinon lens or lenses do you prefer or recommend?

I’ve only ever used the Fujinon XF18-55mmF2.8-4 on both Fujifilm camera bodies I’ve owned and subsequently all of my photos. I’ve found the lens to be very sharp with no issues at all. This has been a great lens for my learning over the last 18 months. I intend to purchase the XF10-24mmF4 when I upgrade camera bodies, from what I have seen it is an amazing lens for landscapes and suits my current needs.


Do you have a particularly favourite image in mind that you feel strongly about? Can you share the story behind this image?

All of the images I share publicly I appreciate. They were often enjoyed with amazing people who were with me exploring with many laughs along the way. One particular photo that stands out for me is of a beautiful sunset at Pennington Bay on Kangaroo Island, which is off mainland Australia. The water was an amazingly clear aqua colour, the sky was a mix of purples and pinks, and the rocky landscape was still being lit up by the sun. It was an amazing moment with great company and I was really happy I captured a photo to remember it by.


1

“Stunning Pennington” – Fujifilm X-T10, ISO 100, 19.6mm, F11, 14 seconds


Could you describe your photographic workflow? How do you share your images with your audience (Facebook/Instagram?)

Once the photo is taken, I try to edit the photo that day as soon as I’m home, so the excitement and environment is still fresh in the mind. I simply remove the memory card and insert it into my MacBook Pro. I upload the photos directly to Lightroom. From there, I like to enhance the presence of the photo by adjusting the clarity, vibrance and saturation. This is a delicate task as it is easy to overedit. I’ll then make minor adjustments to the tone of the image with exposure, contrast, blacks, whites and shadows. Lastly, I might make some changes to colours, only if I think it is required. I mainly use Instagram (@josh_delany) to share my images, as that is where my main interest in photography started. I do have a Facebook page (Josh Delany Photography) but I’m not as active on that platform.

Do you prefer any third-party, post-processing software, camera accessories to further develop your work?

As mentioned in the previous question, the only post-processing I use at the moment is Adobe Lightroom. I’m still learning my way through the program but feel I know the basics. Next step for me is to learn how to use Photoshop effectively.


dscf0631

“Lucy Liu Bar & Restaurant, Melbourne” – Fujifilm X-T1 + XF18-55mm F2.8-4 R LM OIS


Do you have any final thoughts regarding Fujifilm X Series? Do you have any tips or advice you’d like to share for other photographers out there pursuing their craft?

I feel the Fujifilm X Series is the leader in the mirrorless range of cameras. I really love the style and practicality of the models they produce. As for tips and advice, I’m still a novice myself, constantly learning new things, with much more to learn. I’ve found the more you know about your camera, the better prepared you’ll be when on-site trying to shoot your subject. So study the camera, research any difficulties you may have found today, so you’re more prepared tomorrow. Get out and practice, practice, practice. The main thing is to have fun! Get out and explore, get creative, take chances. Enjoy the moment while it’s in front of you as well as taking a photo that will last forever.


If you, or someone you know in Australia, is interested in joining our X-Thusiast community, check out the full X-Thusiast Gallery and Submission details.